I’ve always found Mini Linzer cookies with strawberry preserve to be a classic indulgence in any dessert lineup. The combination of buttery dough and sweet, tangy filling never fails to impress. As I explore the process of making these delightful treats, there are a few key elements to consider that can elevate your baking game. Let’s uncover the essential steps and tips that turn these cookies into a stunning addition to your next gathering.
What kind of recipe is it?
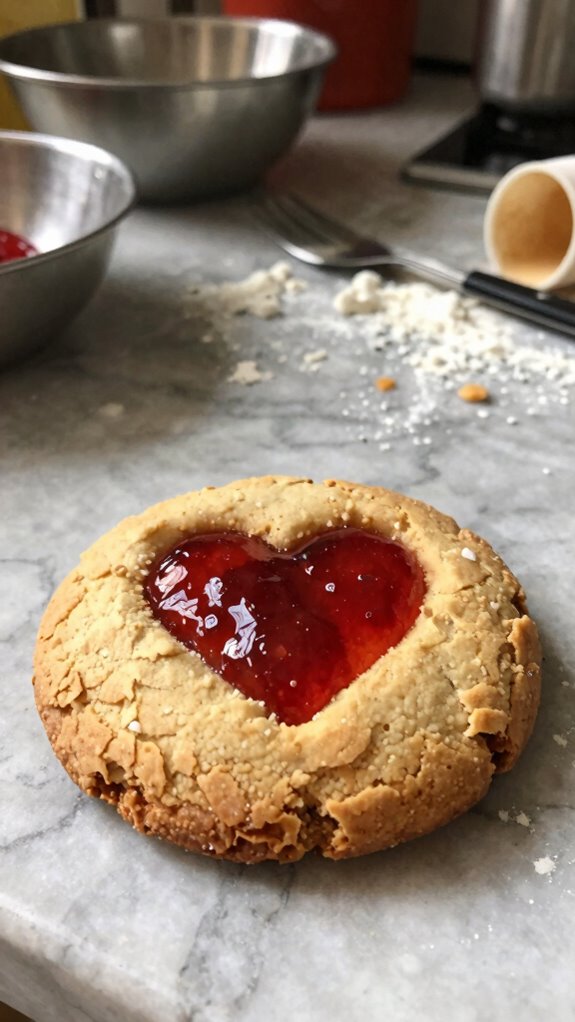
Mini Linzer Cookies are delightful bite-sized treats that originate from the classic Linzer torte, featuring a rich, buttery dough infused with almonds or hazelnuts and typically filled with fruit preserves.
These cookies are characterized by their delicate sandwich structure, often dusted with powdered sugar for an elegant finish.
Perfect for holiday celebrations, tea times, or as thoughtful gifts, they cater to cookie lovers and baking enthusiasts alike, inviting everyone to enjoy a taste of tradition in a charming, miniaturized form.
Preparation Time
| Parameter | Details |
|---|---|
| Difficulty of the Recipe | Medium |
| Preparation Time | 30 minutes (plus chilling time) |
| Number of Servings | Approximately 24 mini cookies |
Ingredients
| Ingredient | Quantity |
|---|---|
| All-purpose flour | 1 ½ cups |
| Unsalted butter | ½ cup (1 stick) |
| Granulated sugar | ½ cup |
| Powdered sugar | ½ cup (for dusting cookies) |
| Large egg | 1 |
| Vanilla extract | 1 teaspoon |
| Salt | ¼ teaspoon |
| Ground almonds (or almond flour) | ¼ cup |
| Raspberry jam (or any preferred jam) | ½ cup |
Essential Kitchen Equipment
| Tool/Equipment | Purpose | Alternative Option |
|---|---|---|
| Mixing Bowls (Large and Medium) | Used for mixing ingredients together; the large bowl is for the dry ingredients, while the medium bowl is for the wet ingredients. | Any large bowl and medium bowl from your kitchen can work. |
| Measuring Cups (Dry and Liquid) | Essential for accurately measuring flour, sugar, and liquids to ensure proper ratios for baking. | Use any standard cups for rough measurements, though precise measurements are recommended for baking. |
| Measuring Spoons | Necessary for measuring small quantities of ingredients like salt or vanilla extract. | Use a regular teaspoon for small measurements, but keep in mind that it may not be as accurate. |
| Stand Mixer or Hand Mixer | These tools help to cream butter and sugar together efficiently and mix the cookie dough thoroughly. | A whisk can be used to mix ingredients manually, although it requires more effort and time. |
| Rubber Spatula | Ideal for scraping the sides of bowls and folding in dry ingredients evenly into wet ingredients. | A large spoon can substitute, but it may not scrape as effectively. |
| Wooden Spoon | Great for mixing ingredients by hand, especially thicker doughs and batters. | Any sturdy spoon can be used, though it may not be as effective for thorough mixing. |
| Baking Sheets (2-3) | Used to place cookies on for baking in the oven; multiple sheets allow for baking a larger batch at once. | Any flat oven-safe tray can work, but be mindful of even heat distribution. |
| Parchment Paper or Silicone Mats | Prevent cookies from sticking to the baking sheet and promotes even baking. | You can lightly grease the baking sheet with butter or oil as an alternative. |
| Cookie Scoop or Spoon | Helps portion out dough for uniform cookie sizes, ensuring even baking and presentation. | Use two tablespoons to manually scoop dough, but the size may not be as consistent. |
| Cooling Rack | Essential for cooling baked cookies evenly without becoming soggy. | If unavailable, use a plate or a clean countertop, but ensure cookies get proper airflow. |
| Oven Thermometer | Ensures that the oven temperature is accurate, which is critical for baking success. | If you don’t have one, rely on the oven’s built-in settings, but be cautious as some ovens can be inaccurate. |
Cooking Steps
- Prepare all ingredients: Gather 240 g (2 cups) of all-purpose flour, 125 g (1/2 cup) of unsalted butter (softened), 100 g (1/2 cup) of granulated sugar, 1 large egg yolk, 1 tsp of vanilla extract, 1/2 tsp of salt, and 120 g (approximately 1/2 cup) of fruit preserves (raspberry or apricot work well).
- Preheat the oven: Set your oven to 175 °C (350 °F) and place the oven rack in the middle position.
- Mix the dry ingredients: In a large mixing bowl, whisk together 240 g of flour and 1/2 tsp of salt until evenly combined.
- Cream the butter and sugar: In a medium mixing bowl, use a stand mixer or hand mixer set on medium speed to cream 125 g of softened butter and 100 g of granulated sugar together until light and fluffy, about 3-5 minutes.
- Incorporate the egg yolk and vanilla: Add 1 large egg yolk and 1 tsp of vanilla extract to the butter-sugar mixture, mixing until smooth and well combined.
- Combine wet and dry ingredients: Gradually add the dry flour mixture to the wet mixture, mixing on low speed until just combined. Avoid overmixing to keep the cookies tender.
- Chill the dough: Cover the mixing bowl with plastic wrap and refrigerate the dough for at least 30 minutes to help firm it up.
- Prepare baking sheets: Line two baking sheets with parchment paper or silicone mats, ensuring they’re flat and evenly covered.
- Roll out the dough: Once chilled, divide the dough into two portions. On a lightly floured surface, roll out one portion to a thickness of about 4 mm (1/8 inch). Keep the other portion refrigerated while working.
- Cut the cookies: Use a round cookie cutter (about 5 cm/2 inches in diameter) to cut out shapes from the rolled dough. Use a smaller cutter (about 2.5 cm/1 inch) to cut out the centers of half of the cookies for the tops. Repeat until all dough is used.
- Transfer to prepared sheets: Carefully place the cutouts onto the lined baking sheets, ensuring they’re at least 2.5 cm (1 inch) apart.
- Bake the cookies: Place the baking sheets in the preheated oven. Bake for 10-12 minutes, until the edges are lightly golden and the tops are pale but not browned. The cookies should be firm to the touch but not hard.
- Cool the cookies: Remove the baking sheets from the oven and let the cookies cool on the sheets for about 5 minutes before transferring them to a cooling rack. Allow them to cool completely.
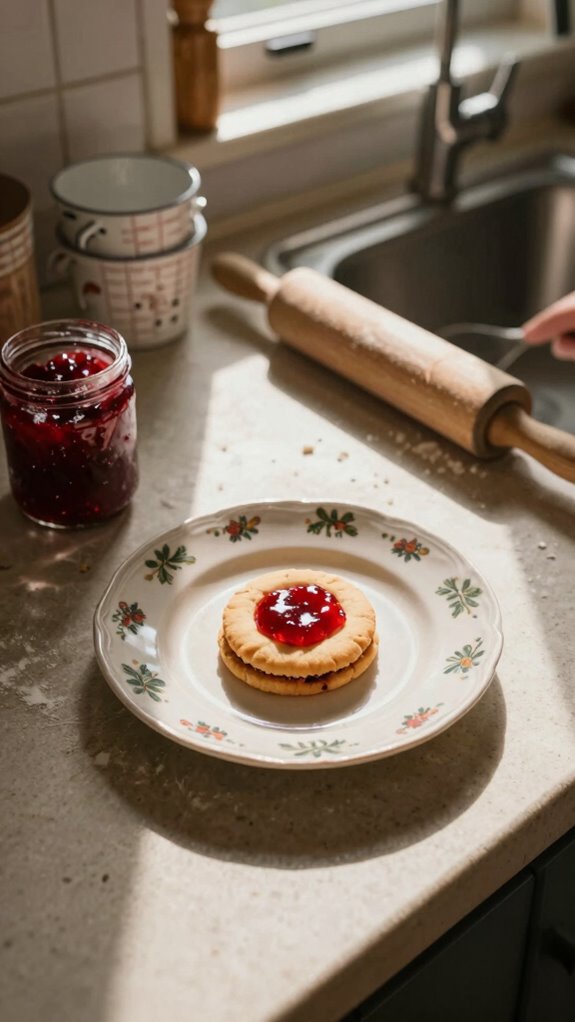
- Assemble the cookies: Spread approximately 1 tsp of fruit preserves on the flat side of the solid cookies. Top each with a cut-out cookie, pressing gently to adhere.
- Finish: Optionally, dust the tops of the assembled cookies with powdered sugar before serving for a decorative touch. Enjoy your mini Linzer cookies with a delightful combination of flavors and textures.
Variations
- Chocolate Linzer Cookies: Replace 30 g (1/4 cup) of flour with unsweetened cocoa powder for a rich chocolate flavor.
- Peanut Butter Linzer Cookies: Substitute 60 g (1/4 cup) of softened butter with peanut butter for a nutty twist.
- Gluten-Free Linzer Cookies: Use a gluten-free all-purpose flour blend (240 g/2 cups) in place of regular flour to make them gluten-free.
- Dairy-Free Linzer Cookies: Swap the unsalted butter (125 g/1/2 cup) for coconut oil or dairy-free butter to create a dairy-free version.
- Vegan Linzer Cookies: Replace the egg yolk with 60 g (1/4 cup) of unsweetened applesauce and use dairy-free butter for a vegan adaptation.
- Almond Linzer Cookies: Incorporate 60 g (1/2 cup) of finely ground almonds into the flour mixture for a nutty flavor and texture.
- Seasonal Spice Linzer Cookies: Add 1 tsp of ground cinnamon and a pinch of nutmeg for a warm, spiced flavor suitable for autumn.
- No-Bake Linzer Cookies: Use a raw nut base with cocoa powder and dates to make healthier, no-bake cookies; omit baking steps entirely.
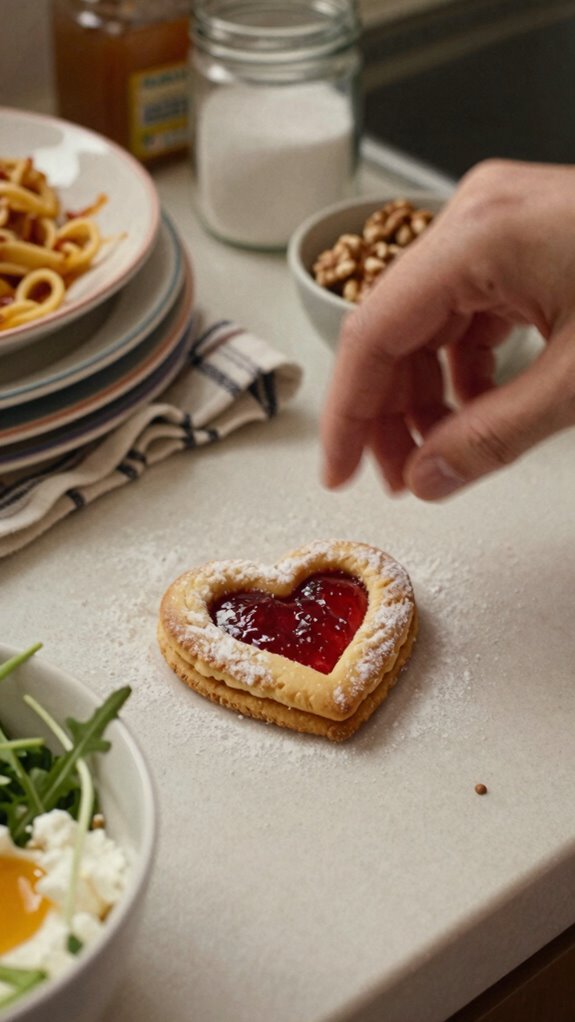
Tips on plating and presentation

While I’ve always believed that presentation is just as important as taste, plating your mini Linzer cookies can truly elevate them from ordinary to extraordinary.
I recommend using simple plating techniques, like stacking cookies with a dollop of strawberry preserve on top.
Explore different presentation styles, such as arranging them on a colorful plate or adding edible flowers for a stunning finish. Your guests will be impressed!
What other dishes can I pair it with?
After elevating your mini Linzer cookies with beautiful plating, it’s time to think about what other dishes can complement them.
I love pairing these cookies with buttery shortbread or a rich chocolate truffle for dessert platters.
Fresh fruit, like berries, also works wonders, adding color and balance.
These cookie pairings create a delightful experience that’ll impress your guests!
What drinks can I pair it with?
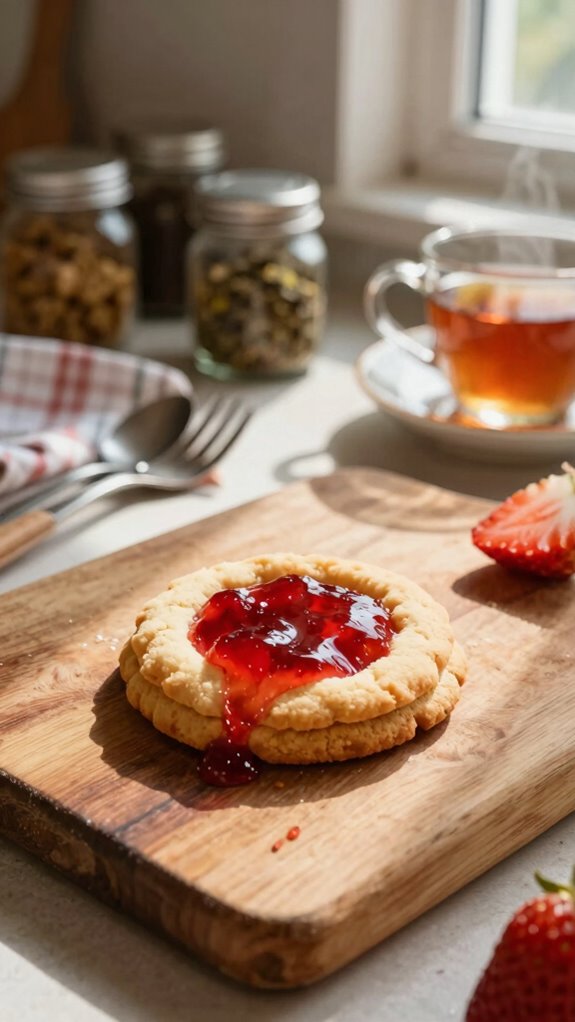
What drinks can elevate the enjoyment of mini Linzer cookies?
I’ve found that a light herbal tea pairs perfectly, enhancing the cookie’s delicate flavors.
For those who prefer wine, a sweet Riesling makes an excellent selection, balancing the tart strawberry preserve beautifully.
With these tea pairings or wine selection, you’ll create a delightful experience that complements every bite of your tasty treat!
Frequently Asked Questions
Can I Use Other Preserves Instead of Strawberry?
Absolutely! I’ve used alternative fruit preserves like raspberry and apricot in my recipes, and they taste great. Sometimes, I even add creamy fillings to enhance the flavor. You can’t go wrong experimenting!
How Long Do These Cookies Last?
These cookies generally last about a week at room temperature with proper storage. I recommend keeping them in an airtight container to maximize their shelf life and enjoy them at their best!
Are There Gluten-Free Options for This Recipe?
Yes, I’ve found gluten-free options for this recipe. I love using gluten free flours like almond or coconut flour. They work well! Just watch out for alternative gluten sources to ensure they stay truly gluten-free.
Can I Freeze Mini Linzer Cookies?
Yes, you can freeze mini Linzer cookies! I recommend using airtight containers for cookie storage. Just layer them with parchment paper and use proper freezing techniques to keep them fresh for later enjoyment.
What Is the Origin of Linzer Cookies?
Linzer cookies have fascinating Linzer origins, tracing back to Austria in the 17th century. Their history of cookies reflects a blend of flavors and textures, showcasing how traditional recipes evolve into beloved treats we enjoy today.