When I first tried Brown Butter Red Velvet Cake with Cream Cheese Frosting, I was struck by how the nutty richness of the browned butter elevated the classic recipe. The moist texture paired perfectly with the tangy cream cheese frosting, creating a wonderful balance. It’s an indulgent treat that’s perfect for special occasions. But there’s more to this cake than just its flavor—let’s explore the preparation and the subtle details that make it truly special.
What kind of recipe is it?
Brown Butter Red Velvet Cake is a decadent twist on a classic dessert, combining the rich flavors of brown butter with the vibrant hue of red velvet.
This cake features a moist, tender crumb and a slightly nutty essence that elevates its sweet profile.
Ideal for special occasions or gatherings, it’s perfect for both seasoned bakers and those looking to impress with a unique treat.
Indulge in this stunning cake to celebrate birthdays, anniversaries, or simply to satisfy your sweet tooth!
Preparation Time
| Item | Details |
|---|---|
| Difficulty of the Recipe | Intermediate |
| Preparation Time | 30 minutes |
| Number of Servings | 8-10 servings |
Ingredients
| Ingredient | Quantity |
|---|---|
| All-purpose flour | 2 1/2 cups |
| Unsweetened cocoa powder | 1 tablespoon |
| Baking soda | 1 teaspoon |
| Salt | 1/2 teaspoon |
| Brown sugar | 1 cup |
| Granulated sugar | 1/4 cup |
| Unsalted butter (browned) | 1 cup (2 sticks) |
| Buttermilk | 1 cup |
| Large eggs | 2 |
| Red food coloring | 2 tablespoons |
| Vanilla extract | 1 teaspoon |
| White vinegar | 1 teaspoon |
| Cream cheese (softened) | 8 oz |
| Powdered sugar | 2 cups |
| Heavy cream | 1/4 cup |
Essential Kitchen Equipment
| Tool/Equipment | Purpose | Alternative Option |
|---|---|---|
| Mixing bowls (large and medium) | Used for combining dry ingredients and wet ingredients separately before mixing. | Any large bowl or pot can work in a pinch. |
| Measuring cups (dry and liquid) | Essential for accurately measuring ingredients like flour, sugar, and buttermilk. | Use a standard glass measuring cup or a clean jar. |
| Measuring spoons | Necessary for measuring small amounts of ingredients like baking soda, salt, and vanilla extract. | A regular teaspoon can substitute for measuring spoons. |
| Stand mixer or hand mixer | Used to cream the browned butter and sugars together and to mix the batter thoroughly. | A whisk or wooden spoon can be used for manual mixing. |
| Rubber spatula | Ideal for scraping down the sides of bowls and folding in ingredients without deflating the batter. | A wooden spoon can work, but a rubber spatula is more effective. |
| Wooden spoon | Good for stirring batter and doughs as well as mixing dry ingredients together. | A sturdy plastic or silicone spoon can be used as well. |
| Baking sheets (2-3) | Needed for transferring the cake to the oven and for cooling if any layers are baked on them. | Any flat baking pan or tray can serve the same purpose. |
| Parchment paper or silicone mats | Used to line baking sheets for easy removal of cakes and to prevent sticking. | Greasing the baking sheets with butter can be an alternative. |
| Cookie scoop or spoon | Useful for portioning out batter evenly into cake pans if baking in multiple layers. | A regular spoon can be used; just ensure portions are consistent. |
| Cooling rack | Essential for allowing the cake layers to cool evenly after baking. | A wire rack from an old grill or even a set of plates can suffice. |
| Oven thermometer | Used to ensure that the oven temperature is accurate, which is crucial for baking. | An instant-read kitchen thermometer can check oven temperature, though it’s less convenient. |
Cooking Steps
- Preheat the oven to 175 °C (350 °F). Position the oven rack in the center to ensure even baking.
- Prepare three 20 cm (8-inch) round cake pans by greasing them with butter and lining the bottoms with parchment paper. This prevents sticking and allows for easier removal of the cake layers.
- In a large mixing bowl, combine 240 g (2 cups) of all-purpose flour, 150 g (¾ cup) of granulated sugar, and 5 g (1 teaspoon) of baking soda. Use a whisk to mix these dry ingredients thoroughly.
- In a separate medium mixing bowl, combine 2 large eggs, 240 ml (1 cup) of buttermilk, 120 ml (½ cup) of vegetable oil, 60 g (¼ cup) of unsweetened cocoa powder, 5 ml (1 teaspoon) of vanilla extract, and 120 ml (½ cup) of red food coloring.
- Whisk these wet ingredients until well blended and smooth.
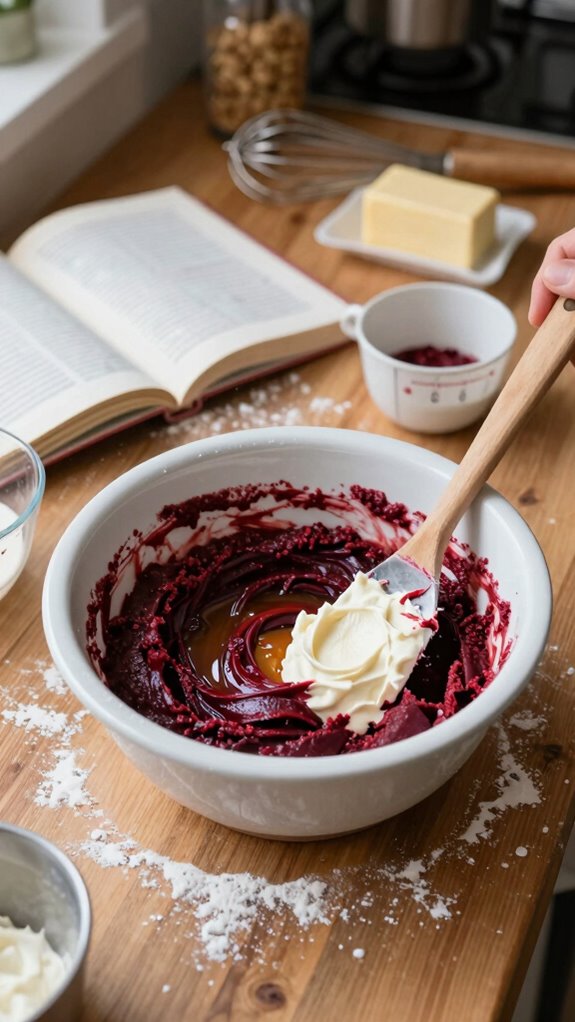
- Brown 115 g (½ cup) of unsalted butter in a saucepan over medium heat. Stir constantly until the butter turns a rich golden brown and has a nutty aroma, about 5–7 minutes.
- Remove from heat and let cool slightly.
- Slowly pour the browned butter into the wet ingredients, mixing until just combined.
- Gradually add the dry ingredients to the wet mixture, folding gently with a rubber spatula until no flour pockets remain.
- Ensure not to overmix, as this can affect the cake’s texture.
- Divide the batter evenly among the prepared cake pans, using a cookie scoop or spoon for consistency.
- Tap the pans gently on the countertop to release any air bubbles.
- Bake in the preheated oven for 25–30 minutes, or until a toothpick inserted in the center comes out clean and the tops spring back when lightly touched.
- Remove the cake layers from the oven and let cool in the pans for about 10 minutes.
- Then, carefully invert the cakes onto a cooling rack to cool completely, about 1 hour.
- Once cooled, level the tops of the cake layers if needed for even stacking, using a serrated knife.
- Optionally, allow the cake layers to rest for a few hours or overnight, wrapped in plastic wrap at room temperature for improved flavor and texture through carryover cooking.
Variations
- Chocolate Chip Red Velvet: Add 150 g (1 cup) of semi-sweet chocolate chips for a delightful chocolatey twist in each layer.
- Gluten-Free Red Velvet: Substitute the all-purpose flour with 240 g (2 cups) of a gluten-free all-purpose baking blend for a gluten-free version.
- Vegan Red Velvet: Replace eggs with 60 ml (¼ cup) of applesauce and use 240 ml (1 cup) of dairy-free milk instead of buttermilk for a plant-based alternative.
- Almond Red Velvet: Incorporate 60 ml (¼ cup) of almond extract into the wet ingredients for a nutty flavor profile.
- Rainbow Red Velvet: Instead of food coloring, add 240 ml (1 cup) of blended fruit puree (like raspberries) for a natural fruity note and color variation.
- Coconut Red Velvet: Mix in 100 g (1 cup) of shredded coconut into the batter for a tropical twist and enhanced texture.
- Spiced Red Velvet: Add 5 g (1 teaspoon) of cinnamon and 2 g (½ teaspoon) of nutmeg to the dry ingredients for a warm, spiced flavor.
- Slow-Cooker Red Velvet: Pour the batter into a greased slow cooker and cook on high for 2–3 hours for a moist, pudding-like cake texture.
Tips on plating and presentation

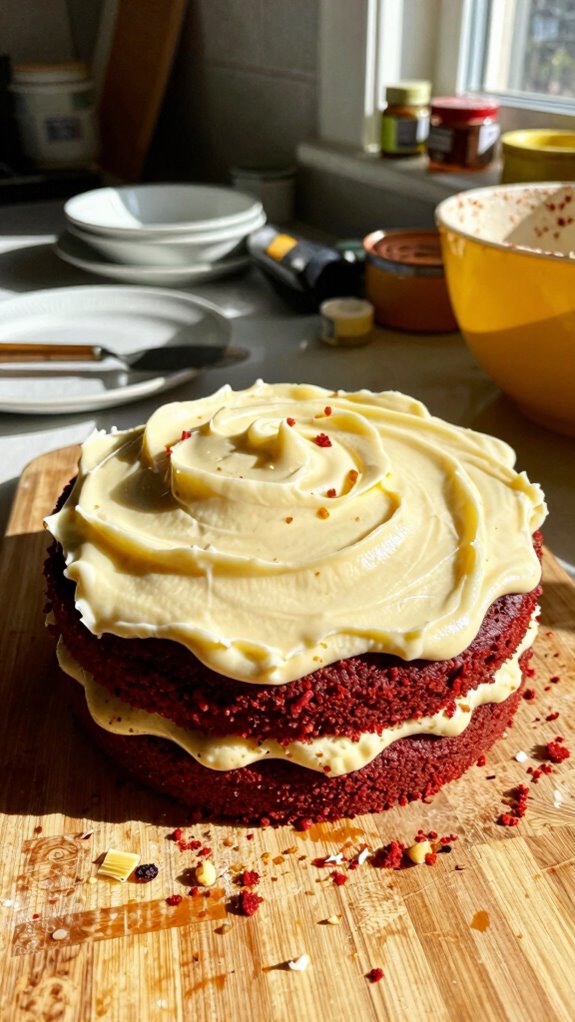
While presenting a Brown Butter Red Velvet Cake, I find that first impressions matter, so it’s essential to elevate its visual appeal.
Using effective plating techniques, such as a clean white plate or adding a decorative garnish like mint leaves, can make a huge difference.
For presentation tips, consider layering with cream cheese frosting in an artistic way, showcasing the cake’s richness.
What other dishes can I pair it with?
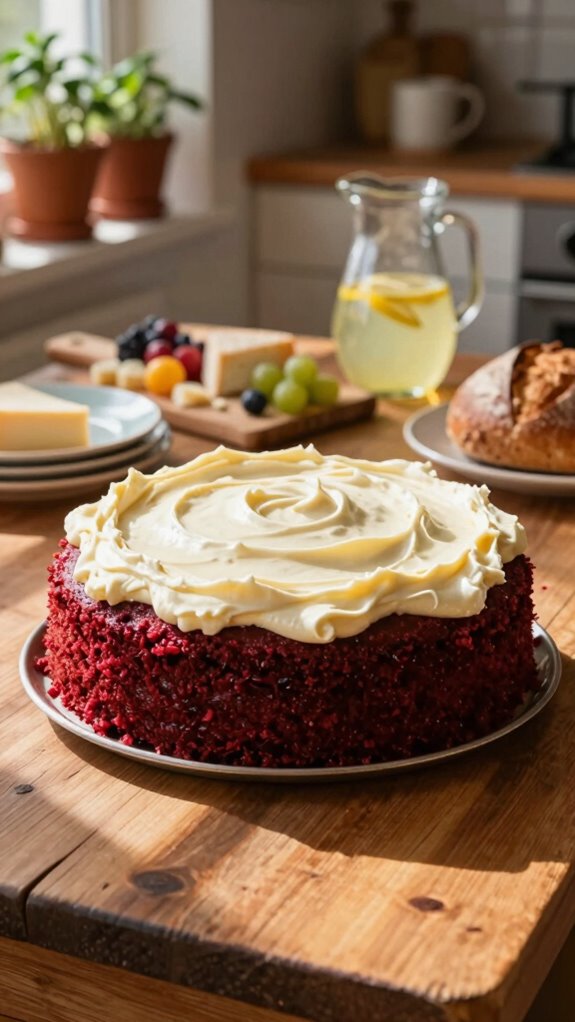
After showcasing your Brown Butter Red Velvet Cake beautifully on the plate, you might wonder what other dishes would complement it perfectly.
I recommend a light, citrusy sorbet for dessert pairing, as its refreshing taste creates delightful flavor contrasts.
Additionally, serving alongside vanilla ice cream can enhance the richness of the cake, making for a well-rounded dessert experience that your guests will adore.
What drinks can I pair it with?
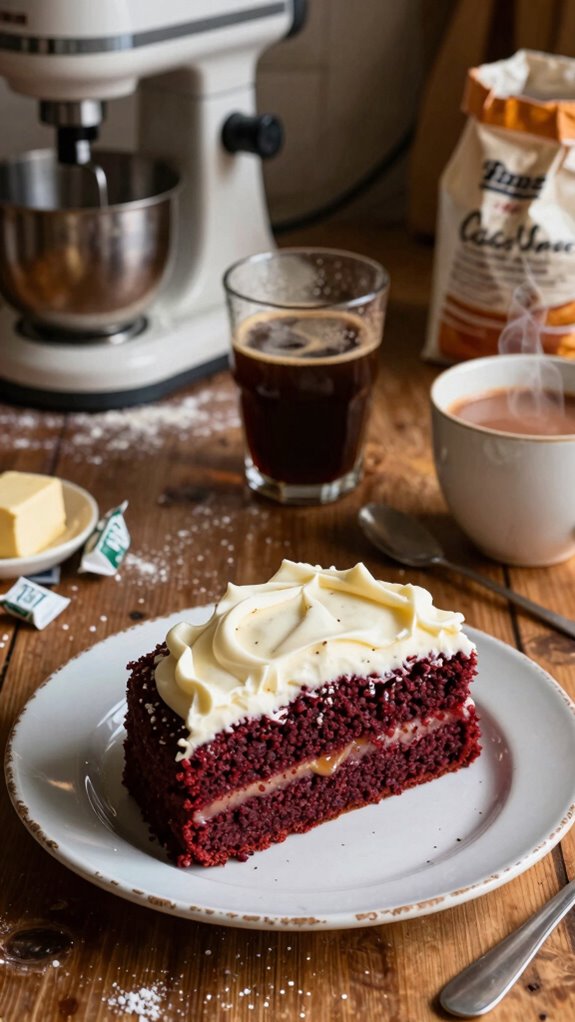
What drinks can elevate your Brown Butter Red Velvet Cake experience?
For a delightful wine pairing, try a light-bodied red like Pinot Noir—it complements the cake’s richness beautifully.
If you prefer coffee, a rich espresso or a smooth latte can enhance those buttery flavors.
Both options create an indulgent treat that’s hard to resist. Enjoy experimenting with these delicious pairings!
Frequently Asked Questions
Can I Use Almond Flour for a Gluten-Free Version?
Yes, you can use almond flour for a gluten-free version. I love its benefits, as it adds moisture and richness. Just remember, the recipe texture might change slightly, but it’ll still be delicious!
How Do I Store Leftovers Effectively?
I store leftovers in a proper container, ensuring it’s airtight. I also place it in the fridge promptly. For extra freshness, I recommend consuming them within a few days to enjoy their best flavor.
Can I Make the Frosting Ahead of Time?
Yes, you can make the frosting ahead of time. I store it in an airtight container in the refrigerator and let it reach room temperature before using, ensuring the perfect consistency for spreading!
Is There a Vegan Alternative for This Recipe?
Absolutely! I’ve found that using vegan cream cheese, dairy-free butter, and plant-based milk makes great vegan substitutions. These options keep the delicious flavor intact while ensuring it’s suitable for anyone following a plant-based diet.
What Type of Food Coloring Is Best for Red Velvet?
I prefer using gel food coloring for red velvet; it gives a vibrant, rich hue without altering the batter’s consistency. Liquid dye often creates a diluted color, which isn’t what I want for my desserts.