As I was preparing for the holiday season, I stumbled upon a delightful recipe for Candy Cane Cookies with White Chocolate Dip. These cookies combine the sweetness of vanilla with a hint of peppermint, creating a festive treat that’s hard to resist. The addition of creamy white chocolate makes them even more tempting. Let’s explore how to make this seasonal favorite and elevate your holiday gatherings. You might just want to keep this one for yourself.
What kind of recipe is it?
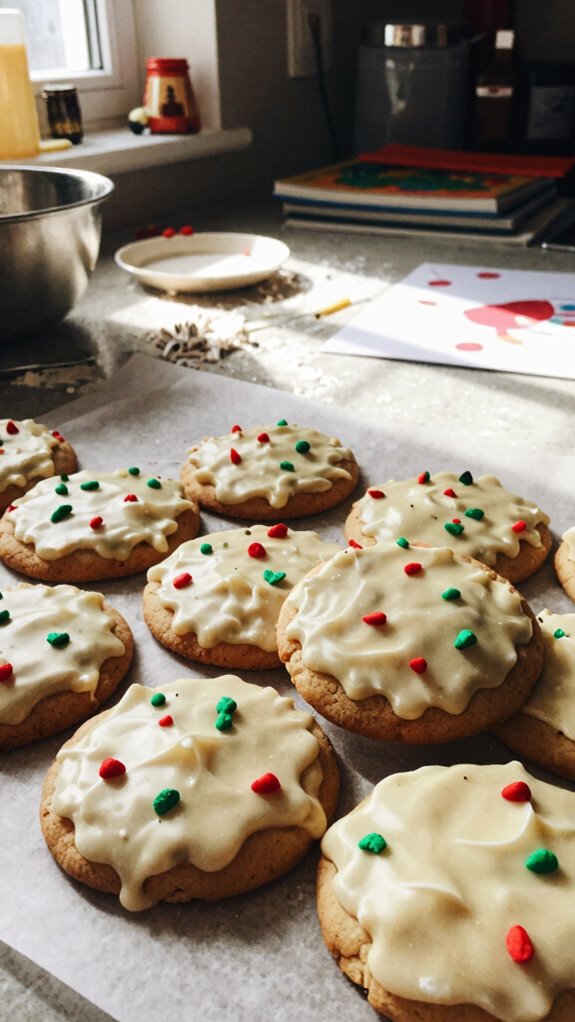
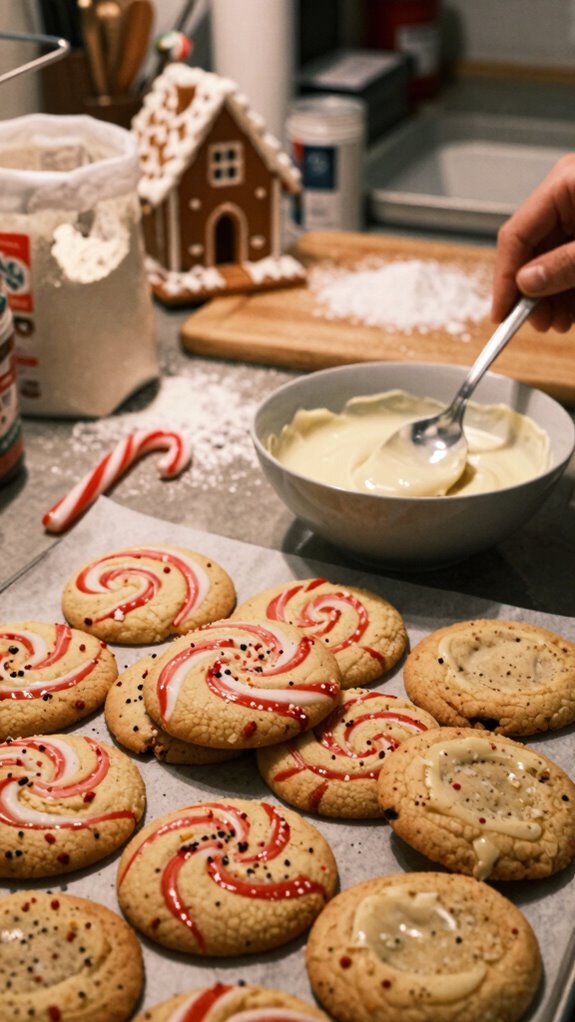
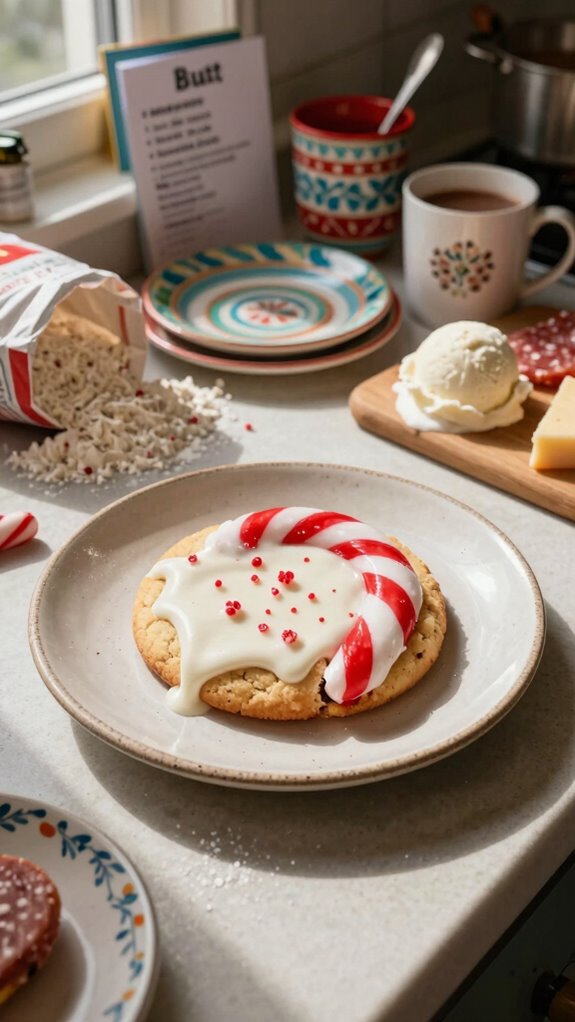
The Candy Cane Cookie recipe is a festive treat perfect for the holiday season, combining the delightful flavors of peppermint and vanilla in a soft, chewy cookie.
These cookies are visually striking with their vibrant red and white swirls, making them a charming addition to any holiday gathering or cookie platter.
They’re ideal for families looking to create cherished memories in the kitchen, as well as for those wanting to impress guests with a delicious and whimsical dessert.
Preparation Time
| Detail | Description |
|---|---|
| Difficulty of the recipe | Medium |
| Preparation Time | 30 minutes |
| Number of servings | 24 cookies |
Ingredients
| Ingredient | Quantity |
|---|---|
| All-purpose flour | 2 ¾ cups |
| Granulated sugar | 1 cup |
| Unsalted butter | ½ cup (1 stick), softened |
| Brown sugar | ½ cup, packed |
| Eggs | 1 large |
| Vanilla extract | 1 teaspoon |
| Almond extract | ½ teaspoon |
| Baking powder | 1 teaspoon |
| Salt | ½ teaspoon |
| Crushed peppermint candy | ½ cup |
| Red food coloring | A few drops (optional) |
| Powdered sugar | For dusting (optional) |
Essential Kitchen Equipment
| Tool/Equipment | Purpose | Alternative Option |
|---|---|---|
| Mixing Bowls (Large and Medium) | Used for combining dry and wet ingredients, allowing enough space to stir without spilling. | Any large bowl will work; use plastic or glass bowls if you don’t have mixing bowls. |
| Measuring Cups (Dry and Liquid) | Ensures accurate measurement of ingredients, critical for baking success. | Use household items like a standard cup (8 oz) for approximations or a food scale for more precision. |
| Measuring Spoons | Used to measure smaller quantities of ingredients like baking powder, salt, and extracts. | You can use any small spoon (e.g., a teaspoon from your cutlery set) for approximate measurements. |
| Stand Mixer or Hand Mixer | Facilitates mixing ingredients easily and achieves a uniform batter. | Use a whisk or wooden spoon for mixing by hand, though it may require more effort. |
| Rubber Spatula | Ideal for scraping the sides of bowls and folding in crushed peppermint candy without damaging the batter. | A wooden spoon or any large spoon can be used to mix, but it may not scrape as efficiently. |
| Wooden Spoon | Used for stirring and combining ingredients, especially when making a thicker dough. | A sturdy metal spoon can also work in place of a wooden spoon. |
| Baking Sheets (2-3) | Provides a flat surface for baking cookies in the oven. More sheets allow for greater baking efficiency. | Any flat, oven-safe tray can work, although specialized baking sheets are recommended for better heat conduction. |
| Parchment Paper or Silicone Mats | Prevents sticking and makes for easy cleanup of baked cookies. | Use aluminum foil (greased) or a well-greased baking sheet as an alternative. |
| Cookie Scoop or Spoon | Helps in portioning cookie dough for even-sized cookies, ensuring consistent baking times. | Use two spoons to scoop and form cookie dough if a scooper isn’t available. |
| Cooling Rack | Allows cookies to cool evenly and prevent sogginess after baking. | A plate or countertop can serve temporarily, but ensure cookies are spaced to allow airflow. |
| Oven Thermometer | Ensures your oven temperature is accurate for even baking. | If unavailable, be mindful of baking times and check on your cookies regularly. |
Cooking Steps
- Mise en Place: Gather all ingredients including 240 g (2 cups) all-purpose flour, 120 g (1/2 cup) unsalted butter, softened, 100 g (1/2 cup) granulated sugar, 100 g (1/2 cup) brown sugar, 1 large egg, 5 ml (1 tsp) vanilla extract, 5 ml (1 tsp) peppermint extract, 5 g (1 tsp) baking powder, 1 g (1/4 tsp) salt, and 60 g (1/4 cup) crushed peppermint candy for decoration, along with necessary kitchen equipment.
- Preheat Oven: Preheat your oven to 180 °C (350 °F), ensuring the oven rack is in the middle position. If using a convection oven, reduce the temperature to 170 °C (340 °F).
- Prepare Baking Sheets: Line 2 baking sheets with parchment paper (or silicone mats) to prevent sticking and ensure easy cleanup.
- Mix Dry Ingredients: In a medium mixing bowl, whisk together 240 g (2 cups) all-purpose flour, 5 g (1 tsp) baking powder, and 1 g (1/4 tsp) salt. Set aside.
- Cream Butter and Sugars: In a large mixing bowl, using a stand mixer or hand mixer on medium speed, cream together 120 g (1/2 cup) softened unsalted butter, 100 g (1/2 cup) granulated sugar, and 100 g (1/2 cup) brown sugar until the mixture is light and fluffy, approximately 2-3 minutes.
- Add Wet Ingredients: Add 1 large egg, 5 ml (1 tsp) vanilla extract, and 5 ml (1 tsp) peppermint extract to the butter-sugar mixture. Mix on medium speed until fully combined, about 1 minute.
- Combine Mixtures: Gradually add the dry ingredient mixture to the wet ingredients, mixing on low speed until just combined. Don’t overmix to maintain the cookie’s tender texture.
- Incorporate Peppermint Candy: Gently fold in 60 g (1/4 cup) crushed peppermint candy using a rubber spatula, ensuring even distribution without overworking the dough.
- Scoop Cookie Dough: Using a cookie scoop or two spoons, portion out about 30 ml (2 tablespoons) of dough per cookie and place them 5 cm (2 inches) apart on the prepared baking sheets.
- Bake Cookies: Place the baking sheets in the preheated oven. Bake for 10-12 minutes or until the edges are lightly golden but the centers still appear slightly soft.
- Rotate the sheets halfway through baking for even cooking.
- Cool Cookies: Remove the baking sheets from the oven and place them on a cooling rack. Let the cookies cool on the sheets for 5 minutes before transferring them to the cooling rack to cool completely.
- The cookies should feel set but soft to the touch.
- Storage: Once cooled, store the cookies in an airtight container at room temperature for up to one week or in the freezer for up to 3 months.
Variations
- Chocolate Peppermint Cookies: Replace 60 g (1/4 cup) of all-purpose flour with 60 g (1/4 cup) unsweetened cocoa powder for a rich chocolate flavor.
- Gluten-Free Candy Canes: Substitute 240 g (2 cups) all-purpose flour with a gluten-free flour blend designed for baking.
- Dairy-Free Delight: Use 120 g (1/2 cup) coconut oil or dairy-free butter instead of unsalted butter for a vegan-friendly version.
- Vegan Candy Cane Cookies: Instead of the egg, use 60 g (1/4 cup) unsweetened applesauce or a flax egg made from 1 tbsp flaxseed meal mixed with 3 tbsp water.
- Lemon Peppermint Twist: Add the zest of one lemon to the wet ingredients for a refreshing citrusy flavor alongside peppermint.
- Almond Flour Variation: Substitute 120 g (1 cup) of all-purpose flour with 120 g (1 cup) almond flour for a nutty taste and added moisture.
- Salted Caramel Candy Canes: Drizzle melted caramel on top of baked cookies and sprinkle with coarse sea salt for a sweet and salty treat.
- No-Bake Candy Cane Bars: Mix cookie dough and press into a lined baking dish; chill until set, then cut into squares for an easy no-bake alternative.
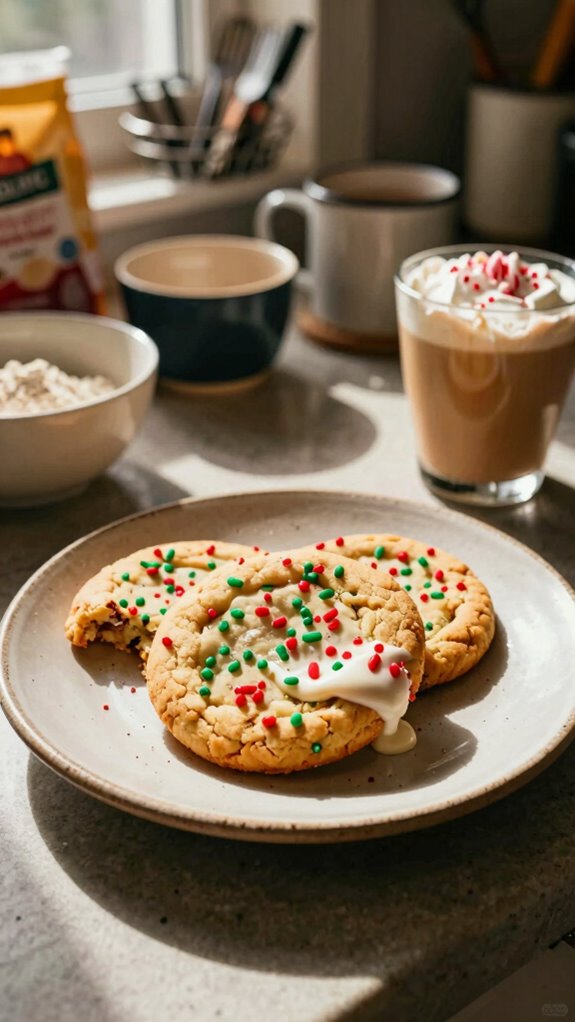
Tips on plating and presentation
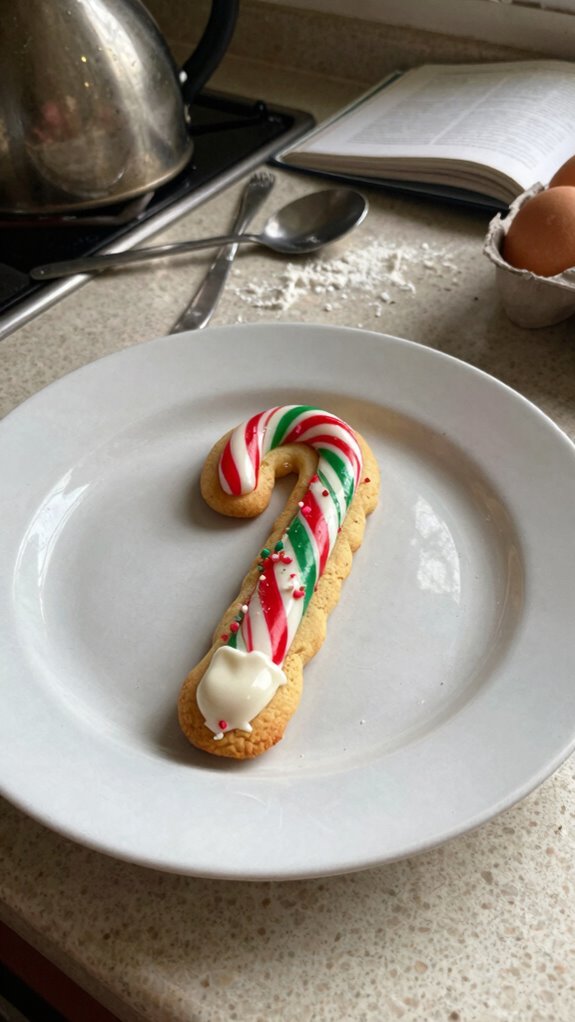
When it comes to plating and presentation, I love to give my Candy Cane Cookies an extra festive touch.
I often use simple plating techniques, like arranging them on a colorful holiday plate or adding a sprinkle of crushed candy canes on top.
For presentation tips, a drizzle of white chocolate on the side elevates their charm and makes them irresistible to guests.
What other dishes can I pair it with?
While I love serving Candy Cane Cookies on their own, they pair beautifully with a variety of holiday dishes and treats.
I often include them on a dessert platter alongside gingerbread cookies, fudge, and peppermint bark. This combination not only looks delightful, but also offers a festive array of flavors that’ll delight your guests during any holiday gathering.
What drinks can I pair it with?
How can you elevate your Candy Cane Cookie experience?
I love pairing them with a steaming cup of hot chocolate; the rich chocolate complements the cookie’s minty flavor perfectly.
Additionally, a warm glass of spiced cider brings out the festive essence of the season.
These drinks not only enhance the cookie’s taste but also create a cozy atmosphere for enjoyment.
Frequently Asked Questions
Can I Freeze the Candy Cane Cookies for Later Use?
Absolutely, I freeze my cookies all the time! Just ensure they’re fully cooled, and then store them in an airtight container. For freezing tips, use parchment between layers to prevent sticking. Enjoy later, guilt-free!
How Long Do These Cookies Stay Fresh?
I’ve found that these cookies stay fresh for about a week when stored properly. Keep them in an airtight container to maximize cookie longevity and maintain that delightful freshness I always love indulging in.
What Type of White Chocolate Works Best for Dipping?
I love using Ghirardelli chocolate for dipping; it melts beautifully and has a rich flavor. Candy melts are also great for convenience, but I prefer the taste of Ghirardelli for a truly indulgent treat.
Can I Substitute Peppermint Extract for Candy Canes?
Absolutely, I often substitute peppermint extract for candy canes in my recipes. It delivers a stronger flavor intensity, and I love experimenting with recipe variations this way. You’ll find it refreshes the cookies beautifully!
Are There Gluten-Free Options for This Cookie Recipe?
Absolutely! I often use gluten-free flours like almond or coconut to create delicious cookies. Just keep an eye on the cookie texture; it might differ, but they still turn out wonderfully tasty and festive!