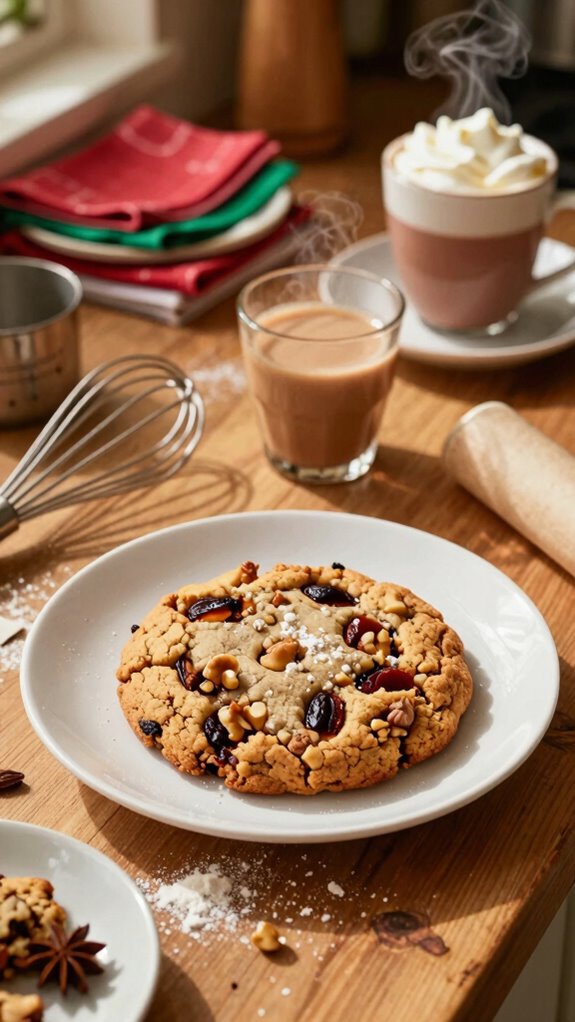
I’ve always enjoyed experimenting with holiday treats, and this Brown Butter Vegan Christmas Fruit Cake Cookie stands out in the crowd. It beautifully combines rich, nutty flavors with festive spices, making it a perfect festive indulgence. The chewy texture and delightful medley of dried fruits and nuts are sure to impress anyone at your holiday gathering. What makes this cookie even more appealing is its versatility for everyone at the table. Let’s explore how to make it shine this season.
What kind of recipe is it?
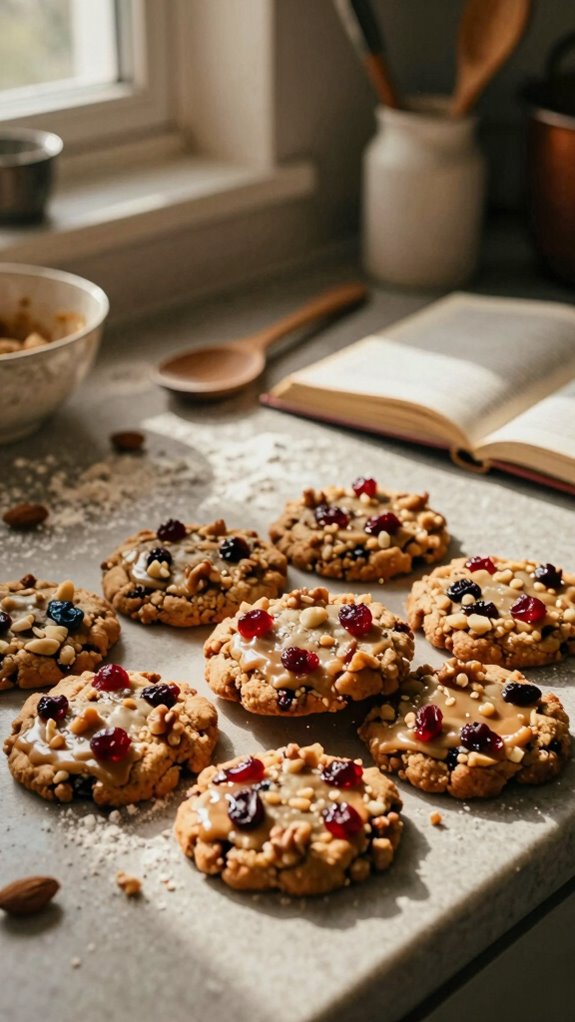
The Brown Butter Vegan Christmas Cookie is a delightful, plant-based treat perfect for the holiday season.
This unique recipe features rich, nutty brown butter, which adds depth of flavor and a warm aroma, making it truly special.
These cookies are soft and chewy, bursting with festive spices that leave you craving more.
Ideal for vegans and anyone looking for a delicious, guilt-free dessert option, they’ll charm family and friends alike, making your holiday gatherings even more memorable.
Preparation Time
| Aspect | Details |
|---|---|
| Difficulty of Recipe | Moderate |
| Preparation Time | 20 minutes |
| Number of Servings | 24 cookies |
Ingredients
| Ingredient | Quantity |
|---|---|
| All-purpose flour | 2 ¼ cups (280g) |
| Brown sugar | 1 cup (220g) |
| Granulated sugar | ½ cup (100g) |
| Vegan butter | ½ cup (115g) |
| Ground cinnamon | 1 teaspoon |
| Baking soda | 1 teaspoon |
| Baking powder | 1 teaspoon |
| Salt | ½ teaspoon |
| Vanilla extract | 2 teaspoons |
| Almond milk (or any plant milk) | ¼ cup (60ml) |
| Vegan chocolate chips | 1 cup (170g) |
| Chopped nuts (optional) | ½ cup (75g) |
Feel free to adjust any quantities based on personal taste or dietary preferences!
Essential Kitchen Equipment
| Tool/Equipment | Purpose | Alternative Option |
|---|---|---|
| Mixing bowls (large & medium) | To mix the dry ingredients and the wet ingredients separately before combining. | Any large bowl can work; a large pot may substitute. |
| Measuring cups (dry & liquid) | To measure flour, sugars, and liquids accurately to ensure the correct balance for the dough. | Use a kitchen scale for more precise measurements or repurposed containers. |
| Measuring spoons | To measure small quantities of ingredients like baking powder, baking soda, and spices. | Use a standard tablespoon or teaspoon from your kitchen as a guide. |
| Stand mixer or hand mixer | To cream the vegan butter and sugars together easily, making the mixing process faster and more efficient. | Mixing by hand with a whisk or wooden spoon is a good alternative if you don’t have a mixer. |
| Rubber spatula | To scrape down the sides of the mixing bowl and fold in the dry ingredients without overmixing the dough. | A wooden spoon or any flexible spatula can work in a pinch. |
| Wooden spoon | To stir and combine the ingredients thoroughly after adding them together. | A sturdy plastic spoon can be used instead. |
| Baking sheets (2-3) | To place the cookie dough for baking in the oven. Adequate surface area allows multiple trays for a single batch. | Use any flat baking surface or upside-down sheet tray if needed. |
| Parchment paper or silicone mats | Create a non-stick surface for baking cookies, making them easy to remove. | Lightly greasing the baking sheets can be a substitute, though it may result in more sticking. |
| Cookie scoop or spoon | For portioning out cookie dough evenly, ensuring uniform size and baking times. | Two spoons can work; use one to scoop and the other to push the dough onto the baking sheet. |
| Cooling rack | To cool the cookies evenly after baking, preventing them from becoming soggy on the bottom. | A plate or countertop can be used, although it may lead to less even cooling. |
| Oven thermometer | To ensure your oven is at the correct temperature for baking, which is crucial for achieving the right cookie texture. | A simple check with an oven-safe thermometer from your kitchen might suffice. |
Cooking Steps
1. Mise en Place: Gather all ingredients including vegan butter (room temperature), brown sugar, granulated sugar, almond milk, vanilla extract, flour, baking powder, baking soda, salt, and any optional mix-ins (e.g., chocolate chips, nuts).
Measure out each ingredient precisely and have the necessary tools ready (mixing bowls, mixer, spatulas, etc.).
2. Preheat Oven: Set the oven to 180 °C (350 °F) and position the oven rack in the middle. Allow the oven to preheat for at least 15 minutes.
3. Pan Preparation: Line two to three baking sheets (standard size) with parchment paper or silicone mats, ensuring complete coverage for a non-stick surface.
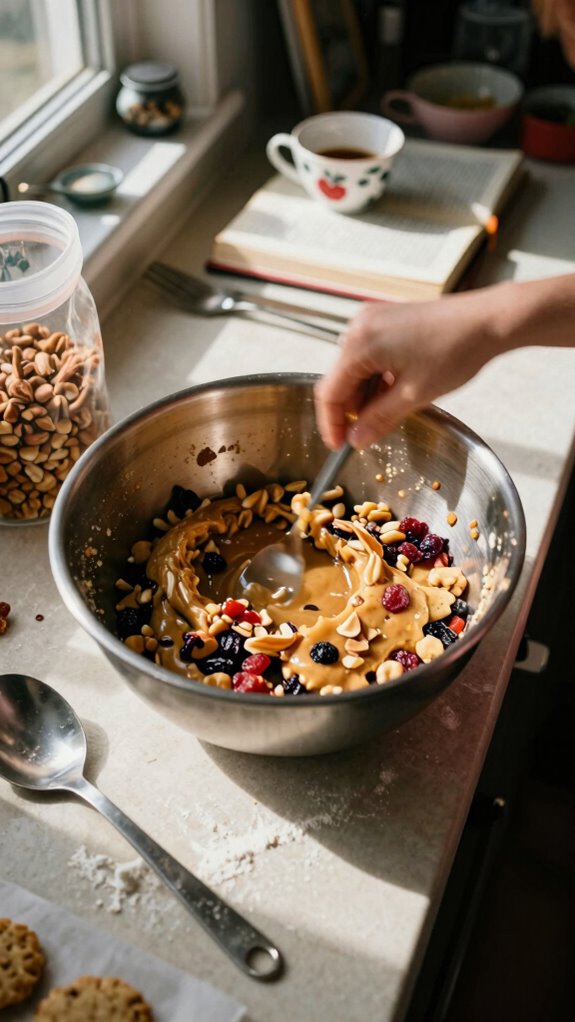
4. Cream the Mixture: In a large mixing bowl, add 120 ml (½ cup) of vegan butter, 150 g (¾ cup) of brown sugar, and 100 g (½ cup) of granulated sugar.
Using a stand mixer on medium speed (or hand mixer), cream together the ingredients for 3-4 minutes until the mixture is light and fluffy in texture, taking on a pale color and aromatic sweetness.
5. Incorporate Wet Ingredients****: Lower the speed of the mixer, and gradually add 60 ml (¼ cup) of almond milk and 10 ml (2 tsp) of vanilla extract.
Mix until well combined, ensuring no lumps remain in the batter.
6. Mix Dry Ingredients**: In a medium mixing bowl, whisk together** 240 g (2 cups) of all-purpose flour, 5 g (1 tsp) of baking powder, 5 g (1 tsp) of baking soda, and 3 g (½ tsp) of salt until evenly distributed.
7. Combine Ingredients: Gradually add the dry mixture to the wet mixture using a rubber spatula, gently folding until just combined.
Avoid overmixing to maintain a tender cookie texture. If desired, fold in any chocolate chips or nuts at this stage.
8. Portion the Dough: Using a cookie scoop or two spoons, portion 30 g (2 tablespoons) of dough onto the prepared baking sheets, spacing them approximately 5 cm (2 inches) apart to allow for spreading.
9. Bake Cookies: Place the baking sheets in the preheated oven at 180 °C (350 °F) and bake for 10-12 minutes until the edges are set and lightly golden, while the centers remain soft and puffy.
10. Cooling: Once baked, remove the cookies from the oven and let them cool on the baking sheets for 5 minutes, then transfer them to a Cooling rack to cool completely for at least 15 minutes before serving.
This cooling period helps the cookies firm up while maintaining a chewy center.
11. Storage: Once cooled completely, store the cookies in an airtight container at room temperature for up to one week, or freeze for longer storage to maintain optimal texture and flavor.
Variations
- Chocolate Chip Walnut: Add 100 g (1 cup) of vegan chocolate chips and 100 g (1 cup) of chopped walnuts for a rich, nutty flavor.
- Peanut Butter Blossom: Incorporate 60 g (¼ cup) of creamy peanut butter into the wet ingredients and add a chocolate star on top after baking.
- Gluten-Free Coconut: Substitute all-purpose flour with 240 g (2 cups) of gluten-free flour blend and fold in 100 g (1 cup) of shredded coconut for a tropical twist.
- Spiced Gingerbread: Mix in 2 tsp of ground ginger, 1 tsp of cinnamon, and ¼ tsp of nutmeg with the dry ingredients for a festive, spiced cookie.
- Matcha Almond: Add 10 g (2 tsp) of culinary matcha powder to the dry ingredients and sprinkle slivered almonds on top before baking for a unique flavor and color.
- Pumpkin Spice: Replace 60 ml (¼ cup) of almond milk with 120 g (½ cup) of pure pumpkin puree and add 1 tsp of pumpkin pie spice for a seasonal variation.
- Mint Chocolate: Mix ½ tsp of peppermint extract into the wet ingredients and fold in 100 g (1 cup) of dark chocolate chips for a refreshing twist.
- Baked in a Mug: Divide the dough into individual mugs, adjusting baking time to 1-2 minutes in the microwave for a quick, single-serving treat.
Tips on plating and presentation
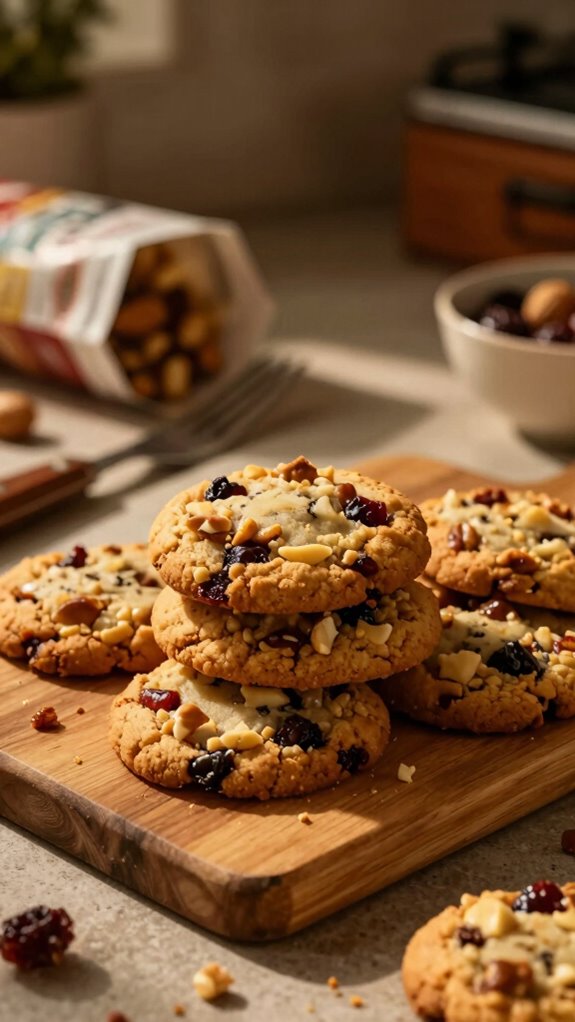
Although it might seem easy to just pile cookies on a plate, I find that good plating can elevate your Brown Butter Vegan Christmas Cookies into a festive centerpiece.
Use plating techniques like stacking cookies at varying heights and adding festive garnishes such as edible flowers or fresh herbs. A sprinkle of powdered sugar can also enhance the visual appeal, making your presentation truly special.
What other dishes can I pair it with?
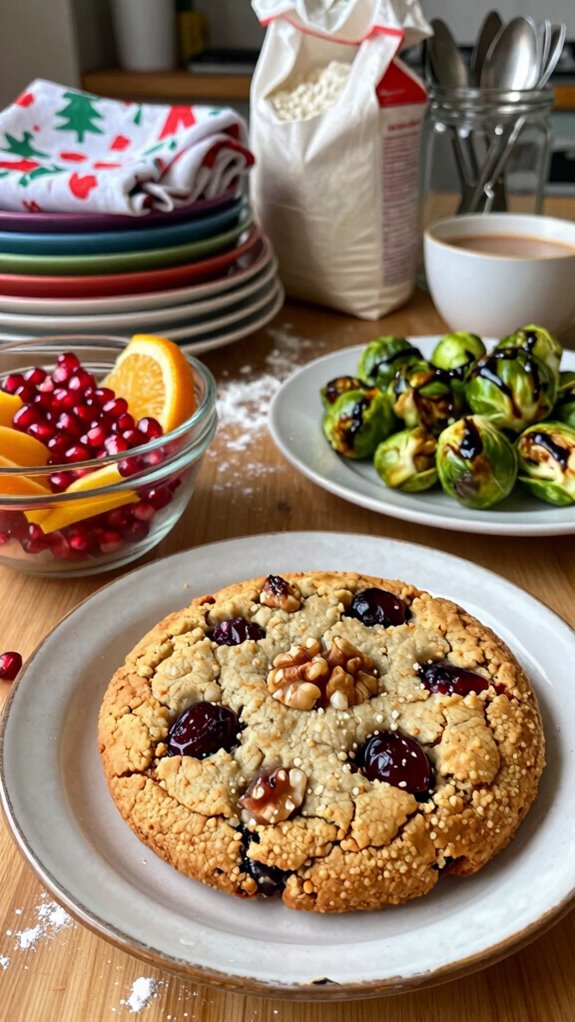
If you’re looking to create a delightful spread alongside your Brown Butter Vegan Christmas Cookies, consider pairing them with a few complementary dishes.
I love the idea of adding spiced gingerbread bars or peppermint brownie bites to the mix. These holiday desserts make for great festive pairings, enhancing the rich flavors of your cookies.
Trust me, your guests will be impressed!
What drinks can I pair it with?
To elevate your holiday gathering even further, pairing drinks with your Brown Butter Vegan Christmas Cookies can create a harmonious experience.
For cocktail pairings, I recommend a spiced rum or warm apple cider with a splash of bourbon.
If you prefer non-alcoholic options, try a festive cranberry or pomegranate spritzer.
Both choices complement the nutty richness of the cookies beautifully!
Frequently Asked Questions
Can I Substitute the Brown Butter With Another Ingredient?
Absolutely, you can use nut butter as a brown butter alternative! It adds richness while keeping the vegan aspect. I love using almond or cashew butter for a delicious twist in recipes like these.
How Do I Store Leftover Cookies?
I store leftover cookies in an airtight container at room temperature. This proper storage keeps them fresh for days. If I want them even fresher, I’ll freeze them, ensuring delightful bites whenever I crave them!
Are There Gluten-Free Options for This Cookie Recipe?
Absolutely! I use gluten-free flours like almond or coconut flour in my recipes. For sweetness, I incorporate alternative sweeteners like maple syrup or coconut sugar, ensuring the cookies remain delicious and suitable for gluten-free diets.
What Is the Shelf Life of the Cookies?
I’ve found that these cookies maintain their freshness for about a week at room temperature, or up to two weeks refrigerated. Proper storage helps extend their shelf life and keeps them delicious and enjoyable longer.
Can I Freeze the Dough for Later Use?
Absolutely, you can freeze the dough for later use! I recommend scooping the dough into portions and wrapping each securely. That way, it keeps fresh, and you’ve got perfect cookies ready anytime you want.