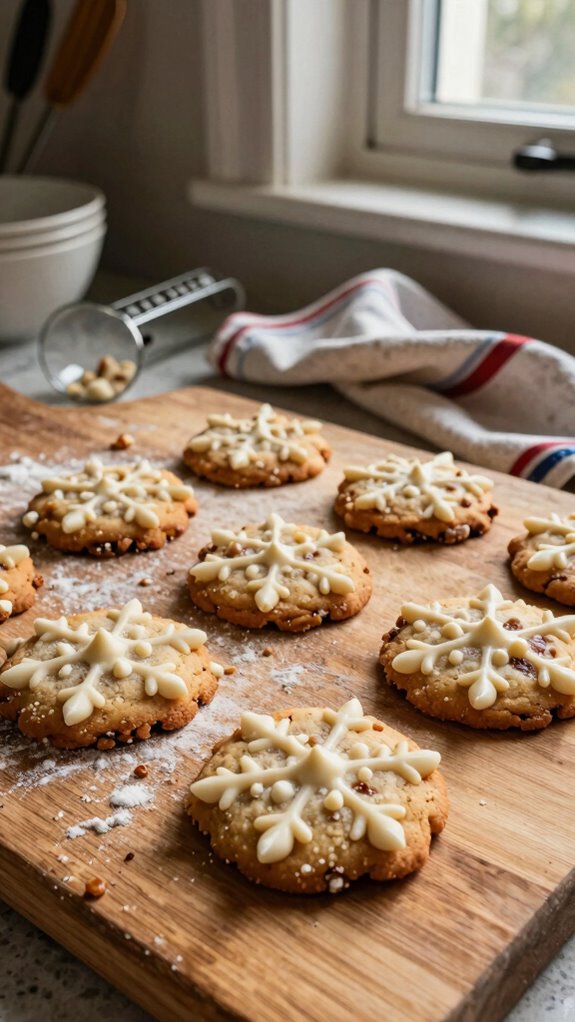
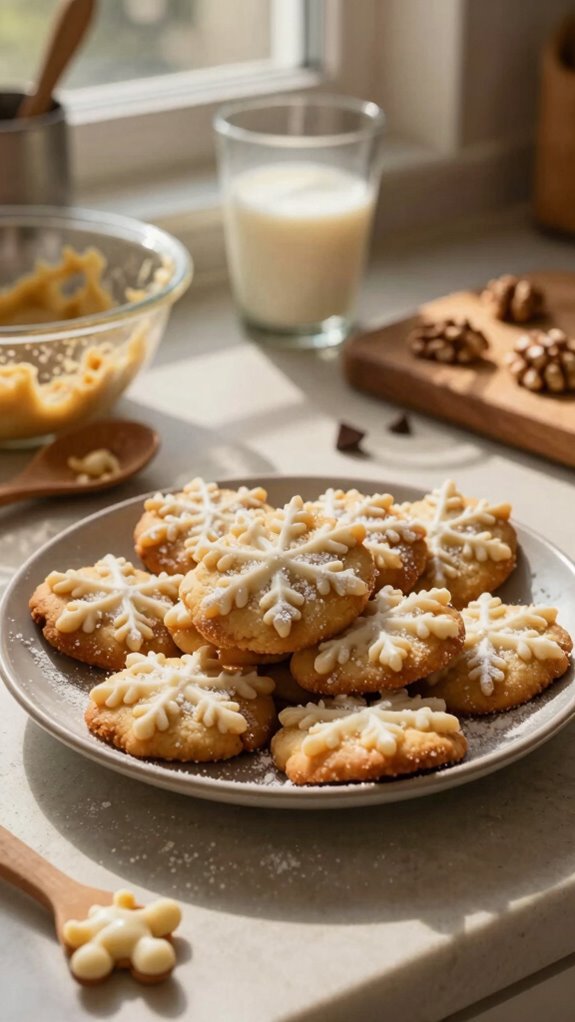
I’ve recently experimented with a unique cookie recipe that combines the richness of brown butter with the sweetness of white chocolate, all shaped into charming snowflakes. These cookies not only embody the cozy spirit of the season but also offer a delightful taste that’s hard to resist. I’m eager to share the process, from preparation to perfecting the presentation, so you can create these treats for your next gathering. Let’s explore the details together.
What kind of recipe is it?
Brown Butter White Chocolate Cookies are a delightful treat that brings a gourmet twist to the classic cookie.
This recipe features the rich, nutty flavor of browned butter, which enhances the sweetness of creamy white chocolate chips, creating a perfect balance of taste and texture.
Ideal for cookie enthusiasts and bakers looking to impress at gatherings, these cookies are soft and chewy, making them irresistible.
Whether you’re indulging yourself or sharing with friends and family, these cookies are sure to elevate any dessert experience.
Preparation Time
| Aspect | Details |
|---|---|
| Difficulty of Recipe | Intermediate |
| Preparation Time | 15 minutes |
| Number of Servings | 24 cookies |
Ingredients
| Ingredient | Quantity |
|---|---|
| Unsalted butter | 1 cup (2 sticks) |
| Brown sugar | 3/4 cup |
| Granulated sugar | 1/2 cup |
| Large egg | 1 |
| Large egg yolk | 1 |
| Vanilla extract | 1 tablespoon |
| All-purpose flour | 2 cups |
| Baking soda | 1 teaspoon |
| Baking powder | 1/2 teaspoon |
| Salt | 1/2 teaspoon |
| White chocolate chips | 1 cup |
| Chopped nuts (optional) | 1/2 cup (e.g., macadamia or pecans) |
Essential Kitchen Equipment
| Tool/Equipment | Purpose | Alternative Option |
|---|---|---|
| Mixing Bowls (Large & Medium) | Used to mix dough and combine ingredients efficiently. | Use any large, heatproof container; stainless steel or glass bowls work well. |
| Measuring Cups (Dry & Liquid) | Essential for accurately measuring ingredients like flour, sugar, and liquids. | Use disposable cups or a graduated cylinder for liquids, or get creative with everyday cups and convert measurements. |
| Measuring Spoons | Necessary for measuring out small quantities of ingredients like vanilla extract, baking powder, and salt. | Use standard teaspoons/tablespoons from your kitchen. |
| Stand Mixer or Hand Mixer | Helps mix and cream the butter and sugars together quickly and thoroughly. | Use a wooden spoon or a whisk for manual mixing; it requires more effort. |
| Rubber Spatula | Ideal for scraping down the sides of bowls and folding ingredients together. | A sturdy spoon can also work, but may not be as effective at scraping. |
| Wooden Spoon | Useful for stirring and mixing ingredients, especially when combining dry ingredients. | Any sturdy spoon can suffice, but wooden spoons are preferable for their durability. |
| Baking Sheets (2-3) | Needed for placing cookies for baking, allowing even heat distribution. | Use any flat oven-safe surface; remember to adjust baking times as necessary. |
| Parchment Paper or Silicone Mats | Prevents sticking and allows for easy removal of cookies from baking sheets. | Lightly grease the baking sheets as an alternative. |
| Cookie Scoop or Spoon | Facilitates portioning out dough for uniform cookie size. | Use a standard spoon to scoop dough, although it may lead to inconsistencies in size. |
| Cooling Rack | Allows cookies to cool evenly after baking, preventing sogginess. | Place cookies directly on a wire rack or the baking sheet; just ensure they are on a heat-safe surface. |
| Oven Thermometer | Ensures your oven temperature is accurate for perfect baking results. | An alternative is to invest in an oven thermometer for accuracy; you can also rely on a simple kitchen thermometer if you have one. |
This table provides you with the essential kitchen equipment needed for baking Brown Butter White Chocolate Cookies, along with their purposes and practical alternatives that work perfectly in a home kitchen setting.
Cooking Steps
1. Prepare your workstation by gathering and measuring out all ingredients required for the Brown Butter White Chocolate Cookies, including the butter, sugars, flour, eggs, baking soda, salt, and white chocolate.
2. Preheat your oven to 190 °C (375 °F). Position the oven rack in the middle of the oven. If using convection, reduce the temperature to 175 °C (350 °F).
3. In a medium saucepan over medium heat, melt 170 g (3/4 cup) of unsalted butter. Stir continuously until the butter foams and begins to turn golden brown, about 5-7 minutes. Pay attention to the nutty aroma; once it reaches a deep amber color and has a fragrant scent, remove it from heat and let it cool slightly.
4. In a large mixing bowl, combine 150 g (3/4 cup) of granulated sugar and 150 g (3/4 cup) of packed light brown sugar. Pour the warm brown butter over the sugars and mix using a stand mixer fitted with a paddle attachment or a hand mixer on medium speed until the mixture is smooth and creamy, about 2-3 minutes.
5. Add in 1 large egg and 1 large egg yolk to the sugar mixture, along with 5 ml (1 teaspoon) of vanilla extract. Beat on medium speed until well incorporated, about 1 minute.
6. In a separate bowl, sift together 200 g (1 ½ cups) of all-purpose flour, 5 g (1 teaspoon) of baking soda, and 2 g (1/2 teaspoon) of salt. Gradually fold the dry ingredients into the wet mixture using a rubber spatula, mixing just until no dry flour is visible.
Avoid overmixing to maintain a tender cookie texture.
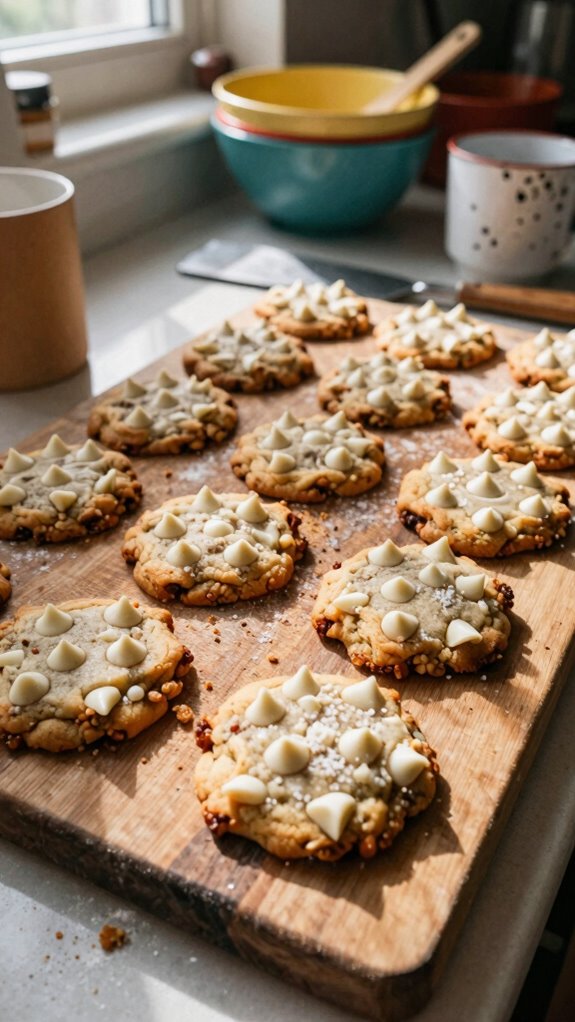
7. Gently fold in 150 g (1 cup) of chopped white chocolate or white chocolate chips until evenly distributed throughout the dough.
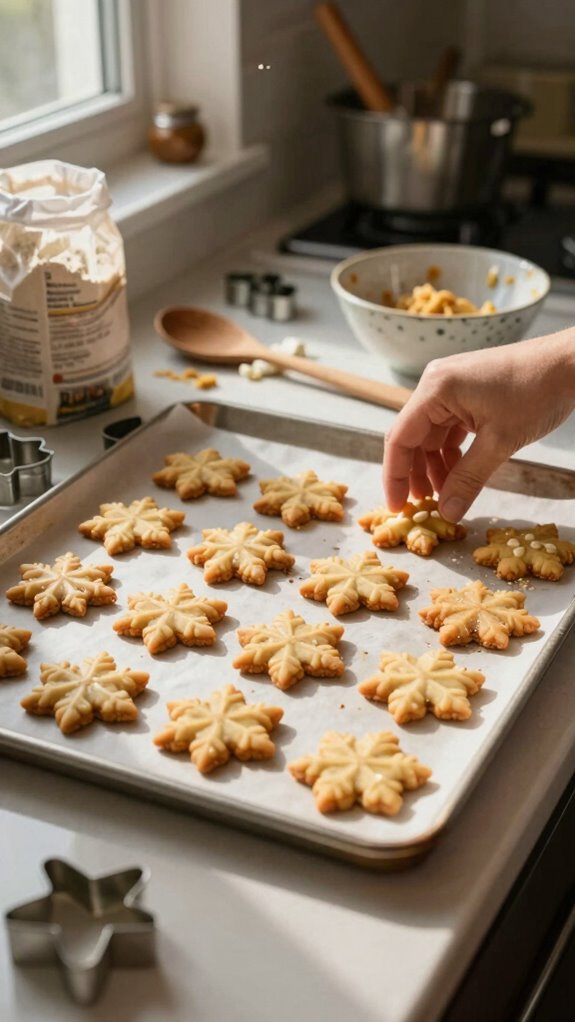
8. Line two baking sheets (or prepare them by greasing lightly if not using parchment paper) with parchment paper. Using a cookie scoop or spoon, portion out 30-35 g (2 tablespoons) of dough for each cookie and place the dough balls onto the prepared baking sheets. Leave at least 5 cm (2 inches) between each cookie.
9. Bake in the preheated oven for 10-12 minutes, or until the edges are lightly golden and the centers appear set but still soft. The aroma of toasted vanilla and chocolate should fill your kitchen.
10. Once baked, remove the baking sheets from the oven and allow the cookies to cool on the sheets for 5 minutes. Then, transfer them to a wire cooling rack to cool completely for an additional 10-15 minutes to prevent sogginess.
11. Enjoy the cookies once cooled, or store them in an airtight container at room temperature, where they’ll remain fresh for up to one week.
Variations
- Pumpkin Spice Cookies: Incorporate 100 g (1/2 cup) of pumpkin puree and 5 g (1 teaspoon) of pumpkin spice into the dough for a seasonal fall twist.
- Coconut Crunch: Fold in 100 g (1 cup) of shredded unsweetened coconut for a tropical flavor and chewy texture.
- Baked Doughnut Style: Shape the dough into doughnut forms and bake for 8-10 minutes to make cookie doughnuts, topping them with a light glaze of powdered sugar and milk.
Tips on plating and presentation
Although the aroma of freshly baked Brown Butter White Chocolate Cookies may already have your guests excited, the way you present them can elevate their experience even further.
Try using simple plating techniques like stacking the cookies slightly askew for visual interest. Add a dusting of powdered sugar and a sprig of mint for color.
These presentation tips will surely impress your guests!
What other dishes can I pair it with?
After impressing your guests with the presentation of your Brown Butter White Chocolate Cookies, consider what other dishes can complement their rich, buttery flavor.
I love pairing them with festive desserts like cranberry orange bliss bars or peppermint bark.
These cookie pairings enhance the overall experience, bringing a delightful variety to your spread while keeping the holiday spirit alive.
What drinks can I pair it with?
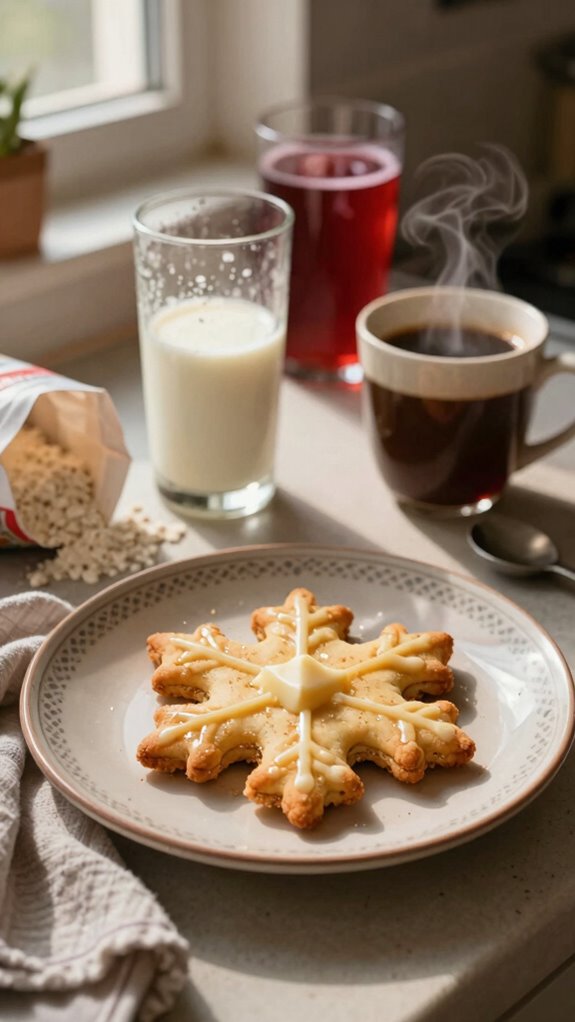
A perfect pairing can elevate the enjoyment of my Brown Butter White Chocolate Cookies.
I love enjoying these cookies with a rich cup of coffee, as the flavors complement each other beautifully. If you’re in the mood for something more indulgent, try serving them with a sweet dessert wine.
The combination creates a delightful harmony that transforms each bite into a memorable experience.
Frequently Asked Questions
Can I Use Dark Chocolate Instead of White Chocolate?
Absolutely! I love using dark chocolate instead; it adds a rich depth and unique flavor variation to cookies. Plus, dark chocolate’s health benefits make them even more enjoyable. Give it a try—you won’t regret it!
How Do I Store Leftover Cookies?
I store leftover cookies in an airtight container at room temperature to maintain cookie freshness. If I need them to last longer, I freeze them and enjoy the perfect treat later. It’s that easy!
What Makes Brown Butter Different From Regular Butter?
Brown butter’s different because I cook it until it starts browning, which creates a nutty flavor and caramel notes. This unique taste elevates my baked goods, making them rich and delicious compared to regular butter.
Can I Freeze the Cookie Dough?
Yes, I can freeze the cookie dough! I ensure the dough consistency is perfect, then use effective freezing techniques. This way, I can enjoy fresh cookies later without sacrificing taste or texture.
How Long Do These Cookies Stay Fresh?
These cookies stay fresh for about a week at room temperature. For optimal freshness tips, I suggest storing them in an airtight container. If you do that, their lifespan will extend beyond that delightful week!