When I first tried the Brown Butter Oreo Dipped Christmas Cookie, I was struck by the rich, nutty flavor that really elevates a classic treat. Mixing Oreos with browned butter creates a unique depth that’s hard to resist. As I explored this recipe, I discovered various ways to enhance not just the cookie itself, but also how to present and pair it. If you’re curious about crafting these indulgent cookies, let’s get into the details.
What kind of recipe is it?
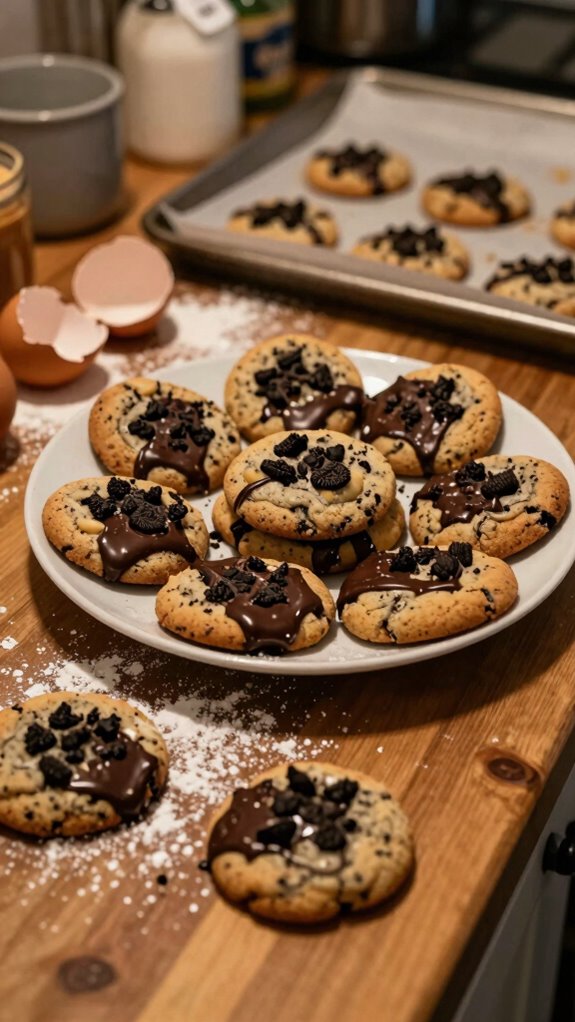
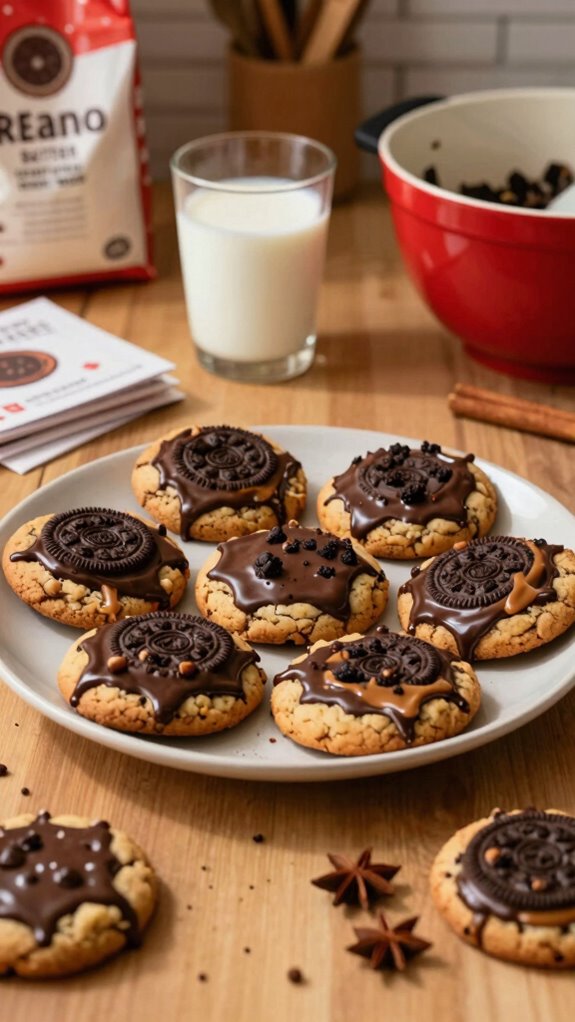
The Brown Butter Oreo Dipped Christmas Cookie is a delightful twist on the classic holiday treat, combining rich, nutty brown butter with the beloved flavors of Oreos.
This unique recipe features a soft, chewy cookie base that’s perfectly complemented by a decadent chocolate dip, making it an irresistible indulgence for festive gatherings.
Perfect for cookie exchanges or holiday parties, this treat appeals to families, cookie enthusiasts, and anyone looking to spread cheer through baking.
You’ll want to create these cookies to elevate your holiday celebrations!
Preparation Time
| Detail | Information |
|---|---|
| Difficulty of the Recipe | Moderate |
| Preparation Time | 30 minutes |
| Number of Servings | 24 cookies |
Ingredients
| Ingredient | Quantity |
|---|---|
| Unsalted Butter | 1 cup (2 sticks) |
| Granulated Sugar | 1 cup |
| Brown Sugar | 1 cup |
| Large Eggs | 2 |
| Vanilla Extract | 2 teaspoons |
| All-Purpose Flour | 2 ½ cups |
| Baking Soda | 1 teaspoon |
| Salt | 1 teaspoon |
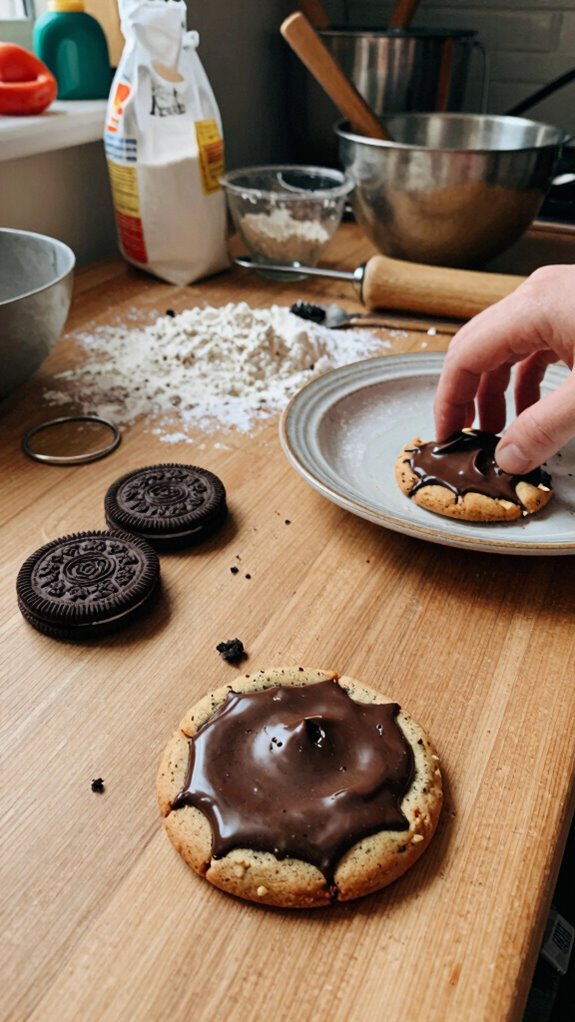
| Oreos | 24 cookies |
| Semisweet Chocolate Chips | 1 cup |
| Sprinkles (optional) | For decoration |
Essential Kitchen Equipment
| Tool/Equipment | Purpose | Alternative Option |
|---|---|---|
| Mixing Bowls (Large and Medium) | To mix the ingredients and combine wet and dry components efficiently. | Any large container, such as a pot or a sturdy plastic bowl. |
| Measuring Cups (Dry and Liquid) | Essential for accurately measuring flour, sugar, and liquids. | Use a scale for measuring by weight or use any cup as a reference for volume (e.g., coffee mug). |
| Measuring Spoons | For measuring smaller quantities of ingredients like baking soda and vanilla extract. | Use a standard household spoon if necessary (1 tablespoon ≈ 15ml). |
| Stand Mixer or Hand Mixer | To cream the butter and sugars together and mix the dough thoroughly. | Mixing by hand with a wooden spoon (may require more effort). |
| Rubber Spatula | Great for scraping down the sides of bowls and folding in ingredients without over-mixing. | A large spoon can also work, though you may have to work a bit harder to combine ingredients. |
| Wooden Spoon | Useful for mixing thick dough and batter. | Any sturdy spoon, such as a metal or plastic spoon can work. |
| Baking Sheets (2-3) | Required for placing the cookie dough for baking. | Any flat, heat-safe pan can suffice if you don’t have specific baking sheets. |
| Parchment Paper or Silicone Mats | To line baking sheets for easy cookie removal and to prevent sticking. | Lightly greasing the baking sheets with butter or oil can be a substitute. |
| Cookie Scoop or Spoon | For portioning the cookie dough evenly. | A regular spoon can be used, just adjust the amount you scoop to ensure uniformity. |
| Cooling Rack | Allows cookies to cool evenly and prevents them from becoming soggy. | A wire rack if available; if not, you can cool them on the countertop itself. |
| Oven Thermometer | To ensure the oven temperature is accurate for baking the cookies properly. | Trusting the built-in oven gauge, although it may not always be accurate. |
Cooking Steps
- Mise en Place: Gather all ingredients and necessary tools, including mixing bowls, measuring cups, measuring spoons, a stand mixer or hand mixer, a rubber spatula, a wooden spoon, baking sheets, parchment paper, a cookie scoop or spoon, and a cooling rack.
- Preheat the Oven: Set the oven to 180°C (350°F) and position the rack in the center.
- Prepare Baking Sheets: Line 2-3 baking sheets with parchment paper for easy cookie removal.
- Brown the Butter: In a medium saucepan over medium heat, melt 170 g (¾ cup) of unsalted butter until it begins to brown, approximately 5-7 minutes. Stir continuously until the butter is golden brown and releases a nutty aroma. Remove from heat and allow to cool slightly.
- Mix Wet Ingredients: In a large mixing bowl, combine the browned butter (shouldn’t be hot), 200 g (1 cup) of brown sugar, and 100 g (½ cup) of granulated sugar. Using a stand mixer on medium speed, cream together until light and fluffy, about 2-3 minutes.
- Add Eggs and Vanilla: Add 2 large eggs and 1 tsp of vanilla extract to the butter-sugar mixture. Mix on medium speed until well combined, approximately 1 minute.
- Whisk Dry Ingredients: In a separate medium bowl, whisk together 290 g (2 ¼ cups) of all-purpose flour, 1 tsp of baking soda, and ½ tsp of salt.
- Combine Mixtures: Gradually add the dry ingredients to the wet mixture using a rubber spatula. Stir gently until just combined, being careful not to overmix; the dough should be slightly sticky.
- Fold in Oreos: Chop 200 g (about 14-16 Oreos) roughly and fold into the dough using a wooden spoon until evenly distributed.
- Scoop Dough: Use a cookie scoop (approximately 30 ml) or a spoon to portion out the dough onto the prepared baking sheets, leaving space (5 cm (2 inches)) between each cookie.
- Bake: Place the baking sheets in the preheated oven and bake for 10-12 minutes, or until the cookies are golden brown at the edges and soft in the center. If using convection, reduce temperature to 165°C (330°F).
- Cool Cookies: After baking, remove the sheets from the oven and let the cookies cool for 5 minutes on the sheet. Then, transfer to a wire rack to cool completely.
- Prepare for Dipping: While cookies cool, melt 200 g (about 1½ cups) of white chocolate in a microwave-safe bowl in 30-second intervals, stirring in between, until fully melted.
- Dip Cookies: Once the cookies are completely cooled, dip half of each cookie into the melted white chocolate. Allow excess chocolate to drip off before placing them back onto a parchment-lined sheet.
- Set Chocolate: Allow dipped cookies to set for about 30 minutes at room temperature, or until the chocolate is firm to the touch.
- Store or Serve: Enjoy cookies immediately or store in an airtight container at room temperature for up to one week.
Variations
- Peanut Butter Oreo: Replace 100 g (½ cup) of granulated sugar with 100 g (½ cup) of creamy peanut butter for a nutty flavor twist.
- Gluten-Free Cookies: Substitute 290 g (2 ¼ cups) of all-purpose flour with a gluten-free flour blend to make the recipe gluten-free.
- Vegan Delight: Use 170 g (¾ cup) of coconut oil instead of butter, substitute eggs with 2 flax eggs (2 tbsp ground flaxseed mixed with 6 tbsp water), and replace white chocolate with dairy-free chocolate for a vegan version.
- Chocolate Mint Oreo: Incorporate mint flavor by using 200 g (about 14-16) of mint Oreos and adding ½ tsp peppermint extract to the wet ingredients.
- Cranberry Almond Cookies: Add 100 g (1 cup) of chopped dried cranberries and replace Oreos with chopped dark chocolate to create a festive holiday flavor.
- Coconut Macadamia: Mix 100 g (1 cup) of shredded coconut and 100 g (1 cup) of chopped macadamia nuts into the dough for a tropical twist.
- Baking on a Grill: For a summer twist, bake cookies on a preheated grill at medium heat, using a grilling mat or foil to prevent sticking.
- Double Chocolate Oreo: Enhance chocolate flavor by substituting 50 g (⅓ cup) of flour with cocoa powder and using chocolate Oreos instead of regular Oreos.
Tips on plating and presentation
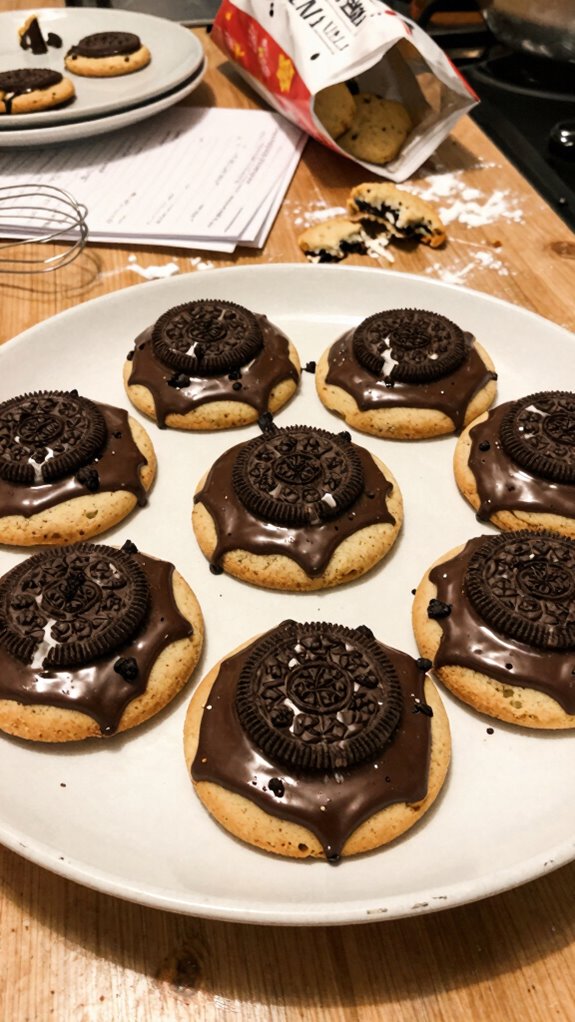
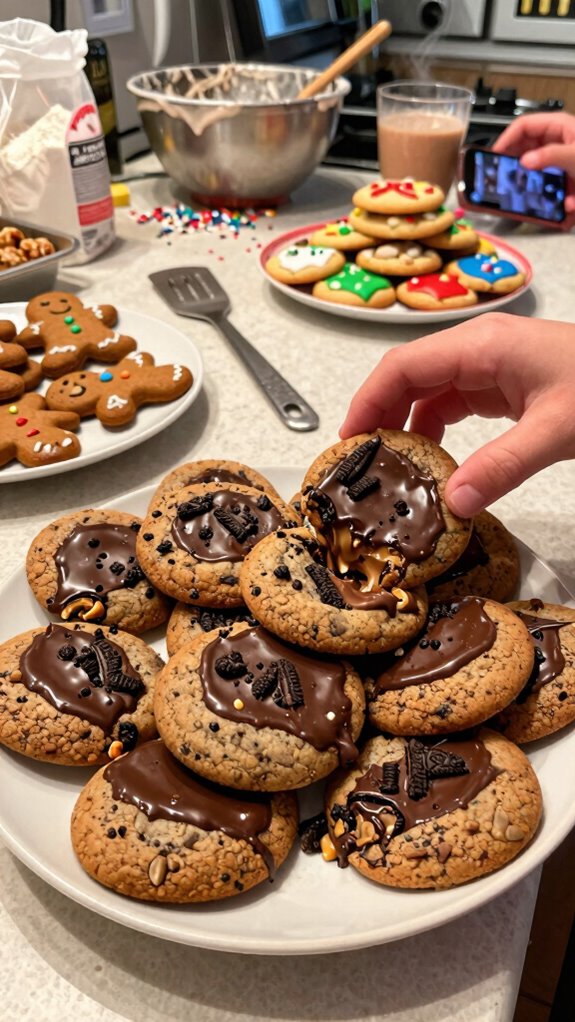
To create an eye-catching presentation for your Brown Butter Oreo Dipped Christmas Cookies, I’ll suggest opting for colorful platters that contrast beautifully with the rich hues of the cookies.
Consider using simple garnish techniques, like dusting powdered sugar or adding festive sprinkles.
For serving suggestions, stack cookies artfully and surround them with seasonal greenery for an inviting holiday display.
Enjoy your festive treat!
What other dishes can I pair it with?
How can I elevate my holiday gatherings with a perfect pairing for my Brown Butter Oreo Dipped Christmas Cookies?
I love adding rich chocolate truffles, nutty biscotti, and festive peppermint bark to my dessert platters.
These treats complement the cookies beautifully and create a delightful spread for holiday parties.
Trust me, your guests will adore this sweet combination!
What drinks can I pair it with?
What drinks can I savor alongside my Brown Butter Oreo Dipped Christmas Cookies?
I love pairing them with rich, velvety hot chocolate for that perfect cozy vibe. The chocolatey goodness complements the cookies beautifully.
Alternatively, I enjoy a glass of warm almond milk, which adds a subtle nuttiness that enhances the flavors.
Both options make my cookie experience truly irresistible!
Frequently Asked Questions
Can I Use Gluten-Free Oreos for This Recipe?
Absolutely, I’ve used gluten-free Oreos before, and they work great! Just keep in mind that the cookie texture might be slightly different, but it’ll still taste fantastic. Enjoy experimenting with gluten-free alternatives in your baking!
How Long Do These Cookies Stay Fresh?
These cookies stay fresh for about a week when stored in an airtight container. I recommend keeping them in a cool, dry place to maintain cookie freshness. Trust me, you’ll appreciate those storage tips!
Can I Freeze the Cookies After Baking?
Yes, you can freeze the cookies after baking! For optimal cookie storage, I recommend wrapping each one tightly in plastic wrap, then placing them in an airtight container. Use these freezing tips for lasting freshness!
What’s the Best Way to Store Leftovers?
I store my leftover cookies in an airtight container at room temperature. It keeps them soft and fresh. For longer storage, I recommend using the freezer. Just remember to label those containers for easy access later!
Can I Substitute Brown Butter With Regular Butter?
You can substitute brown butter with regular butter, but you’ll miss that rich, nutty butter flavor. Just remember to make slight baking adjustments, like adding a pinch of salt for depth. Happy baking!