I’ve come across a delightful recipe for Gluten-Free Chocolate Kiss Cookies made with almond flour. These cookies strike a perfect balance between rich chocolate and a chewy texture, making them an excellent option for those avoiding gluten. With simple ingredients and easy steps, you’ll want to know how to whip these up for any occasion. Curious about the preparation and some tips to make them stand out? Let’s take a closer look.
What kind of recipe is it?
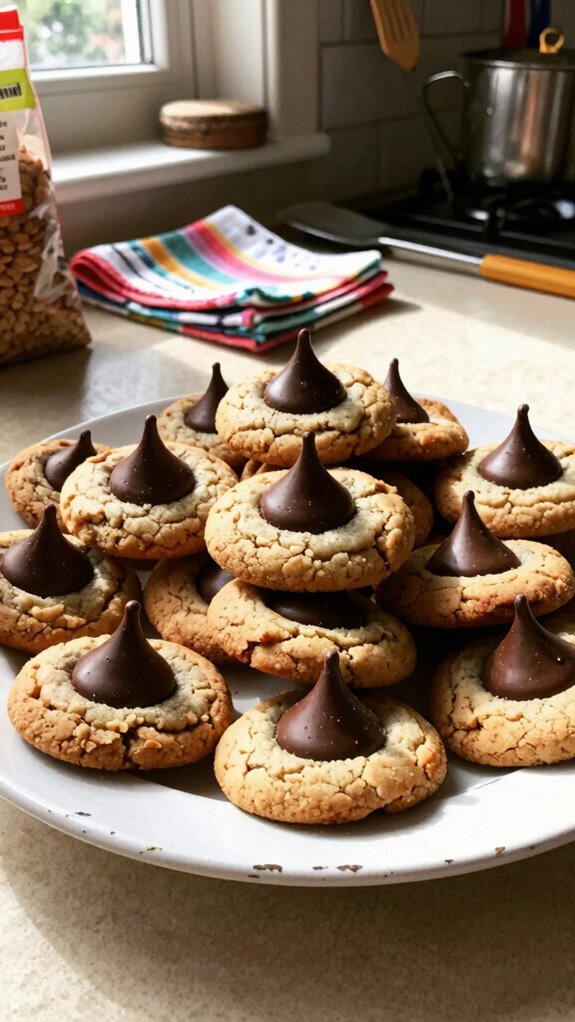
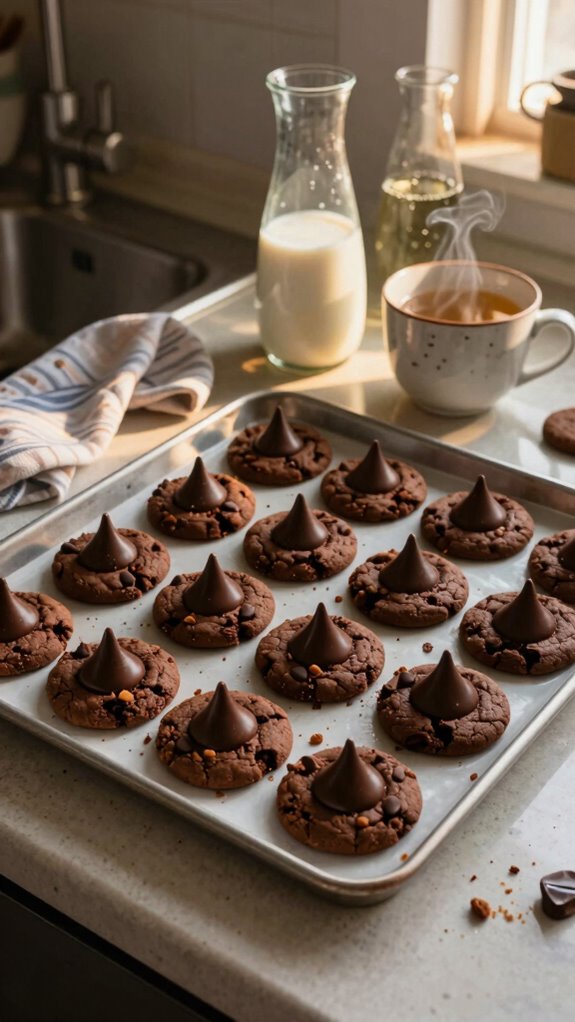
The Gluten-Free Chocolate Kiss Cookie is a delightful and indulgent treat perfect for those who follow a gluten-free diet.
These cookies feature a soft, chewy texture infused with rich chocolate flavors, topped with a creamy chocolate kiss for a sweet finish.
Ideal for holidays, parties, or everyday snacking, they appeal to both kids and adults alike.
This recipe is both easy to make and a crowd-pleaser, ensuring that everyone can enjoy a delicious dessert without gluten worries.
Preparation Time
| Detail | Description |
|---|---|
| Difficulty of the Recipe | Easy |
| Preparation Time | 15 minutes |
| Number of Servings | Approximately 24 cookies |
Ingredients
| Ingredient | Quantity |
|---|---|
| Gluten-free all-purpose flour | 1 ¾ cups |
| Unsweetened cocoa powder | ½ cup |
| Baking soda | 1 teaspoon |
| Salt | ¼ teaspoon |
| Granulated sugar | ¾ cup |
| Brown sugar | ¾ cup, packed |
| Unsalted butter, softened | ¾ cup |
| Large egg | 1 |
| Pure vanilla extract | 1 teaspoon |
| Chocolate kisses | Approximately 24 pieces |
This table outlines all the necessary ingredients along with their specific quantities required to make the Gluten-Free Chocolate Kiss Cookie.
Essential Kitchen Equipment
| Tool/Equipment | Purpose | Alternative Option |
|---|---|---|
| Mixing Bowls (Large & Medium) | Used for combining dry ingredients and wet ingredients separately before mixing them together. | Any large bowls from your kitchen |
| Measuring Cups (Dry & Liquid) | Essential for accurately measuring ingredients like flour, sugars, and liquids to ensure proper proportions in the recipe. | Standard cup from your kitchen can be used for approximate measurements |
| Measuring Spoons | Used for measuring small quantities of ingredients such as baking soda, salt, and vanilla extract with accuracy. | Tablespoon and teaspoon from your utensil drawer |
| Stand Mixer or Hand Mixer | Ideal for creaming together the butter and sugars, and for mixing in the egg and dry ingredients. | Mixing by hand with a wooden spoon or whisk |
| Rubber Spatula | Helpful for scraping down the sides of the mixing bowl and folding in ingredients without over-mixing. | Flexible silicone spatula or any large spoon |
| Wooden Spoon | Used for mixing ingredients together, especially when combining the dry and wet mixtures. | Any sturdy spoon, even a large fork |
| Baking Sheets (2-3) | Provides the surface to place the cookie dough when baking; multiple sheets allow for batch baking. | Any oven-safe baking tray or utilize parchment-lined trays |
| Parchment Paper or Silicone Mats | Prevents cookies from sticking to the baking sheets and ensures even baking and easier cleanup. | Greasing the baking sheets with butter or oil |
| Cookie Scoop or Spoon | A cookie scoop helps create uniform-sized cookies for even baking; spoons can also be used to drop cookie dough onto baking sheets. | Two tablespoons to drop dough if you do not have a cookie scoop |
| Cooling Rack | Allows baked cookies to cool evenly on both sides, preventing sogginess after baking. | Placing cookies on a plate or counter lined with parchment paper |
| Oven Thermometer | Ensures the oven is at the correct temperature, which is crucial for proper baking. | Test oven with a simple oven-safe dish of water or a regular temperature gauge |
Cooking Steps
- Assemble all ingredients: gluten-free flour, cocoa powder, baking soda, salt, butter, granulated sugar, brown sugar, egg, pure vanilla extract, and chocolate kisses. Prepare the necessary cooking tools: large mixing bowls, measuring cups, measuring spoons, a stand mixer or hand mixer, a rubber spatula, a baking sheet (or multiple sheets), parchment paper, a cooling rack, and a cookie scoop or spoon.
- Preheat the oven to 175 °C (350 °F). Position the oven rack in the center of the oven for even heat distribution.
- Line the baking sheet with parchment paper to prevent sticking. If not available, lightly grease the baking sheet with butter or oil.
- In a large mixing bowl, whisk together 120 g (1 cup) of gluten-free flour, 30 g (1/4 cup) of unsweetened cocoa powder, 1 teaspoon of baking soda, and a pinch of salt until well combined. Set aside.
- In a separate medium mixing bowl, cream together 113 g (1/2 cup) of softened butter and 150 g (3/4 cup) of granulated sugar using a stand mixer or hand mixer on medium speed until light and fluffy, approximately 2-3 minutes.
- Add 100 g (1/2 cup) of packed brown sugar to the creamed mixture, then mix to combine until fully incorporated. Scrape down the sides with a rubber spatula if necessary.
- Add 1 large egg and 1 teaspoon of pure vanilla extract to the mixture. Mix on low speed until well blended.
- Gradually incorporate the dry ingredients from step 4 into the wet mixture, mixing on low speed until just combined. Don’t over-mix; there should be no dry flour visible.
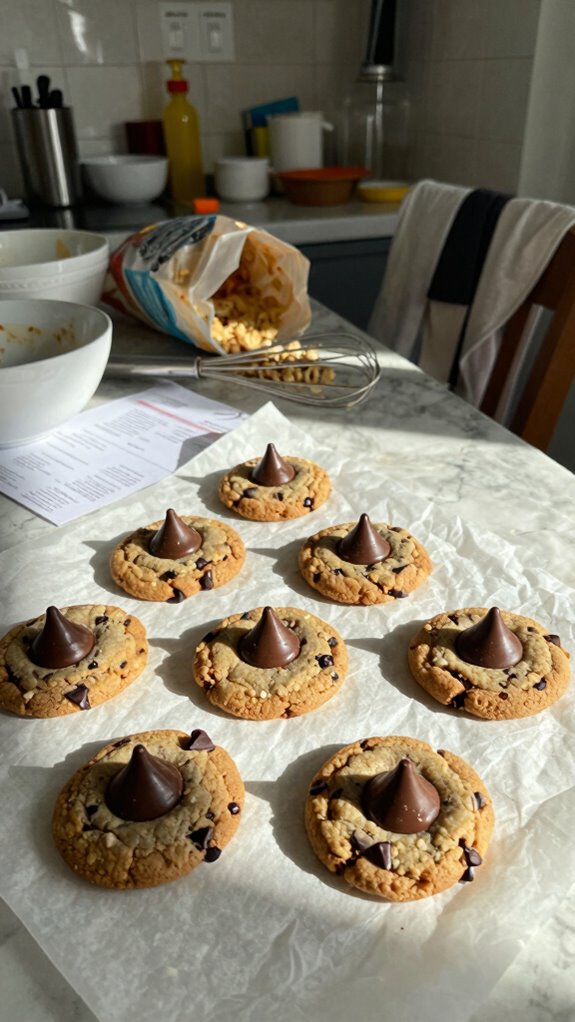
- Using a cookie scoop or two tablespoons, portion out the cookie dough onto the prepared baking sheet, leaving about 5 cm (2 inches) of space between each cookie to allow for spreading.
- Bake the cookies in the preheated oven for 8-10 minutes, or until the edges appear set, and the tops are slightly glossy. The cookies shouldn’t be fully firm, as they’ll continue to cook slightly after removal.
- Remove the cookies from the oven and immediately press a chocolate kiss into the center of each cookie. Allow them to cool on the baking sheet for 5 minutes, then transfer to a cooling rack to cool completely.
- Allow the cookies to cool for at least 10 minutes on the cooling rack before serving. Let them sit for an additional few minutes if necessary to firm up further.
Enjoy the rich aroma and soft, rich texture once they’re fully cooled.
Variations
- Peanut Butter Chocolate Kiss: Replace 30 g (1/4 cup) of the gluten-free flour with 60 g (1/2 cup) of creamy peanut butter for a nutty flavor twist.
- Coconut Macaroon Variation: Mix in 50 g (1/2 cup) of shredded unsweetened coconut into the dough for a chewy texture and tropical taste.
- Vegan Chocolate Kiss Cookies: Substitute the egg with a flax egg (1 tablespoon ground flaxseed mixed with 3 tablespoons water) and use dairy-free butter for a vegan-friendly version.
- Lavender Chocolate Kiss Cookies: Add 1 teaspoon of dried culinary lavender to the dough for a fragrant, floral twist that pairs beautifully with chocolate.
- Mint Chocolate Kiss Cookies: Incorporate 1/2 teaspoon of peppermint extract into the dough for a refreshing minty flavor and elevate with mint chocolate kisses.
- Almond Flour Variation: Swap 120 g (1 cup) of gluten-free flour for 120 g (1 cup) of almond flour for added nuttiness and a denser texture.
- Spicy Chocolate Kiss Cookies: Add 1/2 teaspoon of cayenne pepper or cinnamon for a warm, spicy kick that contrasts with the sweetness of the cookies.
- Seasonal Pumpkin Spice Version: Replace 30 g (1/4 cup) of cocoa powder with 60 g (1/2 cup) of pumpkin puree and add 1 teaspoon of pumpkin spice for a cozy fall flavor.
Tips on plating and presentation
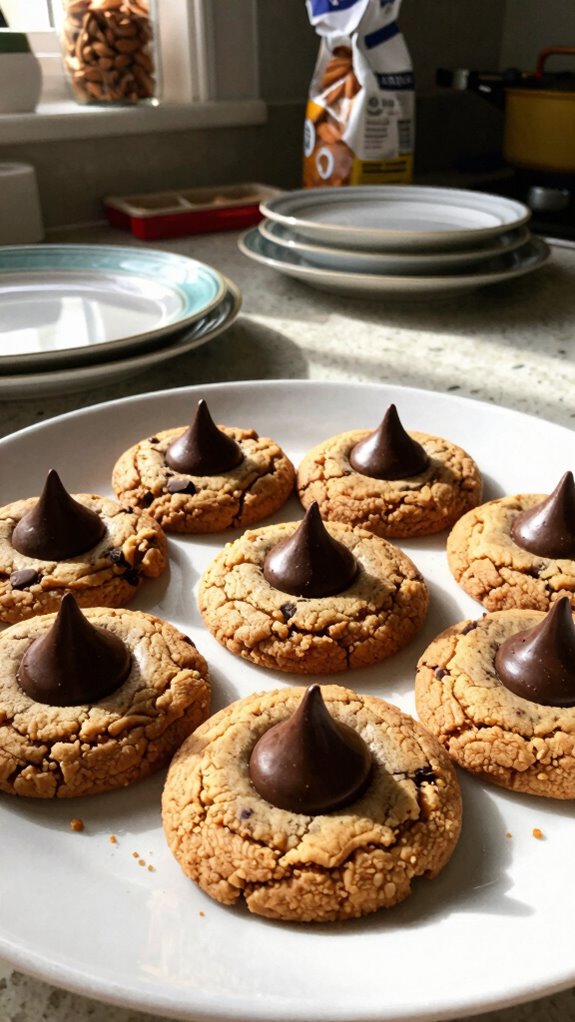
To make your Gluten-Free Chocolate Kiss Cookies visually appealing, consider using a simple but elegant display that highlights their unique features.
I love using vibrant serving platters to contrast the cookies’ rich colors. For garnish ideas, sprinkle some powdered sugar or place fresh berries around them.
Experiment with various plating techniques to create an inviting presentation that’ll impress your guests!
What other dishes can I pair it with?
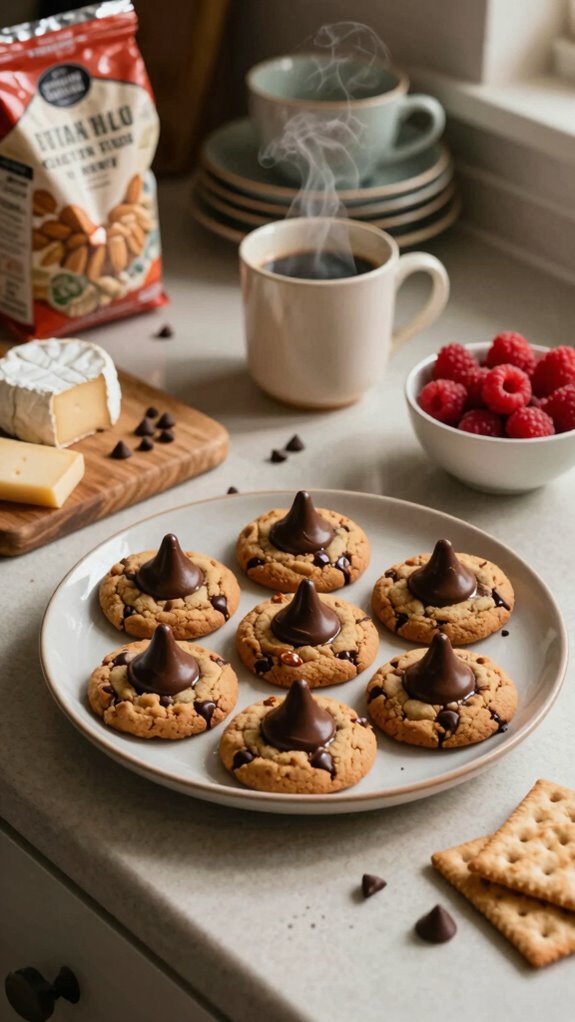
After you’ve impressively arranged your Gluten-Free Chocolate Kiss Cookies, think about what other dishes can complement them beautifully.
These cookies pair wonderfully with a rich chocolate mousse or a light berry tart.
For event suggestions, consider serving them at birthday parties or holiday gatherings.
Guests will love the combination, creating the perfect dessert pairings to satisfy every sweet tooth!
What drinks can I pair it with?
What drinks can elevate the enjoyment of my Gluten-Free Chocolate Kiss Cookies?
I love pairing them with a rich and creamy almond milk hot chocolate for that perfect chocolate pairing.
If I’m in the mood for something refreshing, I might choose a cold cup of iced coffee or a berry-infused sparkling water.
These beverage options complement the cookies beautifully, enhancing their delightful flavors!
Frequently Asked Questions
Can I Use Regular Flour Instead of Almond Flour?
I wouldn’t recommend using regular flour instead of almond flour. Baking substitutes can alter the texture and taste, so stick with almond flour for the best results in your recipe. Trust me, it’s worth it!
How Can I Store Leftover Cookies?
I store leftover cookies in an airtight container or a cookie jar to keep them fresh. If I want them to stay extra soft, I add a slice of bread inside the container.
Are These Cookies Suitable for Vegan Diets?
These cookies aren’t vegan unless I use substitutes. I can switch out the eggs for flaxseed meal or applesauce, making them suitable for a vegan diet while still keeping that delicious taste.
What Is the Shelf Life of These Cookies?
The shelf life of these cookies is about five days at room temperature. I’ve noticed they maintain a soft texture, but refrigerating them can extend freshness while keeping that delightful chewy bite intact. Enjoy!
Can I Freeze the Dough for Later Use?
Absolutely, you can freeze the dough for later use! Just wrap it tightly in plastic wrap, label it, and store it in an airtight container. This way, you’ll have delicious cookies ready anytime!