I’ve always appreciated the unique twist that brown butter brings to traditional recipes, especially when it comes to cookies. The combination of nutty flavor and rich chocolate is simply irresistible. If you’ve never tried making Brown Butter Chocolate Crinkle cookies, you might be surprised by how their texture and taste set them apart. Let’s explore the steps to create this indulgent treat that could elevate your baking game.
What kind of recipe is it?
Brown Butter Chocolate Crinkle cookies are a decadent treat that combines the rich, nutty flavor of browned butter with the classic allure of chocolate.
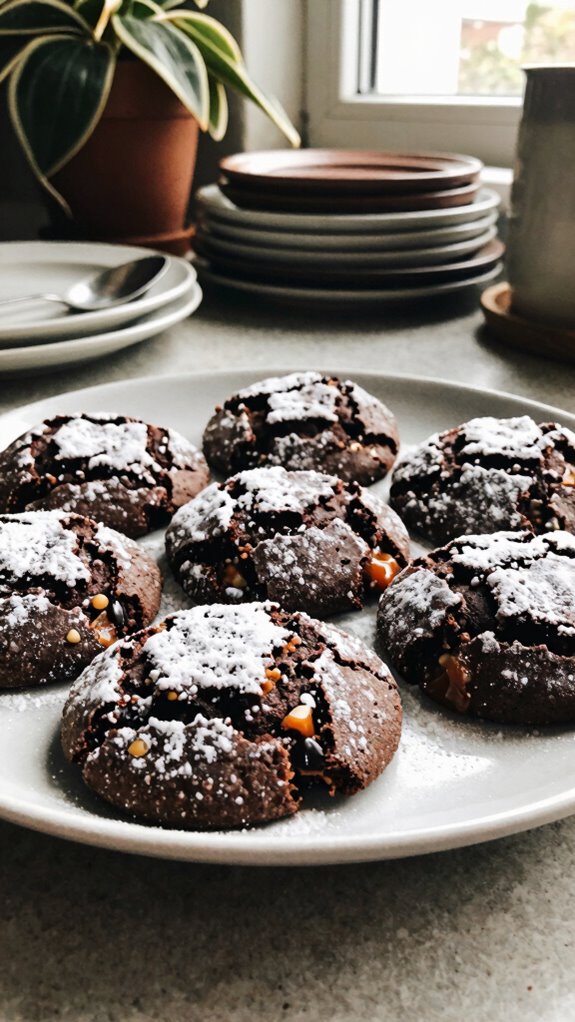
These cookies feature a delightful cracked surface, dusted with powdered sugar, creating a delicious contrast to their soft, chewy interior. Ideal for chocolate lovers and baking enthusiasts alike, this recipe is perfect for gatherings, holiday celebrations, or simply satisfying a sweet craving at home.
Indulge in these irresistible cookies to bring warmth and joy to any occasion!
Preparation Time
| Detail | Description |
|---|---|
| Difficulty of Recipe | Moderate |
| Preparation Time | 30 minutes |
| Number of Servings | Approximately 24 cookies |
Ingredients
| Ingredient | Quantity |
|---|---|
| Unsalted butter | 1 cup (2 sticks) |
| Granulated sugar | 1 ½ cups |
| Brown sugar | ½ cup |
| Eggs | 2 large |
| Vanilla extract | 2 teaspoons |
| All-purpose flour | 2 cups |
| Unsweetened cocoa powder | ¾ cup |
| Baking powder | 1 teaspoon |
| Baking soda | ½ teaspoon |
| Salt | ½ teaspoon |
| Powdered sugar | 1 cup (for rolling) |
Essential Kitchen Equipment
| Tool/Equipment | Purpose | Alternative Option |
|---|---|---|
| Mixing bowls (large and medium) | Used for combining ingredients and mixing the dough. | Any large deep bowl will work. |
| Measuring cups (dry and liquid) | Essential for accurately measuring ingredients like sugar, flour, and butter. | Use a scale to weigh ingredients for better accuracy. |
| Measuring spoons | Important for measuring small quantities of ingredients such as baking soda and vanilla. | Use a standardized spoon set or similar household spoons. |
| Stand mixer or hand mixer | Facilitates efficiently mixing the batter and ensures thorough blending. | Mix by hand with a wooden spoon for a more traditional method. |
| Rubber spatula | Useful for scraping down sides of the bowl and incorporating ingredients. | A regular spatula or a spoon can also work, but may require more effort. |
| Wooden spoon | Typically used for mixing and combining ingredients, especially in thicker doughs. | Any sturdy spoon can be a substitute, such as a plastic one. |
| Baking sheets (2-3) | Used for placing cookies in the oven for baking. | Use any flat, oven-safe baking dish instead, if necessary. |
| Parchment paper or silicone mats | Prevents cookies from sticking to the baking sheet for easier removal. | Lightly grease the baking sheets with butter or oil as an alternative. |
| Cookie scoop or spoon | Helps in portioning out the dough evenly for uniform cookie sizes. | Use two standard spoons to drop the dough onto the baking sheet. |
| Cooling rack | Provides a surface for cookies to cool after baking, preventing sogginess. | Place cookies on a counter or any flat surface if a cooling rack is not available. |
| Oven thermometer | Ensures that the oven is baking at the correct temperature for consistent results. | Simply use the oven’s built-in temperature setting, though it may not be 100% accurate. |
Cooking Steps

- Mise en Place: Gather all ingredients, including 115 g (1 stick) unsalted butter, 200 g (1 cup) granulated sugar, 100 g (1/2 cup) brown sugar, 2 large eggs, 5 ml (1 tsp) vanilla extract, 150 g (1 1/4 cups) all-purpose flour, 30 g (1/3 cup) unsweetened cocoa powder, 2.5 g (1/2 tsp) baking soda, a pinch of salt, and powdered sugar for coating.
- Preheat: Preheat the oven to 190 °C (375 °F) and position the oven rack in the center to ensure even baking.
- Brown the Butter: In a medium saucepan over medium heat, melt the butter until it begins to foam. Swirl the pan occasionally as it cooks for 4-6 minutes or until the butter turns a golden brown and you can smell a nutty aroma.
- Remove from heat and let cool slightly.
- Combine Sugars and Eggs: In a large mixing bowl, combine the brown butter, 200 g (1 cup) granulated sugar, and 100 g (1/2 cup) brown sugar. Use a stand mixer on medium speed (or a whisk) to blend for about 1 minute until combined.
- Add the 2 large eggs and 5 ml (1 tsp) vanilla extract, continuing to mix for an additional 1-2 minutes until the mixture is smooth and glossy.
- Dry Ingredients: In a separate bowl, whisk together 150 g (1 1/4 cups) all-purpose flour, 30 g (1/3 cup) cocoa powder, 2.5 g (1/2 tsp) baking soda, and a pinch of salt.
- Combine Mixtures: Gradually add the dry ingredients to the wet mixture. Stir with a rubber spatula or wooden spoon until just combined, being careful not to overmix (the dough will be thick and slightly sticky).
- Chill the Dough: Cover the bowl with plastic wrap and refrigerate the dough for at least 30 minutes to 1 hour for easier handling in reducing spread during baking.
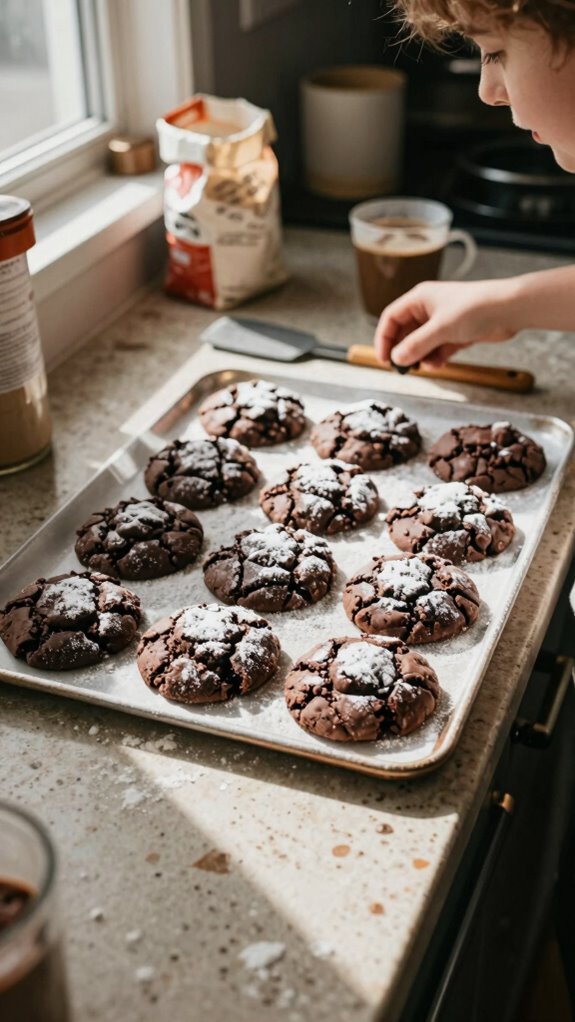
- Prepare Baking Sheets: Line 2-3 baking sheets with parchment paper or silicone mats to prevent sticking.
- Portion the Dough: Using a cookie scoop or spoon, portion the dough into 30 g (about 2 tablespoons) balls, rolling them in your hands to create smooth rounds.
- Coat in Powdered Sugar: Roll each dough ball generously in powdered sugar until fully coated. This will give your crinkle cookies their signature look.
- Bake: Place the coated dough balls onto the prepared baking sheets, spacing them about 5 cm (2 inches) apart. Bake in the preheated oven for 10-12 minutes, or until the edges appear set, and the tops are crinkled and slightly glossy, indicating doneness.
- Cool: Remove from the oven and allow to cool on the baking sheets for 5 minutes before transferring the cookies to a cooling rack to cool completely. This allows them to set properly while preventing sogginess.
The cookies should be soft in the center when warm but firm up as they cool, providing a delightful texture contrast.
Variations
- Nutty Brown Butter Crinkle: Add 100 g (1 cup) chopped walnuts or pecans to the dough for added crunch and flavor.
- Double Chocolate Crinkle: Increase cocoa powder to 60 g (2/3 cup) and reduce flour to 120 g (1 cup) to amplify the chocolate richness.
- Peppermint Crinkle: Mix in 5 ml (1 tsp) peppermint extract and top with crushed candy canes before baking for a festive twist.
- Gluten-Free Crinkle: Substitute all-purpose flour with a gluten-free flour blend in equal quantities for a gluten-free version.
- Dairy-Free Crinkle: Replace unsalted butter with 115 g (1 stick) coconut oil or a vegan butter substitute for a dairy-free option.
- Vegan Crinkle: Use 2 tablespoons of ground flaxseed mixed with 6 tablespoons of water (flax eggs) instead of eggs, and select a dairy-free butter alternative.
- Seasonal Spiced Crinkle: Incorporate 5 g (1 tsp) cinnamon and 2 g (1/2 tsp) nutmeg for a warm, fall-inspired flavor profile.
- Microwave Crinkle Cookie: Scale down to 1 cookie by combining a small portion of ingredients, then cook in the microwave for 30-40 seconds for a quick treat.
Tips on plating and presentation
After exploring some delightful variations of the Brown Butter Chocolate Crinkle cookies, let’s turn our attention to how to present these treats for maximum impact.
Using plating techniques like layering or stacking creates depth, while a sprinkle of powdered sugar enhances visual appeal.
Try serving on a rustic wooden board or a bright plate to make those crinkles pop.
What other dishes can I pair it with?
Pairing Brown Butter Chocolate Crinkle cookies with the right dishes can elevate your dessert experience.
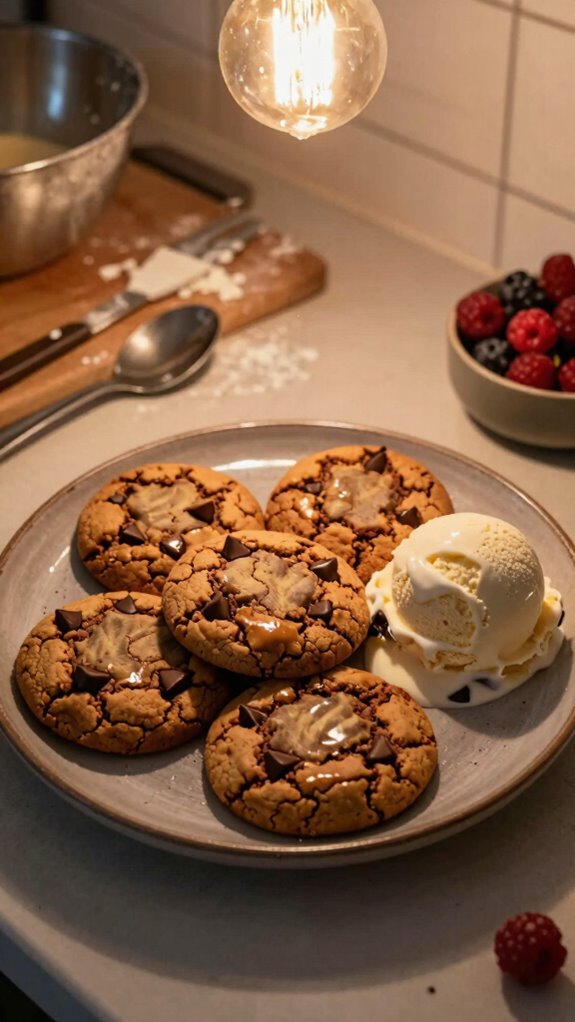
I love serving them alongside a scoop of vanilla ice cream, as the creamy texture and sweetness serve as perfect flavor complements.
Additionally, a rich chocolate tart or a fruit tart adds delightful contrast, creating exciting dessert pairings that keep guests coming back for more.
What drinks can I pair it with?

While enjoying my Brown Butter Chocolate Crinkle cookies, I love to sip on a rich coffee or an espresso.
These chocolate pairings enhance the buttery goodness perfectly. I also find that a glass of milk or even a sweet dessert wine can elevate the experience.
When exploring drink options, I recommend trying a mocha for a delicious twist that complements the chocolatey flavor beautifully.
Frequently Asked Questions
Can I Freeze Brown Butter Chocolate Crinkles for Later Use?
Absolutely, I freeze my cookies for later use! For frozen storage, I place them in an airtight container. When I’m ready, I pull them out and thaw them at room temperature for the best results.
What Variations Can I Try With Different Chocolate Types?
I love experimenting with different chocolate types! You can use dark chocolate for a richer flavor or white chocolate for a sweeter twist. Both add unique tastes and textures, making each batch feel fresh and exciting!
Are There Gluten-Free Options for This Recipe?
Absolutely, I’ve used gluten-free flour in similar recipes, and it works great! Just make a few recipe adjustments, like adding xanthan gum, to ensure the texture stays chewy and delicious. You’ll love the results!
How Do I Store Leftover Brown Butter Chocolate Crinkles?
I store leftover cookies in an airtight container to maintain their freshness. Keeping them away from humidity ensures they stay soft and delicious. They’ll last a few days, but I usually eat them faster!
Can I Substitute Brown Butter With Regular Butter?
Yes, I can substitute regular butter for brown butter, but I’ll miss that nutty flavor. It’s great practicing different baking techniques, though! Experimenting with flavors keeps my baking fresh and exciting every time.