I’ve always appreciated the simplicity of shortbread cookies, but once I started making them with browned butter, my perspective changed completely. The nutty depth transforms an already delightful treat into something extraordinary. If you’re wondering how to achieve this rich flavor while maintaining that perfect crumbly texture, stick around—I’ll guide you through the process, and you might just find your new favorite cookie.
What kind of recipe is it?

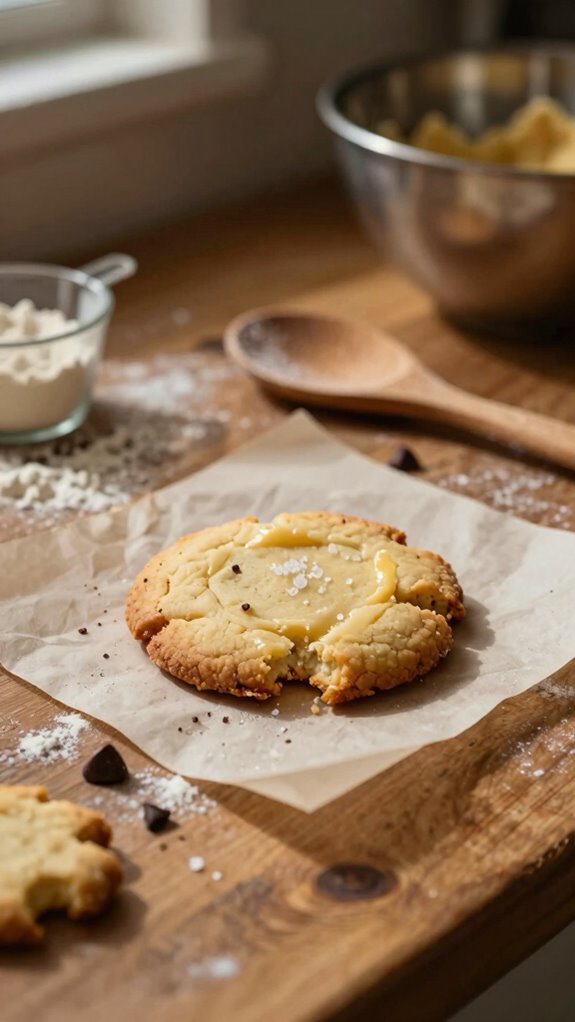
Brown Butter Shortbread Cookies are a delightful twist on the classic shortbread, featuring the rich, nutty flavor of browned butter that elevates their taste profile.
With a buttery texture and a delicate crumb, these cookies are perfect for those who appreciate gourmet treats and a touch of sophistication.
Ideal for cookie lovers, holiday gatherings, or as a thoughtful gift, they offer a comforting indulgence that delights both kids and adults alike.
Baking these cookies is a rewarding experience, filling your kitchen with an irresistible aroma while impressing everyone at the table.
Preparation Time
| Aspect | Details |
|---|---|
| Difficulty of the Recipe | Easy |
| Preparation Time | 15 minutes |
| Number of Servings | Approximately 24 cookies |
Ingredients
| Ingredient | Quantity |
|---|---|
| Unsalted butter | 1 cup (2 sticks) |
| Granulated sugar | ½ cup |
| Brown sugar | ½ cup |
| All-purpose flour | 2 cups |
| Cornstarch | ½ cup |
| Salt | ½ teaspoon |
| Vanilla extract | 1 teaspoon |
Essential Kitchen Equipment
| Tool/Equipment | Purpose | Alternative Option |
|---|---|---|
| Mixing bowls (large & medium) | To combine ingredients in various stages of the recipe. The large bowl is typically used for mixing the dough, while the medium bowl can be used for smaller ingredient combinations (like sugars or dry ingredients). | Use any large bowl available in your kitchen, such as a deep pot or a large salad bowl. |
| Measuring cups (dry & liquid) | To accurately measure out ingredients, ensuring proper ratios for baking. Dry measuring cups are used for flour and sugars, while liquid measuring cups are designed for liquids like vanilla extract. | Use standard cups or containers where you can measure out equal amounts (e.g., 1 cup or 1/2 cup) as a guide, if exact measurements aren’t critical. |
| Measuring spoons | To measure small quantities of ingredients such as baking powder, salt, or vanilla extract, ensuring balance in flavor and texture. | Use a regular teaspoon or tablespoon as substitutes—just be aware of the potential for variations in amount. |
| Stand mixer or hand mixer | To thoroughly mix and cream together the butter and sugars, creating a light and fluffy texture for the dough. A stand mixer can save time and effort but a hand mixer is more affordable and effective for small batches. | Use a wooden spoon or whisk to mix by hand, although it will require more effort and time to achieve the desired creaminess. |
| Rubber spatula | To scrape down the sides of the mixing bowl and to fold ingredients together gently without deflating the dough. | A wooden spoon can also be used, or even a sturdy piece of paper or cardboard if necessary to scrape down the sides effectively. |
| Wooden spoon | To mix ingredients, particularly when combining dry ingredients with wet. It’s also great for folding in delicate mixtures. | Any sturdy spoon (metal or plastic) can substitute, though wooden spoons are generally preferred for their durability. |
| Baking sheets (2-3) | To provide a flat surface for baking the cookies. Using multiple sheets allows for batch baking without waiting for one to cool completely. | An oven-safe tray or any flat baking dish that can withstand oven heat can be used, with parchment placed underneath. |
| Parchment paper or silicone mats | To line baking sheets, preventing cookies from sticking and allowing for easy cleanup. It promotes even baking. | Lightly greasing the baking sheets with butter or oil can serve as a substitute, although it may not provide the same non-stick properties as parchment or silicone. |
| Cookie scoop or spoon | To portion out uniform cookie dough balls for even baking sizes, contributing to consistent texture across cookies. | Use two teaspoons or your clean hands to form the dough into equal balls, though they may not be perfectly uniform. |
| Cooling rack | To cool cookies evenly after baking, preventing them from becoming soggy on the bottom and maintaining the proper texture. | Place cookies on the back of another baking sheet or a cutting board to cool, though this may not provide the even airflow that a cooling rack does. |
| Oven thermometer | To ensure the oven is at the correct temperature for baking, as many ovens can be inaccurate. This helps to avoid underbaking or overbaking the cookies. | If you don’t have an oven thermometer, you can test your oven’s temperature with a simple cookie or cake recipe that you know well, but this is less precise. |
Cooking Steps
- Prepare your mise en place by measuring out 225 g (1 cup) unsalted butter, 100 g (½ cup) confectioners’ sugar, 180 g (1½ cups) all-purpose flour, and ¼ teaspoon salt. Have a baking sheet ready, lined with parchment paper.
- Preheat your oven to 160 °C (325 °F) on the center rack with no convection.
- In a medium mixing bowl, melt the unsalted butter over low heat until it turns golden brown and has a nutty aroma, about 5–8 minutes. Stir constantly to prevent burning. Once browned, remove from heat and allow to cool slightly.
- In a large mixing bowl, combine the melted brown butter and confectioners’ sugar using a stand mixer fitted with the paddle attachment on medium speed for 2 minutes until well mixed and slightly fluffy. If using a hand mixer, beat on medium speed for 3–4 minutes.
- Gradually add the all-purpose flour and salt to the butter-sugar mixture, mixing on low speed until just combined, about 1 minute. The dough should be soft and slightly crumbly but should hold together when pressed.
- Turn the dough out onto a lightly floured surface. Pat the dough into a disk about 1.5 cm (½ inch) thick. If the dough is too crumbly to hold together, add one teaspoon of cold water.
- Cut the dough into desired shapes using cookie cutters or a knife. Place the cut cookies on the prepared baking sheet, spacing them about 2.5 cm (1 inch) apart.
- Bake in the preheated oven for 12–15 minutes or until the edges just begin to turn golden and you can smell a nutty aroma.
- Remove the baking sheet from the oven and allow the cookies to cool on the sheet for 5 minutes. Then, transfer them to a wire rack to cool completely, about 20 minutes. The cookies should be firm to the touch but still delicate.
- Once cooled, enjoy the cookies immediately or store them in an airtight container at room temperature for up to a week.
Variations
- Chocolate-Dipped Shortbread: Dip half of each cooled cookie in melted dark chocolate (150 g; 5 oz) for an indulgent finish.
- Almond Flour Shortbread: Substitute all-purpose flour with 180 g (1½ cups) almond flour for a gluten-free, nutty flavor.
- Lemon Zest Shortbread: Add the zest of 1 lemon to the dough for a bright citrus twist.
- Vegan Brown Butter Shortbread: Replace unsalted butter with 225 g (1 cup) vegan butter and use a flax egg (1 tablespoon ground flaxseed mixed with 2.5 tablespoons water) as a binding agent.
- Coconut Shortbread: Incorporate 75 g (¾ cup) unsweetened shredded coconut into the dough for a tropical flavor.
- Maple Pecan Shortbread: Stir in 100 g (1 cup) finely chopped pecans and substitute confectioners’ sugar with 100 ml (⅓ cup) maple syrup for a nutty, maple-sweetened variation.
- Lavender Honey Shortbread: Infuse the melted butter with 1 tablespoon culinary lavender and sweeten the dough with 50 g (¼ cup) honey instead of confectioners’ sugar for a floral twist.
- Chai Spiced Shortbread: Add 1 teaspoon ground cinnamon, ½ teaspoon ground ginger, and a pinch of nutmeg to the flour for a warm, spiced flavor reminiscent of chai tea.
Tips on plating and presentation
How can you elevate the presentation of your brown butter shortbread cookies?
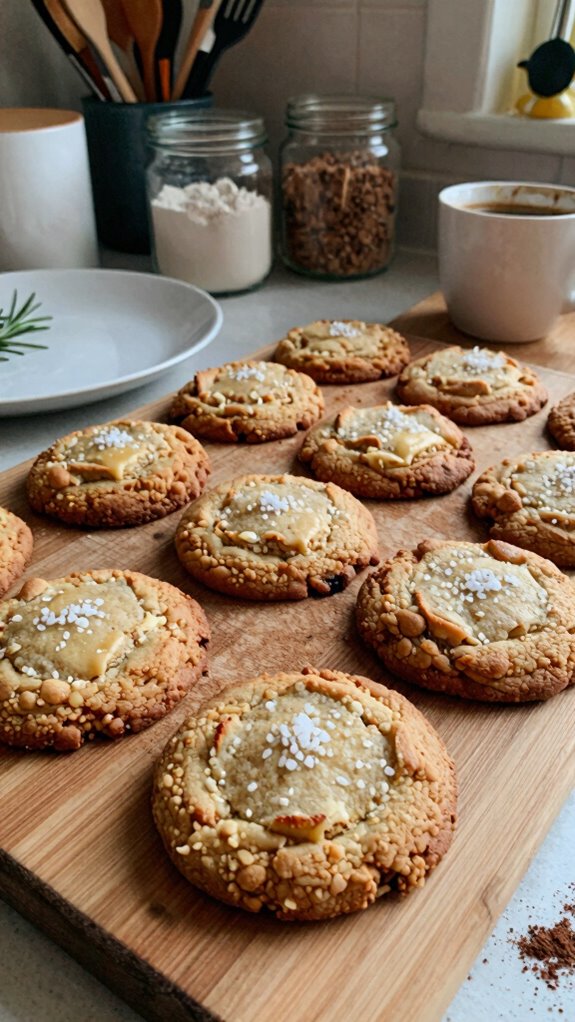
I love using simple plating techniques, like stacking a few cookies on a beautiful plate or arranging them in a neat row.
To amp up the visual appeal, I often add cookie garnishes like a sprinkle of sea salt or a dusting of powdered sugar.
It makes each cookie shine!
What other dishes can I pair it with?
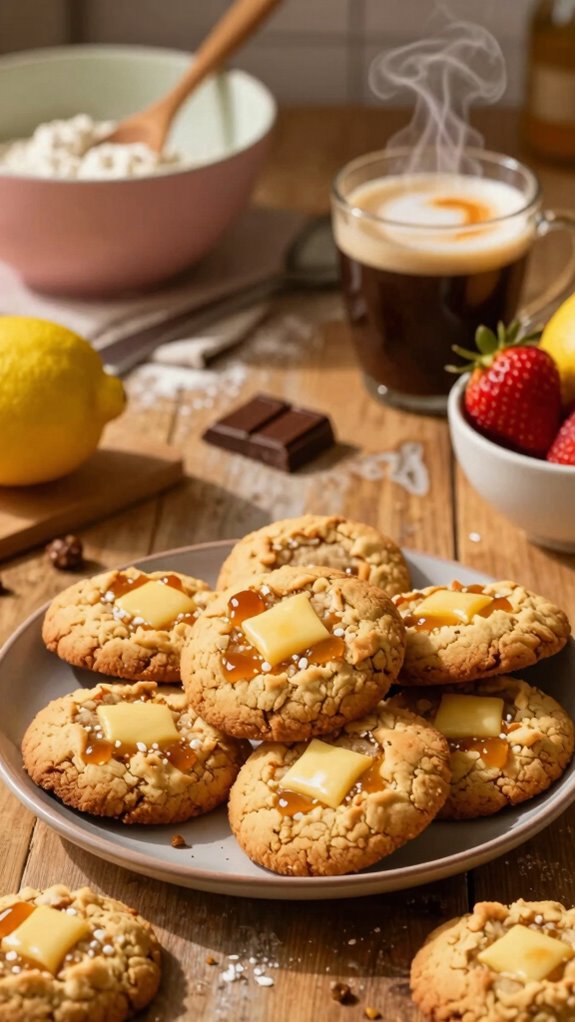
Brown butter shortbread cookies pair beautifully with several dishes, making them a versatile treat.
I love serving them alongside a rich chocolate mousse or a tangy citrus tart. The nutty flavor complements both options perfectly.
For dessert pairings, they also work well with fresh berries or a scoop of vanilla ice cream, creating delightful flavor combinations that elevate any dessert spread.
What drinks can I pair it with?
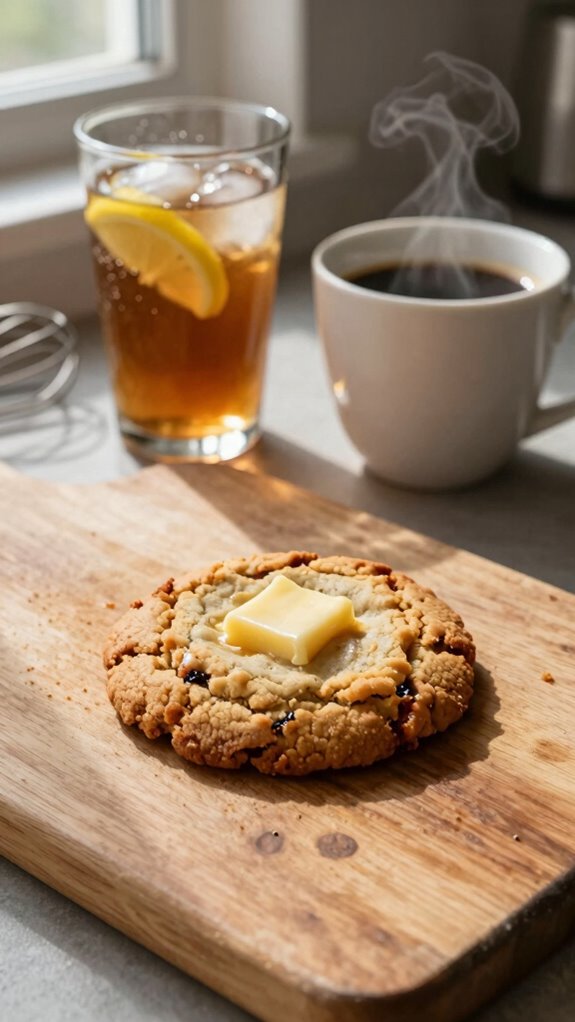
Wondering what drinks pair well with brown butter shortbread cookies? I’ve found that a rich, bold coffee pairing really enhances the nutty flavors of the cookies.
On the other hand, a light herbal tea combination adds a refreshing contrast.
Whether I choose coffee or tea, these drinks elevate my cookie experience and keep me coming back for more delicious bites.
Frequently Asked Questions
Can I Freeze Brown Butter Shortbread Cookies for Later Use?
Yes, I can freeze brown butter shortbread cookies for later use! Just wrap them tightly with plastic wrap and store in an airtight container. These freezing tips help maintain their flavor and texture perfectly!
How Long Can Brown Butter Shortbread Cookies Be Stored?
I store my cookies in an airtight container at room temperature for up to a week. For longer shelf life, I use fridge storage or freeze them, following simple storage tips to keep them fresh.
Are There Gluten-Free Options for This Cookie Recipe?
Absolutely! I’ve used gluten-free flours like almond and oat in my recipes, plus I’ve swapped in alternative sweeteners. It’s amazing how delicious they turn out while still being gluten-free and satisfying for everyone!
What Is the Difference Between Brown Butter and Regular Butter?
Brown butter’s rich, nutty flavor comes from cooking regular butter until it browns, enhancing its complexity. I love using this technique to elevate dishes, adding depth and warmth that regular butter simply can’t match.
Can I Add Chocolate Chips or Nuts to the Dough?
Absolutely, you can add chocolate chips or nuts! I love experimenting with add-ins. Just keep in mind balance and flavor combinations. Stick to the guidelines, and you’ll create a delicious twist on the dough!