I’ve always found that holiday baking brings a touch of magic to the season, and one of my favorite recipes is for Candy Cane Cookies. These gluten-free delights are not just festive; they’re incredibly easy to make and an excellent way to include everyone in the celebrations. If you’re curious about how to create these vibrant, peppermint-flavored treats, let’s explore the simple steps and essential ingredients needed to make them truly special for your gatherings.
What kind of recipe is it?
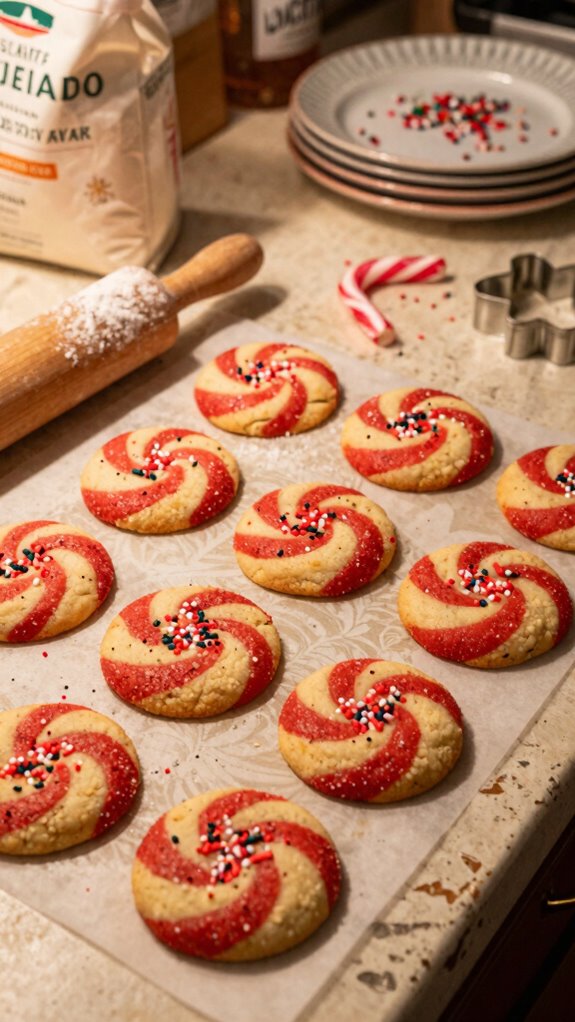
Candy Cane Cookies are a delightful gluten-free treat, perfect for the holiday season or any festive gathering.
These whimsical cookies feature a classic peppermint flavor and a vibrant red-and-white swirl design, making them as visually appealing as they’re delicious.
Ideal for those with gluten sensitivities, this recipe allows everyone to enjoy a festive dessert without compromise.
It’s a great choice for families, holiday parties, or as a unique gift for friends, ensuring that the joy of baking is inclusive and fun!
Preparation Time
| Attribute | Details |
|---|---|
| Difficulty of the recipe | Easy |
| Preparation time | 30 minutes |
| Number of servings | Approximately 24 cookies |
Ingredients
| Ingredient | Quantity |
|---|---|
| Gluten-free all-purpose flour | 2 ¾ cups |
| Granulated sugar | 1 cup |
| Confectioners’ sugar | ½ cup |
| Unsalted butter, softened | ½ cup (1 stick) |
| Egg | 1 large |
| Vanilla extract | 1 teaspoon |
| Peppermint extract | ½ teaspoon |
| Baking powder | 1 teaspoon |
| Baking soda | ½ teaspoon |
| Salt | ¼ teaspoon |
| Red food coloring | ½ teaspoon |
| Green food coloring | ½ teaspoon |
| Crushed candy canes or peppermint candies | ½ cup |
Essential Kitchen Equipment
| Tool/Equipment | Purpose | Alternative Option |
|---|---|---|
| Mixing Bowls (Large and Medium) | Used to mix ingredients together in different stages. | Any large and medium bowls from your kitchen; can use a large pot as a mixing bowl. |
| Measuring Cups (Dry and Liquid) | Essential for accurately measuring flour, sugar, and liquids. | Use a standard mug for liquids (1 cup) or a food scale for dry ingredients. |
| Measuring Spoons | Perfect for measuring small quantities of extracts and baking powder. | Use small containers or a kitchen scale for approximate measurements. |
| Stand Mixer or Hand Mixer | Makes it easy to cream butter and sugar, and mix in other ingredients. | Use a wooden spoon or whisk for manual mixing, though it may require more effort. |
| Rubber Spatula | Great for scraping down the sides of bowls and ensuring all ingredients are combined. | A silicone spatula or a wooden spoon can also work for mixing. |
| Wooden Spoon | Useful for stirring thicker cookie dough and incorporating ingredients. | Any strong utensil that can withstand vigorous mixing can be used. |
| Baking Sheets (2-3) | Needed to place cookie dough for baking. | Use any flat, oven-safe dish like a pizza tray, or line racks with parchment paper if necessary. |
| Parchment Paper or Silicone Mats | Prevent cookies from sticking and help in even cooking. | Grease baking sheets lightly with butter or oil if parchment/silicone is not available. |
| Cookie Scoop or Spoon | Helps in portioning out dough for uniform cookie sizes. | Use two spoons to form dough balls or your hands for shaping. |
| Cooling Rack | Allows cookies to cool evenly after baking. | A plate or cutting board can be used to cool cookies if a rack is unavailable. |
| Oven Thermometer | Ensures your oven is at the correct temperature for baking. | An infrared thermometer or checking the temperature with water (drop test) can be used. |
Cooking Steps
- Before starting, gather all ingredients and tools; ensure you have a large mixing bowl, measuring cups, measuring spoons, a stand mixer (or hand mixer), a rubber spatula, baking sheets (2-3), and parchment paper. Preheat your oven to 175 °C (350 °F). Position the oven rack in the center.
- In a large mixing bowl, combine 240 ml (1 cup) of granulated sugar and 115 g (1/2 cup) of softened unsalted butter. Using the stand mixer fitted with the paddle attachment, cream the mixture on medium speed until light and fluffy, approximately 2-3 minutes. The mixture should appear pale in color and have a smooth texture.
- Add 1 large egg and 5 ml (1 tsp) of peppermint extract to the butter-sugar mixture. Mix on low speed until just combined, about 30 seconds. Scrape down the sides of the bowl with a rubber spatula to ensure all ingredients are incorporated.
- In a separate medium bowl, whisk together 120 g (1 cup) of gluten-free all-purpose flour, 5 ml (1 tsp) of baking powder, and 1 g (1/4 tsp) of salt. Gradually add this dry mixture to the wet ingredients while mixing on low speed until the dough forms, approximately 1-2 minutes. The dough should be soft but not sticky.
- If using, fold in crushed peppermint candy or chocolate chips at this stage using the rubber spatula, ensuring even distribution.
- Line the baking sheets with parchment paper. Using a cookie scoop or a spoon, portion out the dough into 30-40 g (1-1.5 oz) balls and place them evenly spaced on the prepared baking sheets, about 5 cm (2 inches) apart.
- Bake the cookies in the preheated oven for 10-12 minutes. The edges should be lightly golden, while the centers will still appear slightly soft. They’ll continue to set as they cool.
- Remove the baking sheets from the oven and let the cookies cool on the sheets for 5 minutes. Then, transfer the cookies to a cooling rack to cool completely. They should feel firm but soft to the touch once cooled.
- For best flavor, allow the cookies to rest for at least 15 minutes after cooling, as the flavors will develop further during this time. Store in an airtight container for up to a week, or freeze for longer storage.
Variations
- Chocolate Peppermint Cookies: Replace half of the gluten-free flour (60 g / 1/2 cup) with unsweetened cocoa powder for a rich chocolate flavor.
- Vegan Candy Cane Cookies: Substitute 1 large egg with 60 ml (1/4 cup) of unsweetened applesauce and use dairy-free butter in place of unsalted butter.
- Nutty Almond Candy Cane Cookies: Add 60 g (1/2 cup) of finely chopped almonds to the dough for a crunchy texture and nutty flavor.
- Matcha Mint Cookies: Incorporate 5 g (1 tsp) of matcha green tea powder into the dry ingredients for a unique flavor and green hue.
- Spiced Ginger Candy Cane Cookies: Mix in 5 g (1 tsp) of ground ginger and 1 g (1/4 tsp) of ground cinnamon with the dry ingredients to add warmth and spice.
- Lemon Mint Cookies: Substitute peppermint extract with lemon extract and add the zest of 1 lemon for a refreshing twist.
- Pumpkin Candy Cane Cookies: Mix in 120 g (1/2 cup) of pumpkin puree with the wet ingredients for a seasonal fall flavor.
- Air-Fried Candy Cane Cookies: Cook cookies in an air fryer at 160 °C (320 °F) for 8-10 minutes for a healthier alternative with a crisp texture.
Tips on plating and presentation
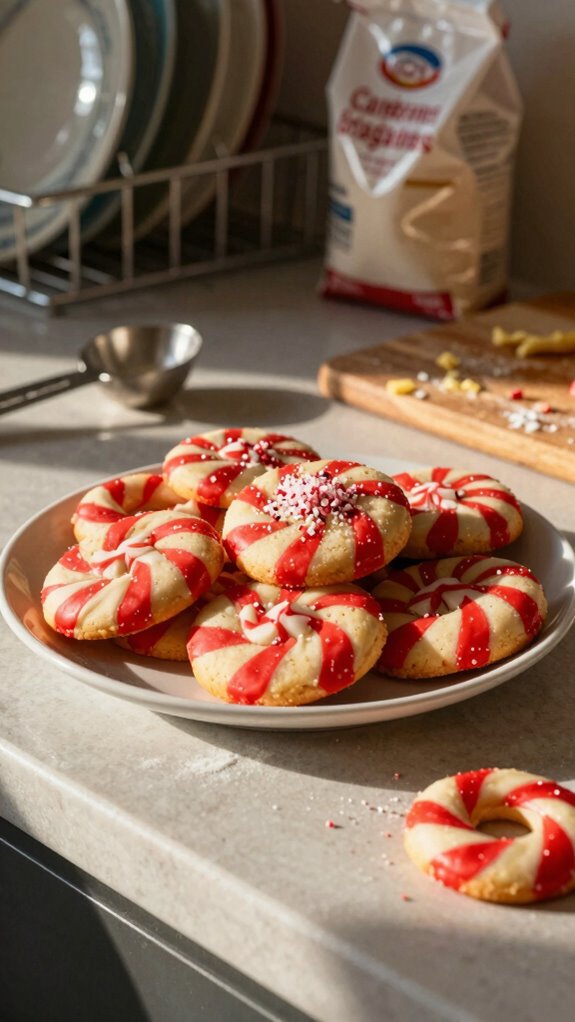
Although plating cookies might seem simple, a little creativity can elevate your candy cane cookies into a stunning centerpiece.
I love using plating techniques like stacking and layering to create height. Adding festive garnishes, such as crushed peppermint or a sprinkle of edible glitter, brings color and joy.
Arrange them on a decorative platter for a warm, inviting holiday display that’ll impress anyone!
What other dishes can I pair it with?
When you’re planning a festive spread, pairing candy cane cookies with complementary dishes can truly enhance the holiday spirit.
I love serving them alongside peppermint bark and a rich chocolate ganache tart. Adding a cheese platter with cranberry-infused cheeses also elevates the selection.
These holiday treats create a delightful atmosphere for festive gatherings, making everything feel even more special and inviting.
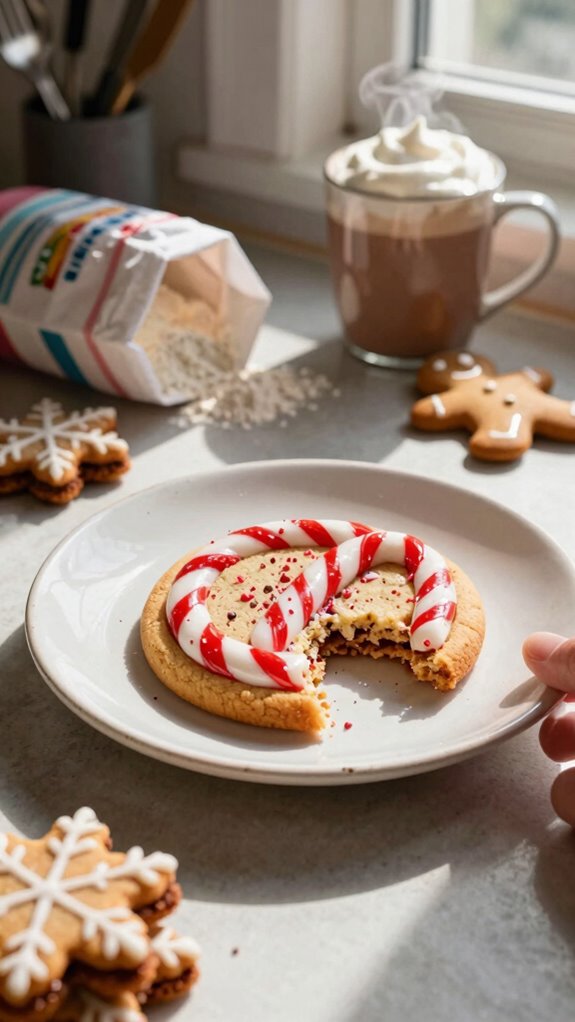
What drinks can I pair it with?
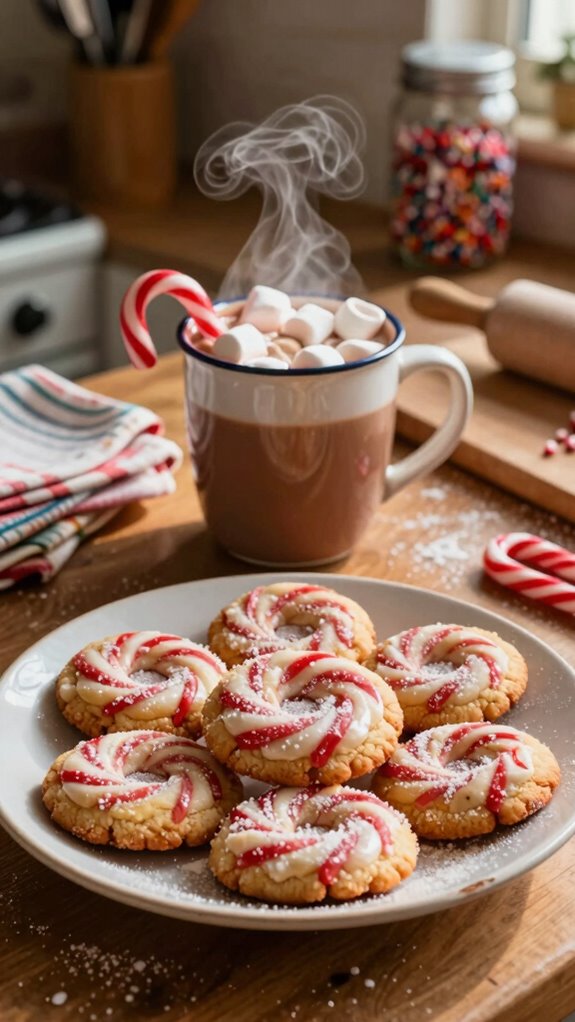
To truly elevate your candy cane cookie experience, consider pairing them with festive drinks that complement their sweet, minty flavors.
A steaming cup of rich hot chocolate adds a delightful warmth, while spiced cider offers a cozy, aromatic contrast.
Both drinks enhance the cookie’s sweetness and provide a perfect balance, making them ideal companions during the holiday season.
Enjoy every bite and sip!
Frequently Asked Questions
Can I Use Alternative Sweeteners in This Recipe?
Absolutely! I’ve used Stevia alternatives and coconut sugar before, and they work well in recipes. Just adjust the quantity, since they’re sweeter than regular sugar, to get the right flavor you’re after.
How Do I Store Leftover Candy Cane Cookies?
I store leftover cookies in airtight cookie containers to keep them fresh longer. If I want extra protection, I add parchment paper between layers. This way, they stay delicious for days and I can enjoy them later!
Can I Freeze the Cookie Dough?
Absolutely, I freeze the dough all the time! Just scoop it onto a baking sheet to freeze individually, then store in a container. When you’re ready, thaw it in the fridge before baking.
What Allergies Should I Be Aware of in This Recipe?
When making this recipe, I always consider nut allergy considerations. If I need an egg substitute, I’ve found options like flaxseed meal work great. Always double-check ingredients to ensure everyone’s safe and enjoying treats together!
How Long Do the Cookies Stay Fresh?
These cookies usually stay fresh for about a week. I recommend storing them in an airtight container to maximize moisture retention. This way, their delicious flavor and texture remain intact throughout their shelf life.