When I think about cookies, mini red velvet thumbprints come to mind as a quintessential treat that embodies both charm and flavor. Their vibrant color and soft texture are enough to catch anyone’s attention. I’m always impressed by how the tangy cream cheese frosting complements the sweetness of the cookie. If you’re curious about how to make these delightful bites and why they stand out, stay with me as we explore the intricacies of this recipe.
What kind of recipe is it?
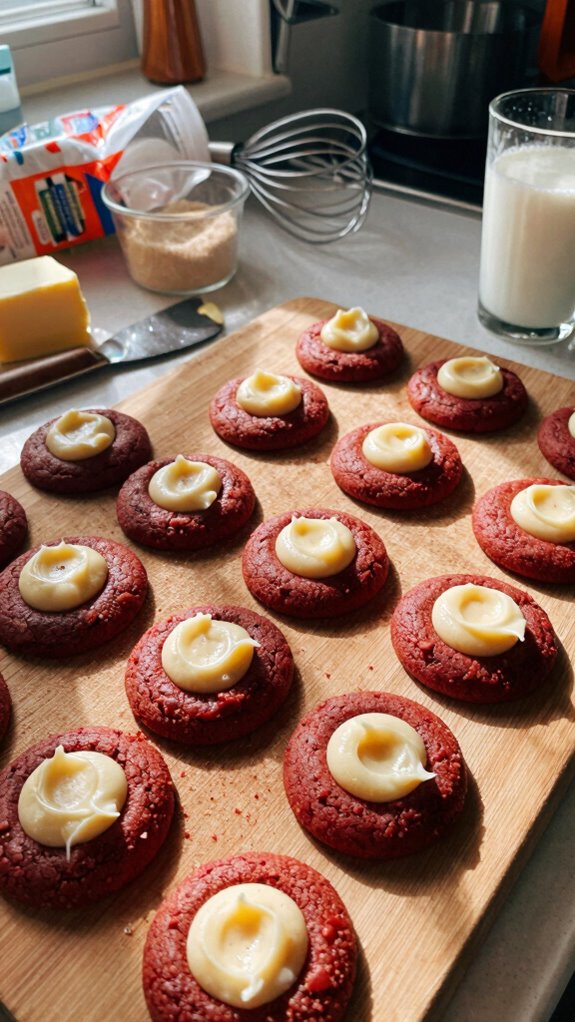
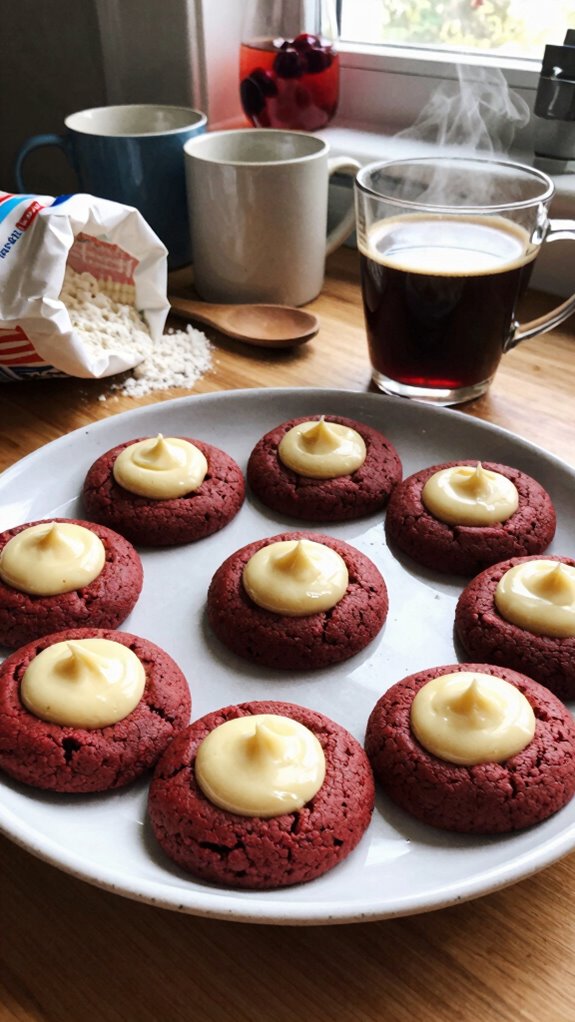
Mini Red Velvet Thumbprint Cookies are a delightful twist on traditional thumbprint cookies, combining the rich flavor of red velvet cake with the fun of bite-sized treats.
These cookies are distinguished by their vibrant color and soft, chewy texture, making them visually appealing and perfect for special occasions. Filled with a luscious cream cheese frosting, they offer a delicious balance of sweetness and tang.
Ideal for holiday gatherings, parties, or as a sweet treat for any red velvet lover, these cookies are sure to impress both friends and family.
Preparation Time
| Feature | Details |
|---|---|
| Difficulty of the Recipe | Medium |
| Preparation Time | 30 minutes |
| Number of Servings | Approximately 24 cookies |
Ingredients
| Ingredient | Quantity |
|---|---|
| All-purpose flour | 2 cups |
| Unsweetened cocoa powder | 1 tablespoon |
| Baking soda | 1 teaspoon |
| Salt | ½ teaspoon |
| Unsalted butter | ½ cup (1 stick), at room temperature |
| Granulated sugar | 1 cup |
| Brown sugar | ½ cup packed |
| Large eggs | 1 |
| Vanilla extract | 1 teaspoon |
| Red food coloring | 2 tablespoons |
| Cream cheese | 4 ounces, softened |
| Powdered sugar | 1 cup |
| Milk | 1 tablespoon |
Essential Kitchen Equipment
| Tool/Equipment | Purpose | Alternative Option |
|---|---|---|
| Mixing Bowls (Large & Medium) | To combine ingredients for the cookie dough and cream cheese filling. | Any large bowls from your kitchen or even large containers. |
| Measuring Cups (Dry & Liquid) | To accurately measure flour, cocoa powder, sugar, and liquid ingredients. | Use a kitchen scale for more precision, if available. |
| Measuring Spoons | To measure small quantities of ingredients like baking soda and salt. | Use the spoon your sugar or cooking oil came in, but be consistent with sizes. |
| Stand Mixer or Hand Mixer | To thoroughly mix the butter and sugars, and to beat in the eggs and vanilla. | A whisk or wooden spoon can be used if you prefer manual mixing. |
| Rubber Spatula | To scrape down the sides of the mixing bowl and to fold in ingredients. | A wooden spoon can also serve this purpose, though it’s less flexible. |
| Wooden Spoon | To mix the dough and combine ingredients when a mixer isn’t used. | A sturdy plastic spoon could be used, but ensure it can withstand heat if mixing warm ingredients. |
| Baking Sheets (2-3) | To spread out cookies for baking. | Any flat, oven-safe tray or platter can work if size accommodates. |
| Parchment Paper or Silicone Mats | To line baking sheets for easy removal of cookies and minimal cleanup. | Aluminum foil or directly greasing the baking sheets can be alternative options. |
| Cookie Scoop or Spoon | To portion the dough evenly for uniform cookies. | Use two tablespoons or your hands to roll into balls if you don’t have a scoop. |
| Cooling Rack | To cool cookies after baking, preventing them from becoming soggy. | A wire rack or even the back of a baking tray can suffice. |
| Oven Thermometer | To ensure the oven is at the correct temperature for baking cookies. | If you don’t have one, preheat the oven as usual and trust the built-in temperature gauge, but monitor carefully. |
Cooking Steps
- Begin with mise en place: measure out all ingredients, including 120 g (1 cup) of all-purpose flour, 15 g (2 tablespoons) of unsweetened cocoa powder, 150 g (3/4 cup) of granulated sugar, 90 g (1/2 cup) of unsalted butter (softened), 1 large egg, 1 tsp vanilla extract, and 1/2 tsp baking soda.
- Preheat your oven to 175 °C (350 °F) and adjust the oven rack to the middle position. Line two baking sheets with parchment paper or silicone mats.
- In a large mixing bowl, cream together 90 g (1/2 cup) of softened unsalted butter and 150 g (3/4 cup) of granulated sugar using a stand mixer fitted with the paddle attachment on medium speed until light and fluffy (about 2-3 minutes).
- Scrape down the sides of the bowl with a rubber spatula as needed.
- Beat in 1 large egg and 1 tsp of vanilla extract at medium speed until incorporated. The mixture should be smooth and slightly airy.
- In a separate medium bowl, whisk together 120 g (1 cup) of all-purpose flour, 15 g (2 tablespoons) of unsweetened cocoa powder, and 1/2 tsp of baking soda until combined.
- Gradually add the flour mixture to the wet ingredients, mixing on low speed until just combined. The dough will be thick and slightly sticky.
- Use a cookie scoop or two tablespoons to portion out the dough, rolling them into 2.5 cm (1 inch) balls. Place them onto the prepared baking sheets about 5 cm (2 inches) apart to allow for spreading.
- With your thumb or the back of a wooden spoon, gently press down the center of each dough ball to create a small indent.
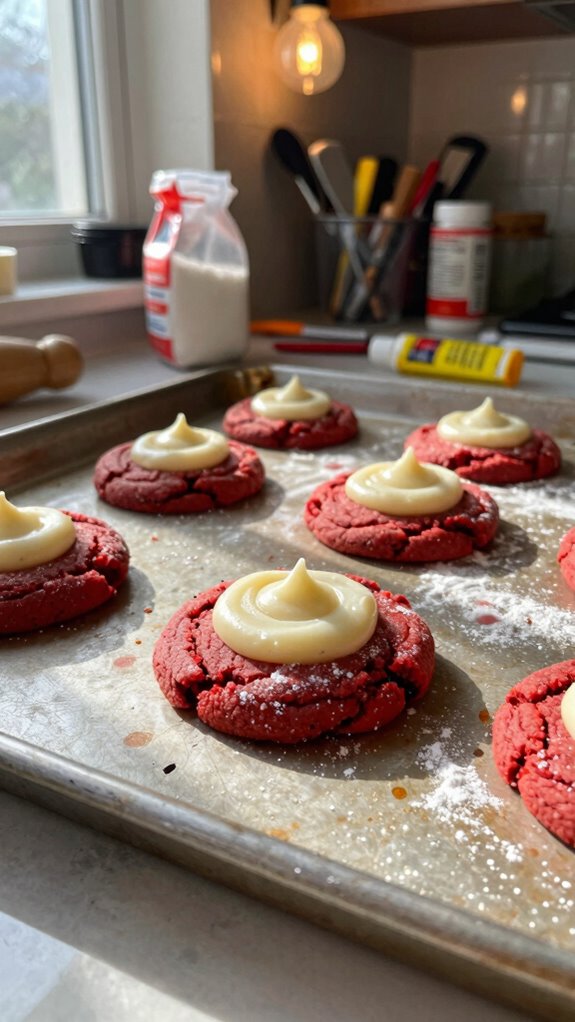
- Bake in the preheated oven at 175 °C (350 °F) for 10-12 minutes. The cookies should appear set and slightly puffed with a soft center.
- They should start to look dry on the top but not golden.
- Remove baking sheets from the oven and allow cookies to cool on the sheets for 5 minutes, then carefully transfer them to a cooling rack to cool completely.
- This prevents cookies from becoming soggy by allowing air circulation around them.
- While cookies are cooling, prepare the cream cheese filling. In a medium mixing bowl, beat together 60 g (4 oz) of softened cream cheese, 60 g (1/4 cup) of unsalted butter (softened), and 75 g (1/2 cup) of powdered sugar until smooth and creamy.
- Once cookies are completely cool, fill the indents with the cream cheese filling using a small piping bag or a spoon, making sure each cookie is generously topped.
- Allow filled cookies to rest in the fridge for about 30 minutes to firm up the filling before serving.
- Enjoy!
Variations
- Chocolate Mint: Add 1 tsp of peppermint extract to the dough for a refreshing minty flavor.
- Gluten-Free Red Velvet: Substitute 120 g (1 cup) of all-purpose flour with 120 g (1 cup) of gluten-free all-purpose flour blend for a gluten-free option.
- Dairy-Free Delight: Use 90 g (1/2 cup) of dairy-free butter and 60 g (4 oz) of dairy-free cream cheese in place of traditional butter and cream cheese for a dairy-free version.
- Vegan Version: Replace the egg with 30 g (2 tbsp) of ground flaxseed mixed with 90 ml (1/3 cup) of water and use vegan butter for a completely vegan cookie.
- Spiced Red Velvet: Incorporate 1/2 tsp of cinnamon or nutmeg into the dough for a warm, spiced flavor twist.
- Nutty Variation: Fold in 60 g (1/2 cup) of finely chopped walnuts or pecans into the dough for added crunch and flavor.
- Seasonal Pumpkin Spice: Swap unsweetened cocoa powder with 30 g (1/4 cup) of pumpkin puree and add 1 tsp of pumpkin pie spice for a fall-inspired version.
- Baked Instead of Thumbprint: Shape the dough into a bar and bake in a loaf pan for 25-30 minutes for red velvet cookie bars instead of individual cookies.
Tips on plating and presentation
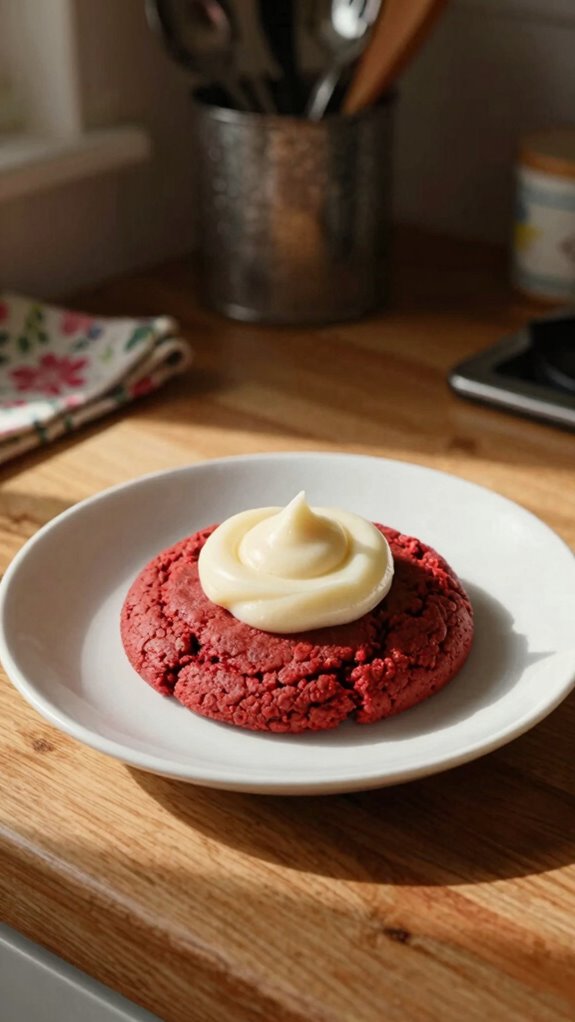
To make your Mini Red Velvet Thumbprint Cookies truly stand out, consider the presentation as much as the taste.
I love using simple plating techniques, like stacking cookies on a decorative plate or arranging them in a circular pattern.
For embellishment ideas, drizzle white chocolate on top or sprinkle with edible glitter to catch the eye.
Small details can elevate your cookies from delicious to stunning!
What other dishes can I pair it with?
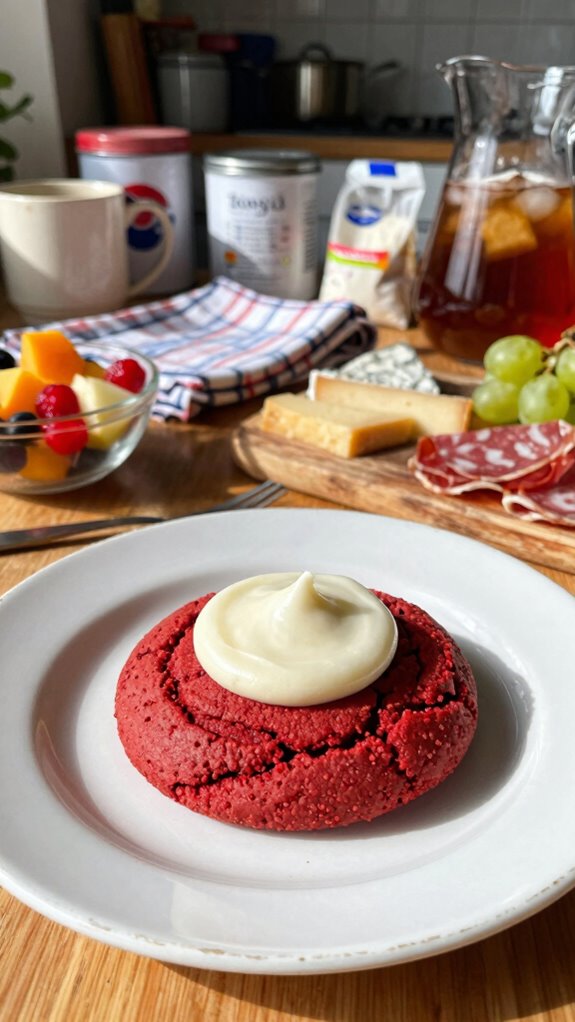
When pairing Mini Red Velvet Thumbprint Cookies, I love to think about the balance of flavors and textures.
These cookies work wonderfully with a creamy cheesecake or tart raspberry sorbet for a delightful dessert pairing.
I also enjoy serving them alongside rich chocolate mousse, creating exciting flavor combinations that highlight their sweetness and add depth to the dessert experience.
What drinks can I pair it with?
While enjoying Mini Red Velvet Thumbprint Cookies, I’ve found that pairing them with the right drink can elevate the experience even further.
I love a rich coffee pairing, as the boldness complements the cookie’s sweetness beautifully.
Alternatively, a smooth dessert wine brings out the cookie’s red velvet flavor, creating a delightful balance.
Trust me, your taste buds will thank you!
Frequently Asked Questions
Can I Use Gluten-Free Flour for This Recipe?
Absolutely, I’ve used gluten-free alternatives in my baking before, and they work well! Just remember to check the flour blend’s properties and adjust baking times for the best results. Happy baking!
How Should I Store Leftover Cookies?
I store my leftover cookies in an airtight container at room temperature. This helps maintain cookie freshness for several days. If I want them to last longer, I freeze them for up to three months.
Can I Freeze These Cookies for Later?
Absolutely, I can freeze these cookies for later! For the best results, I recommend wrapping them tightly to preserve cookie texture. When you’re ready, just thaw them at room temperature and enjoy deliciousness!
What Can I Substitute for Eggs?
If you’re looking to substitute eggs, I’ve had great success using flaxseed meal or unsweetened applesauce. Just mix one tablespoon of flaxseed meal with three tablespoons of water, or use a quarter cup of applesauce.
How Long Do These Cookies Last?
These cookies last about a week when stored in an airtight container. I’ve noticed they retain flavor well, especially in the first few days, but their shelf life decreases gradually after that.