I recently experimented with a no-bake treat that’s both simple and festive: the No-Bake Peppermint Chocolate Thumbprint Bite. Combining rich dark chocolate with a creamy peppermint center, it’s an indulgent dessert that doesn’t require an oven. The process is straightforward, but the results are impressive. If you’re curious about how to recreate this delightful bite, let’s explore the steps and tips to make your holiday season a bit sweeter.
What kind of recipe is it?

No-Bake Peppermint Chocolate Bites are a delightful dessert that combines creamy chocolate with refreshing peppermint flavors, perfect for the holiday season or any festive occasion.
This easy-to-make recipe requires no baking, making it accessible for both novice and experienced cooks. These bite-sized treats aren’t only visually appealing but also offer a satisfying combination of crunchy and smooth textures.
Ideal for holiday parties, family gatherings, or as a sweet gift, they cater to peppermint lovers and anyone looking for a quick, delicious treat.
Preparation Time
| Aspect | Description |
|---|---|
| Difficulty of the Recipe | Easy |
| Preparation Time | 20 minutes |
| Number of Servings | Approximately 12 servings |
Ingredients
| Ingredient | Quantity |
|---|---|
| Dark chocolate (chopped) | 1 cup (6 ounces) |
| Coconut oil | 2 tablespoons |
| Sweetened condensed milk | 1/2 cup |
| Crushed peppermint candies | 1/4 cup |
| Vanilla extract | 1 teaspoon |
| Graham cracker crumbs | 1 cup |
| Powdered sugar | 1/2 cup |
| Sea salt (optional) | A pinch |
| Additional crushed peppermint (for topping) | 2 tablespoons |
These ingredients come together to create delicious, festive chocolate bites that are sure to impress your guests!
Essential Kitchen Equipment
| Tool/Equipment | Purpose | Alternative Option |
|---|---|---|
| Mixing Bowls (Large and Medium) | Used for combining ingredients, mixing melted chocolate, and incorporating other components like graham cracker crumbs and peppermint. | Any large bowl or deep dish can work; even a pot can be used in a pinch. |
| Measuring Cups (Dry and Liquid) | For accurate measurement of ingredients such as graham cracker crumbs, sweetened condensed milk, and coconut oil. | Use common kitchen mugs or smaller containers for approximation, keeping in mind proper volume ratios. |
| Measuring Spoons | Essential for measuring small quantities of ingredients like vanilla extract, crushed peppermint candies, and sea salt. | A regular tablespoon or teaspoon can be used as a rough guide for the measurements. |
| Stand Mixer or Hand Mixer | Used to thoroughly mix the melted chocolate and other ingredients until smooth and well combined. | A whisk can be used for smaller batches, though it will require more effort. |
| Rubber Spatula | Ideal for scraping down the sides of bowls and ensuring all ingredients are well incorporated. | A large spoon can substitute, though it may not be as effective in scraping out every bit. |
| Wooden Spoon | Great for mixing and folding together the ingredients when a gentle touch is needed. | Any sturdy spoon can work, such as a silicone or plastic mixing spoon. |
| Baking Sheets (2-3) | Used to spread the chocolate mixture for cooling and firming up before serving. | Large plates or trays can also be used if you don’t have enough baking sheets. |
| Parchment Paper or Silicone Mats | Provides a non-stick surface for cooling chocolate bites and makes for easy cleanup. | Aluminum foil or wax paper can be used, but ensure they are not directly exposed to heat or moisture. |
| Cookie Scoop or Spoon | Useful for portioning out the chocolate mixture into uniform bites. | You can use a melon baller or simply spoon the mixture by hand for a less uniform size. |
| Cooling Rack | Allows air circulation around the chocolate bites as they cool, preventing moisture buildup. | A simple plate can work, but make sure to space them out to allow for proper cooling. |
| Oven Thermometer | Ensures your oven temperature is accurate for any baking (if implementing extra steps). | An inexpensive kitchen thermometer can serve to check oven temperature before proceeding with prep. |
This essential kitchen equipment list will ensure a smooth preparation of your No-Bake Peppermint Chocolate Bites while offering practical alternatives for cost-conscious cooks.
Cooking Steps
- Gather all ingredients: graham cracker crumbs, sweetened condensed milk, coconut oil, melted chocolate, crushed peppermint candies, vanilla extract, and sea salt. Measure precisely before starting.
- In a large mixing bowl, combine 240 g (2 cups) of graham cracker crumbs, 400 g (14 oz) of sweetened condensed milk, and 60 ml (¼ cup) of melted coconut oil at room temperature. Use a rubber spatula to mix until evenly combined, ensuring no dry crumbs remain.
- Prepare a baking sheet by lining it with parchment paper or a silicone mat. This non-stick surface will make it easier to remove the chocolate bites after cooling.
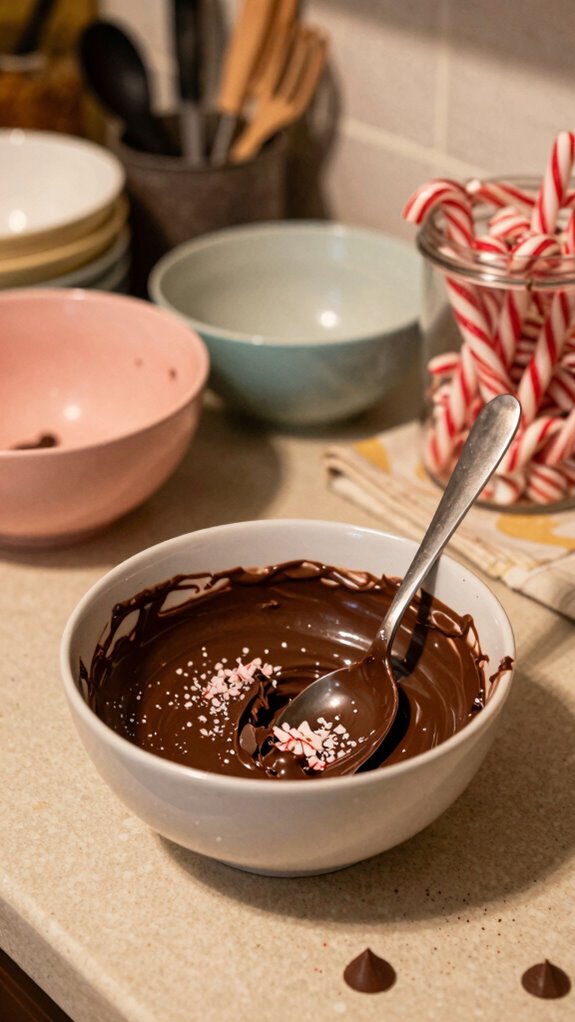
- Melt 340 g (12 oz) of chocolate using a microwave or stovetop method. If using a microwave, heat in a microwave-safe bowl in 30-second intervals at medium power (50% heat), stirring between each interval until smooth and just melted, typically taking 1-2 minutes total.
- Once the chocolate is melted, pour it into the bowl with the graham cracker mixture. Add 5 ml (1 tsp) of vanilla extract, 60 g (½ cup) of crushed peppermint candies, and a pinch of sea salt. Stir gently with a wooden spoon until all ingredients are well incorporated and smooth in texture.
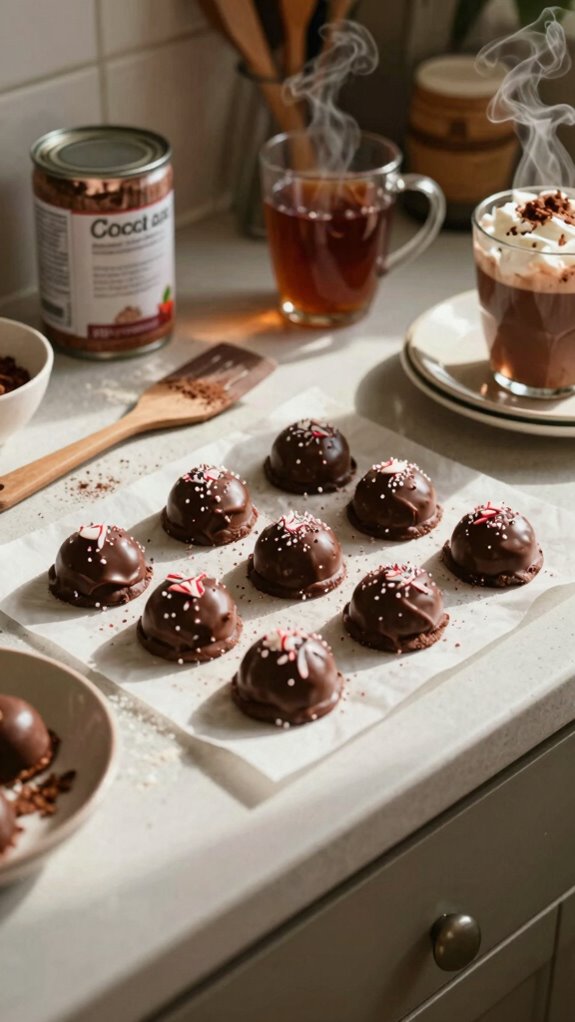
- Portion out the chocolate mixture using a cookie scoop or tablespoon, placing rounded dollops onto the prepared baking sheet. Aim for uniform sizes, about 30-40 g (1-1½ oz) each, spaced evenly apart to facilitate cooling.
- Place the baking sheet in the refrigerator to set. Chill for about 1-2 hours, or until the chocolate bites are firm to the touch and hold their shape.
- After the chocolate bites have set, remove the baking sheet from the refrigerator. Allow the bites to sit at room temperature for about 10 minutes for easier removal.
- Gently peel the parchment paper or silicone mat away from the chocolate bites and transfer them to a cooling rack. Let them cool further for about 15-20 minutes to ensure no residual moisture remains.
- Serve immediately, or store the chocolate bites in an airtight container in the refrigerator for up to one week. Ensure they’re fully cooled and firm to maintain their shape and texture.
Variations
- Nutty Delight: Add 100 g (1 cup) of chopped nuts, such as almonds or walnuts, for added texture and flavor.
- Vegan Chocolate Bites: Substitute sweetened condensed milk with 400 g (14 oz) of coconut cream and use dairy-free chocolate.
- Gluten-Free Version: Use gluten-free graham crackers or crushed rice cereal instead of regular graham cracker crumbs.
- Protein Boost: Mix in 60 g (½ cup) of vanilla or chocolate protein powder to increase the protein content of the bites.
- Minty Fresh: Substitute crushed peppermint candies with 60 g (½ cup) of finely chopped fresh mint leaves for a fresh herbal taste.
- Spiced Seasonal Bites: Add 5 g (1 tsp) of cinnamon or ginger spice to the chocolate mixture for a warm, seasonal flavor twist.
- Coconut Chocolate Bites: Incorporate 60 g (½ cup) of unsweetened shredded coconut into the mixture for a tropical vibe.
- Frozen Treats: After chilling, place the bites in the freezer for 30 minutes for a firmer texture to enjoy as a frozen treat.
Tips on plating and presentation

Creating an eye-catching presentation for your no-bake peppermint chocolate bites can make all the difference when serving them to guests.
I recommend using simple plating techniques, like arranging the bites on a colorful platter or tiered stand.
For garnish ideas, try sprinkling crushed candy canes or drizzling chocolate sauce around the bites.
These elements will elevate your dessert and impress everyone!
What other dishes can I pair it with?
While considering what to serve alongside your no-bake peppermint chocolate bites, think about complementary flavors that enhance the overall experience.
I’d recommend pairing them with rich chocolate truffles or vanilla bean cookies for delightful dessert pairings.
You could also offer festive fruit like mandarin oranges or pomegranate seeds, which brighten up your table of holiday treats and balance the richness of the bites.
What drinks can I pair it with?
To complement your no-bake peppermint chocolate bites, you’ll want to choose drinks that can enhance their rich flavors.
A warm peppermint mocha is a perfect match, with its cozy spices and creamy base balancing the chocolate.
Alternatively, you can indulge in a glass of chocolate wine, which offers a velvety richness that pairs beautifully with the minty sweetness of your treats.
Enjoy!
Frequently Asked Questions
Can I Use a Different Type of Chocolate for This Recipe?
Yes, you can definitely use milk chocolate or dark chocolate for this recipe! I’ve found both options add a unique flavor, so feel free to experiment and see which one you prefer. Enjoy baking!
How Many Thumbprint Bites Does This Recipe Yield?
This recipe yields about 12 to 15 thumbprint bites, depending on how generous you are while shaping them. I love serving them with coffee or hot cocoa for a delightful treat! Enjoy!
Can I Make These Bites Ahead of Time?
Yes, you can definitely make these bites ahead of time! For make ahead tips, just freeze them in an airtight container, and they’ll stay fresh. Thaw them in the fridge before serving—it’s super easy!
Are There Any Vegan Alternatives for This Recipe?
Absolutely! I love using almond or coconut milk for vegan substitutions. For chocolate, I choose dairy-free chocolate chips. Almond flour works great too. There are plenty of plant-based options to make these bites deliciously vegan!
How Should I Store Leftover Thumbprint Bites?
I store leftover bites in an airtight container in the refrigerator for up to a week. For longer storage, I freeze them, layering parchment paper between bites to prevent sticking. They’ll stay fresh for months!