When I first tried making sour cream cookies with gluten-free flour, I was surprised by how soft and cake-like they turned out. It’s a simple recipe that quickly yields a satisfying batch of treats. Plus, I love how versatile these cookies can be, especially with optional add-ins. Want to know how to perfect this delightful dessert and elevate its presentation? Let’s explore the recipe together.
What kind of recipe is it?
The Sour Cream Cookie with Gluten-Free Flour is a delightful and indulgent treat that combines the rich, tangy flavor of sour cream with the lightness of gluten-free flour, making it perfect for individuals with gluten sensitivities.
These cookies have a soft, cake-like texture that melts in your mouth, making them an irresistible choice for dessert.
Easy to prepare, they cater to both seasoned bakers and beginners looking to impress at gatherings.
Enjoy them as a comforting snack or a sweet addition to any occasion.
Preparation Time
| Detail | Description |
|---|---|
| Difficulty of the Recipe | Easy |
| Preparation Time | 15 minutes |
| Number of Servings | 24 cookies |
Ingredients
| Ingredient | Quantity |
|---|---|
| Gluten-Free All-Purpose Flour | 2 cups |
| Baking Powder | 1 teaspoon |
| Baking Soda | 1/2 teaspoon |
| Salt | 1/4 teaspoon |
| Unsalted Butter | 1/2 cup (1 stick) |
| Granulated Sugar | 1 cup |
| Brown Sugar | 1/2 cup (packed) |
| Large Eggs | 1 |
| Vanilla Extract | 1 teaspoon |
| Sour Cream | 1 cup |
| Optional Add-ins (e.g., chocolate chips, nuts) | 1 cup (as preferred) |
Essential Kitchen Equipment
| Tool/Equipment | Purpose | Alternative Option |
|---|---|---|
| Mixing Bowls (Large & Medium) | For combining dry ingredients and wet components. Large bowl for mixing dough and medium bowl for smaller quantities. | Plastic bowls or containers. |
| Measuring Cups (Dry & Liquid) | To accurately measure flour, sugar, and liquids like sour cream. Ensures the right proportions for the recipe. | Use a standard coffee mug for dry (keep in mind it may not be precise) or a clean bottle for liquid measurements. |
| Measuring Spoons | For measuring small quantities like baking powder, baking soda, and vanilla extract. Essential for precision in baking. | A regular teaspoon or tablespoon can be used, though care must be taken to ensure accurate measurements. |
| Stand Mixer or Hand Mixer | For creaming butter and sugars together effectively and mixing dough. A stand mixer can make the process hands-free. | Whisk by hand with a sturdy whisk and a bit of arm power or use a wooden spoon. |
| Rubber Spatula | To scrape down the sides of the mixing bowl and incorporate all ingredients. Ensures no ingredients are left behind. | A wooden spoon or silicone spatula can serve similar purposes. |
| Wooden Spoon | Ideal for mixing, particularly thicker doughs, and for incorporating ingredients without overmixing. | Any sturdy spoon can work, especially a metal one. |
| Baking Sheets (2-3) | To spread out cookies while baking; multiple sheets allow for baking several batches simultaneously. | Use any flat oven-safe tray or left-over ready-to-use packaging as makeshift sheets. |
| Parchment Paper or Silicone Mats | Provides a non-stick surface for cookies, ensures even baking and easy clean-up. | You can lightly grease the baking sheets instead, though it may lead to sticking. |
| Cookie Scoop or Spoon | To portion out cookie dough evenly, ensuring uniform cooking and consistent sizes. | A regular tablespoon can be used to drop cookies onto the baking sheet. |
| Cooling Rack | To allow baked cookies to cool evenly after baking, preventing sogginess. | A clean kitchen towel can temporarily hold cookies, but avoid overcrowding. |
| Oven Thermometer | Ensures that the oven temperature is accurate for proper baking, which is crucial for good results. | An inexpensive thermometer can be bought or occasionally check with an oven-safe dish to gauge temperature adjustments. |
Cooking Steps

6. Combine Dry Ingredients: In a medium mixing bowl, whisk together 180 g (1 ½ cups) of gluten-free flour, 5 g (1 tsp) of baking powder, and 2 g (1/2 tsp) of baking soda until well mixed.
7. Incorporate Dry Ingredients: Gradually add the dry mix to the wet ingredients while mixing on low speed.
Mix until just combined; avoid overmixing to keep the cookies tender.
8. Add Sour Cream: Gently fold in 120 ml (1/2 cup) of sour cream using a rubber spatula until the batter is smooth and uniform.
The texture should be creamy and slightly thick.
9. Scoop the Dough: Use a cookie scoop (or a regular tablespoon) to portion out the dough, approximately 30 g (2 tablespoons) per cookie.
Place them about 5 cm (2 in) apart on your prepared baking sheets.
10. Bake Cookies: Place the first batch of cookies on the center rack of the preheated oven.
Bake for 10-12 minutes or until the edges are lightly golden, and the centers appear set but soft.
The aroma should be rich and buttery.
11. Cool Cookies: Remove the baking sheets from the oven and allow the cookies to cool on the sheets for 5 minutes.
Then, transfer the cookies to a cooling rack to cool completely.
They should have a soft texture in the center once cooled, maintaining a slight crunch on the edges.
12. Rest Before Serving: Allow the cookies to rest for an additional 10-15 minutes at room temperature.
This resting time helps enhance flavor and texture.
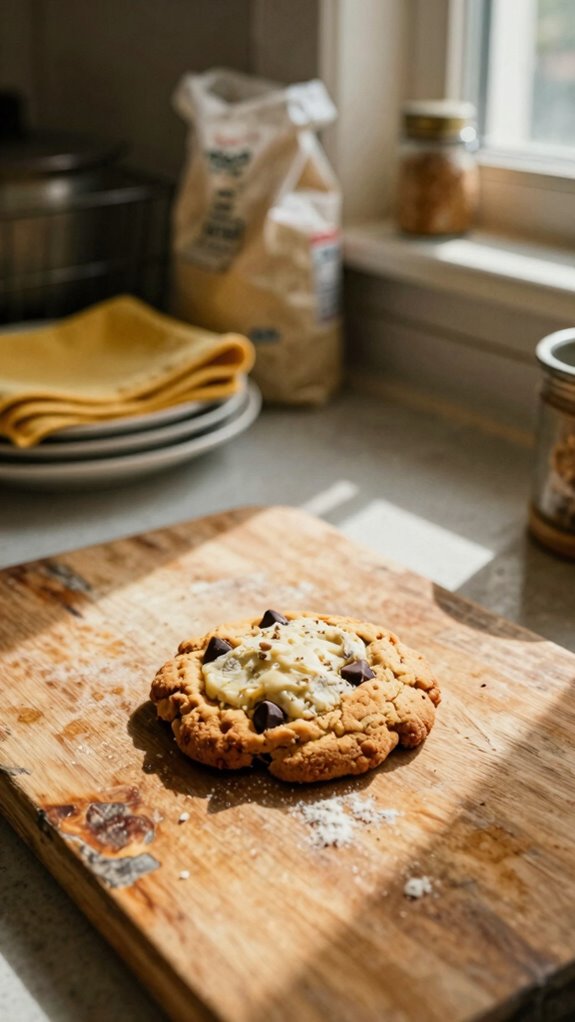
Variations
- Dairy-Free Almond Joy: Blend in 60 g (1/2 cup) of shredded coconut and 50 g (1/3 cup) of chopped almonds for a cookie inspired by the classic candy bar, replacing the sour cream with almond milk.
- Maple Pecan Treats: Use 60 ml (1/4 cup) of maple syrup in place of granulated sugar and mix in 60 g (1/2 cup) of chopped pecans for a sweet and nutty flavor combo.
- Air-Fried Version: Prepare the dough as directed, then cook in an air fryer at 180°C (350°F) for 8-10 minutes for a healthier, less-oily alternative cooking method.
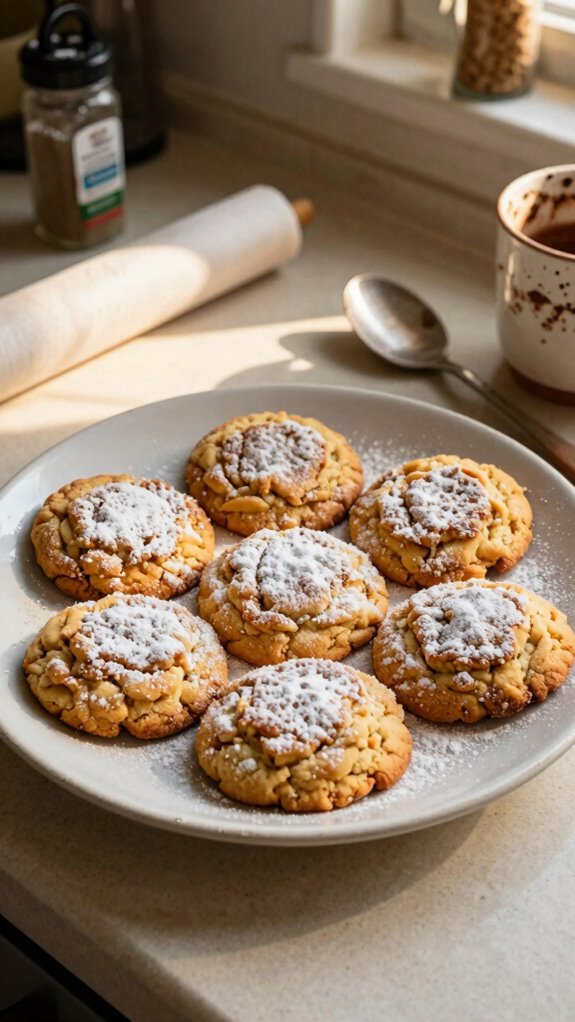
Tips on plating and presentation
When it comes to plating and presentation, a few simple techniques can elevate your sour cream cookies to show-stopping treats.
Arrange them on a colorful plate to contrast with their softness. Use plating techniques like stacking or layering, and don’t forget to add garnish ideas like a sprinkle of powdered sugar or fresh berries for a pop of color.
Your cookies deserve the spotlight!
What other dishes can I pair it with?
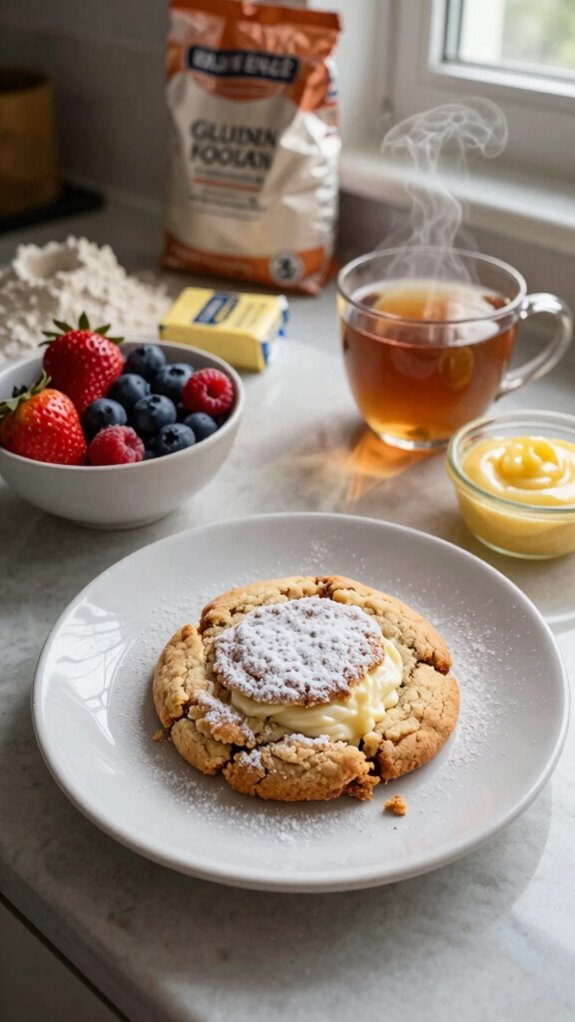
While planning a delightful spread, consider pairing your sour cream cookies with a variety of dishes that complement their creamy texture and subtle tanginess.
Fresh fruit, like berries or sliced peaches, offers a refreshing contrast.
I also love serving them alongside a light cheesecake for a harmonious flavors balance.
These dessert pairings create an inviting and delicious experience for everyone to enjoy!
What drinks can I pair it with?
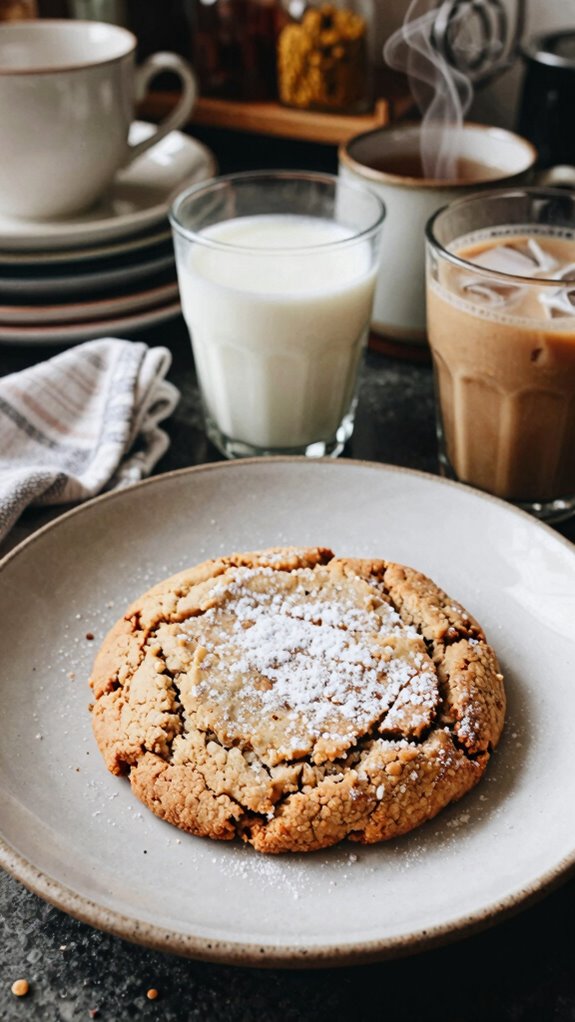
To elevate the enjoyment of sour cream cookies, I love pairing them with drinks that enhance their flavor profile.
For coffee pairings, a rich espresso or creamy latte complements the cookie’s texture beautifully.
If I’m in the mood for tea options, I find that a light chamomile or zesty lemon tea brings out the tanginess of the sour cream perfectly.
It’s a delightful match!
Frequently Asked Questions
Can I Substitute Sour Cream With Yogurt in This Recipe?
Absolutely, you can substitute yogurt for sour cream! I love using yogurt alternatives for their tangy flavor and creamy texture, plus they offer some of the same benefits, like added moisture and richness in recipes.
How Do I Store Leftover Gluten-Free Sour Cream Cookies?
I store leftover cookies in airtight containers. For optimal freshness, I recommend refrigeration tips like sealing them tightly and placing them in the fridge. This way, they’ll stay delicious for longer and maintain their texture.
Are These Cookies Suitable for Vegan Diets?
No, these cookies aren’t suitable for vegan diets since they contain sour cream. However, I’ve found plant-based alternatives to make them vegan-friendly! You can even top them with delicious vegan icing for a sweet finish.
What Is the Texture Difference Between Gluten-Free and Regular Flour Cookies?
I’ve noticed gluten-free cookies often have a different texture compared to regular flour ones—chewier or denser. The flavor profiles can also vary, sometimes being nuttier or more complex, which I find really interesting!
Can I Freeze the Cookie Dough Before Baking?
Yes, I can freeze the cookie dough before baking. For best results, I use airtight containers and label them with freezing tips and dates. It’s such a handy way to have fresh cookies ready anytime!